Category: Treats & Desserts

  • Greek Yogurt Brownies Recipe

    Greek Yogurt Brownies Recipe

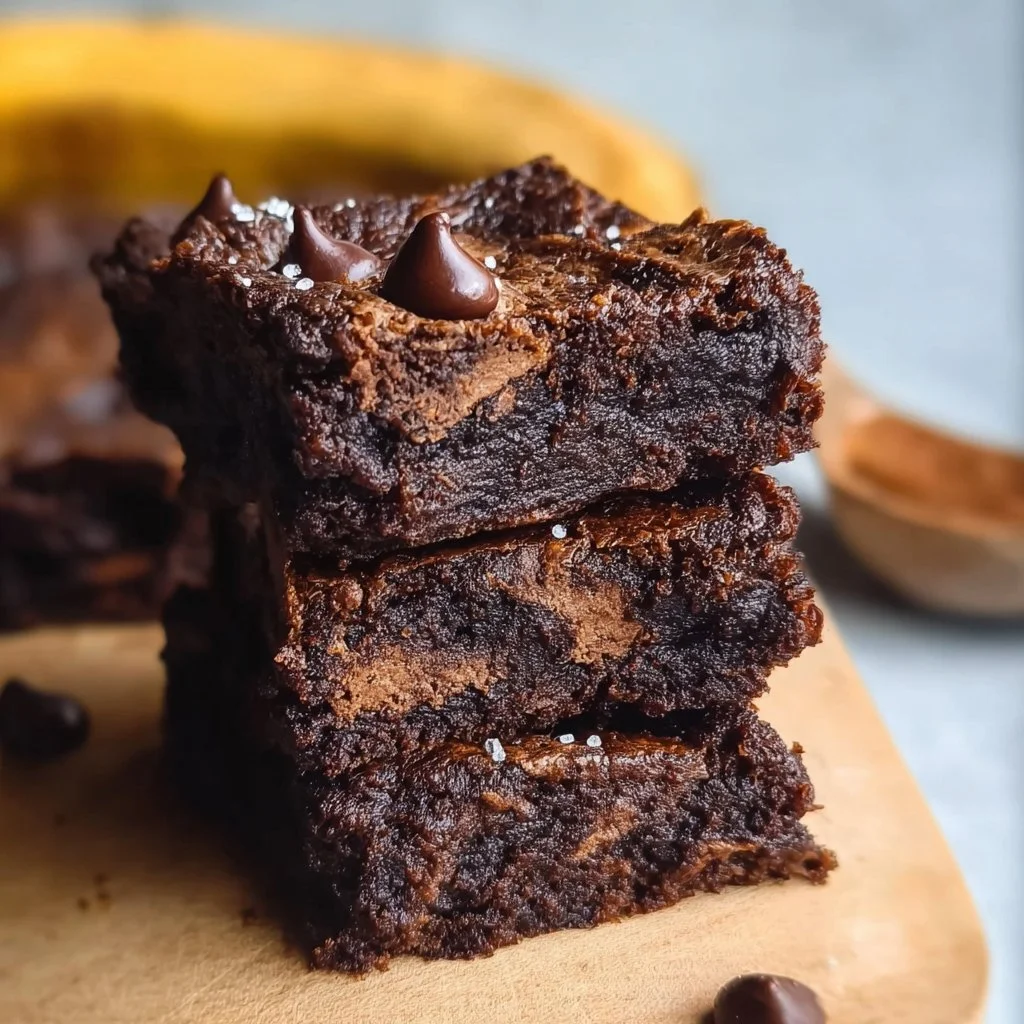
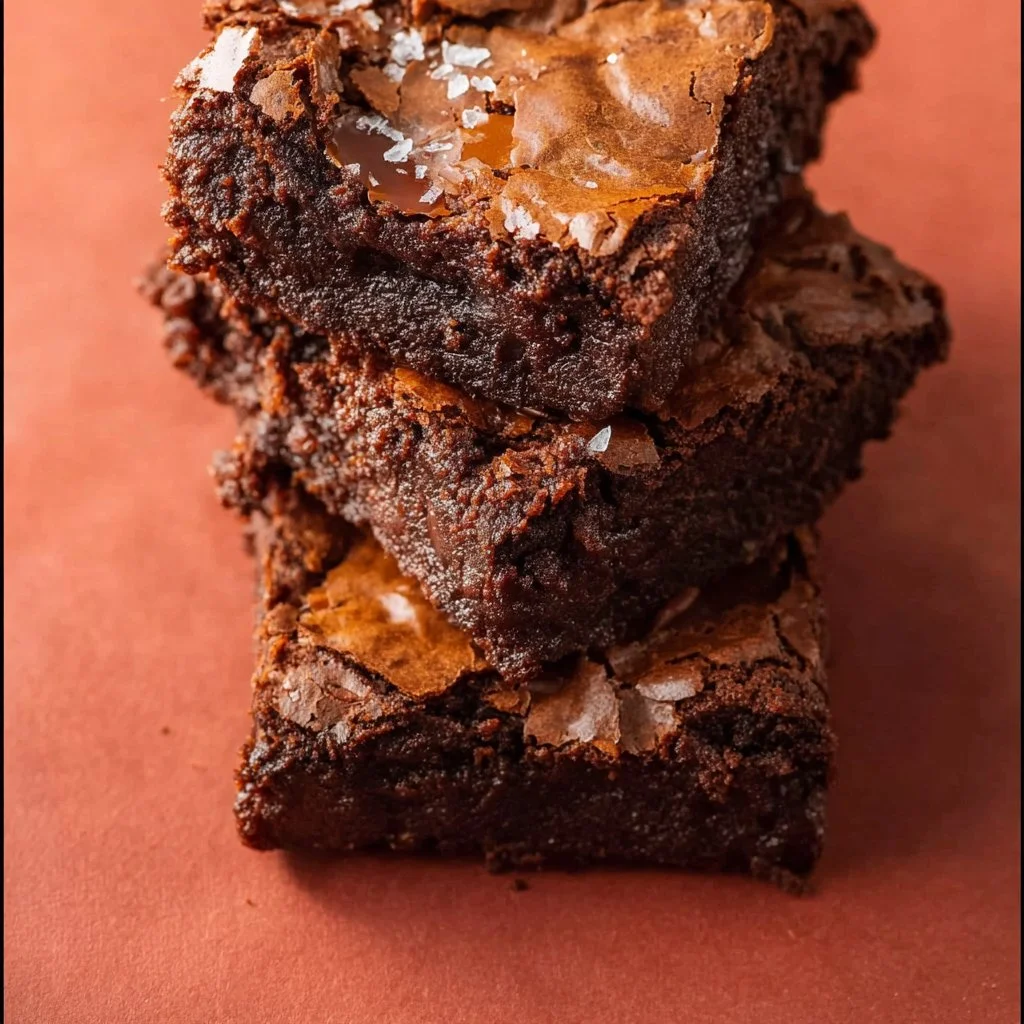
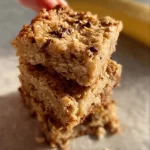
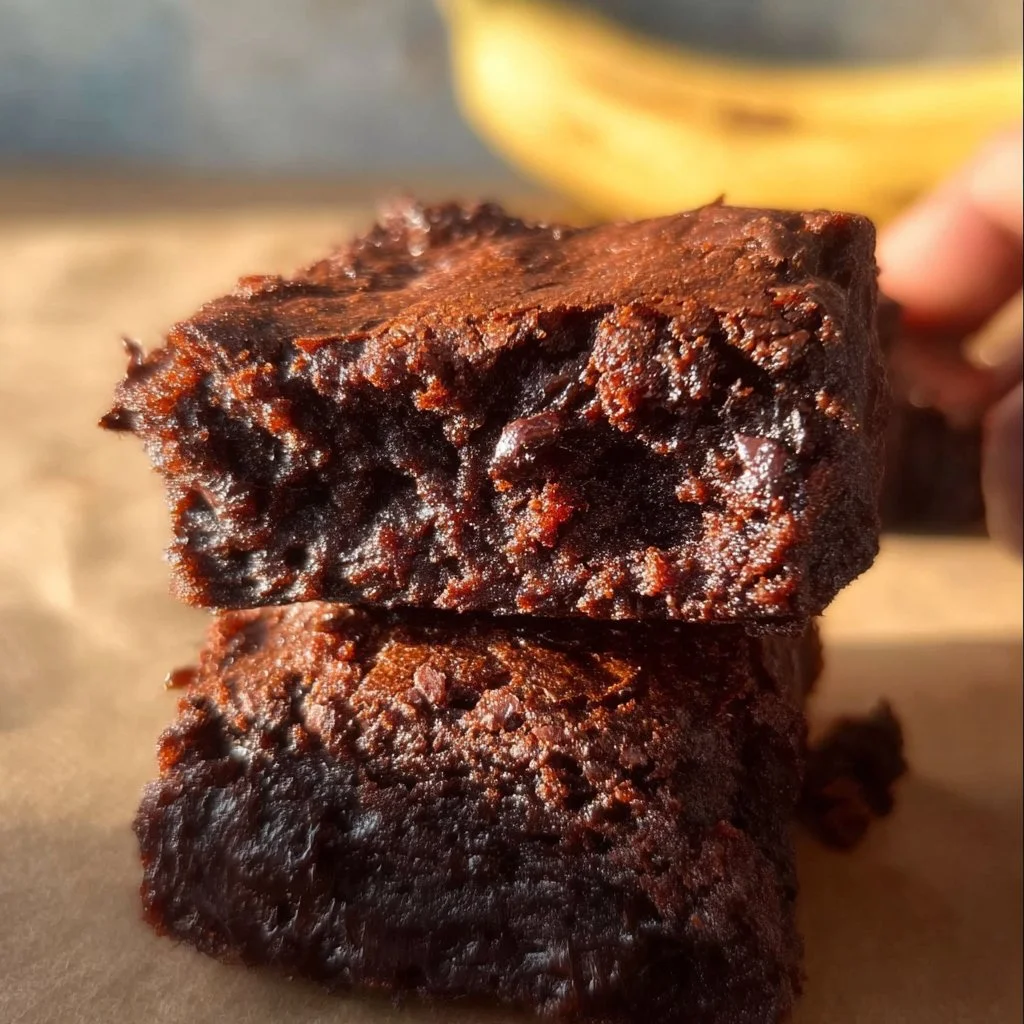
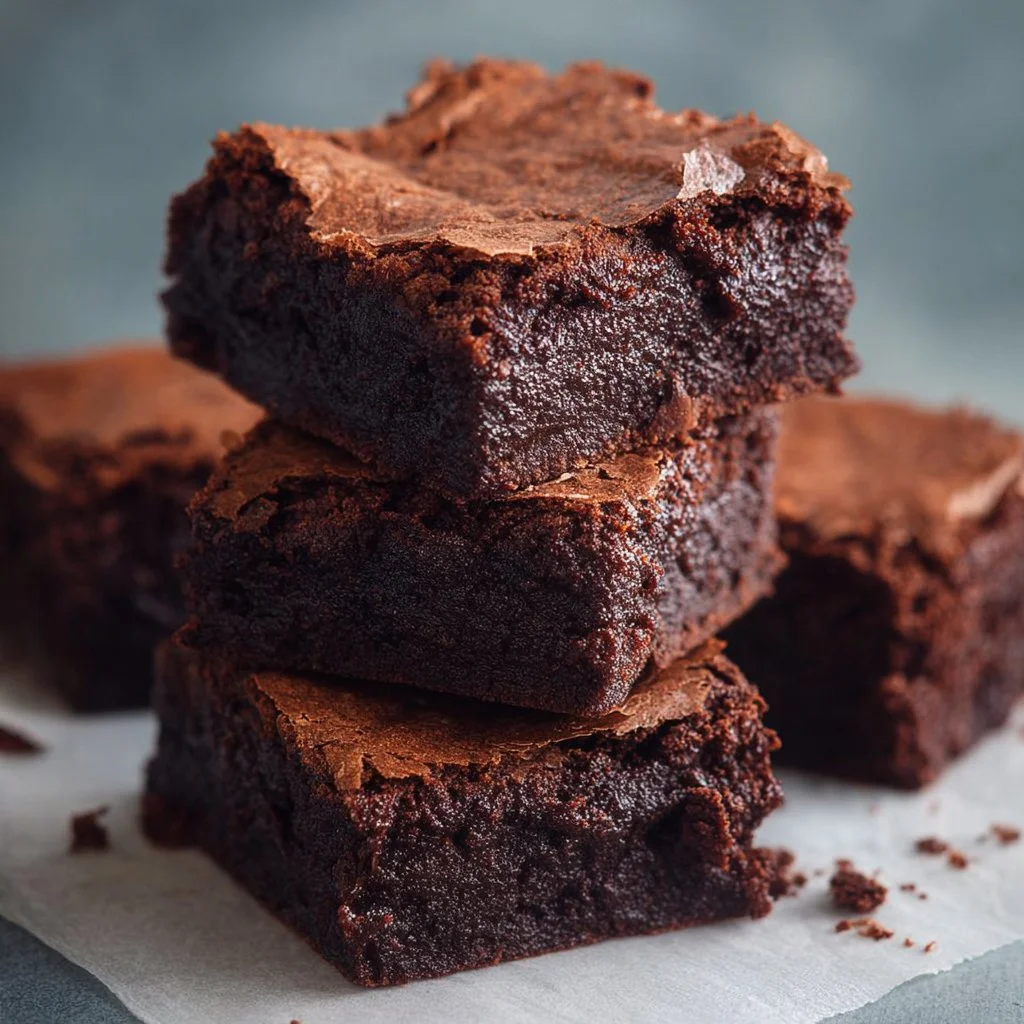
    Indulgent Greek Yogurt Brownies: A Dessert That’s Both Guilt-Free and Delicious!

    Hey there, fellow food enthusiasts! 🍽️ Today, we’re diving into the fantastic world of brownies—specifically, we’re going to whip up a batch of rich, fudgy Greek Yogurt Brownies that will leave your taste buds dancing and your conscience clear. You read that right! Brownies made with Greek yogurt, combining the lusciousness of a classic treat with a healthier twist. Ready to explore this delicious adventure? Let’s roll up our sleeves and head into the kitchen!

    A Sweet Memory to Cherish

    Brownies have always held a special place in my heart. I can vividly remember the first time I baked a batch as a teenager. It was a chilly Sunday afternoon, and my mom had just come home from the grocery store with a bag full of chocolate chips. Naturally, my teenage heart was filled with excitement! We rummaged through the pantry together, and I found a recipe scribbled on the back of an old cookbook that had seen better days.

    As the mixer whirred and chocolate melted on the stovetop, the air filled with a mouthwatering aroma that spoke of home, comfort, and a dash of magic. My mom and I shared stories and laughter while waiting for them to cool—after a hasty decision to cut them while still warm, we managed to burn our fingers but enjoy gooey bites with huge smiles plastered on our faces.

    Fast forward to today: while my brownie game has evolved, my love for creating sweet memories around a baking dish remains stronger than ever. Now that I’ve discovered the incredible benefits and delightful texture of Greek yogurt—both in baking and cooking—I can’t wait to share my version of this classic treat. Let’s get baking, my friends!

    Ingredients

    Let’s gather our ingredients! Here’s what you’ll need to get started on these scrumptious Greek Yogurt Brownies:

    • 1 cup (200g) granulated sugar
      Sweetness is key! You can substitute with coconut sugar for a hint of caramel flavor or use a sugar alternative like erythritol for a lower-calorie option.

    • 1/2 cup (100g) unsweetened cocoa powder
      Rich cocoa is essential for that deep chocolate flavor. Look for Dutch-processed cocoa for a more mellow bitterness, or use raw cacao powder for a superfood twist.

    • 1/2 teaspoon salt
      A pinch of salt enhances all the flavors. If you’re watching your sodium intake, light pink Himalayan salt is a great alternative and adds trace minerals!

    • 1 teaspoon baking powder
      This helps the brownies rise a bit without compromising that fudgy texture. You can use baking soda, just remember to adjust the measurements slightly as they have different leavening powers.

    • 2 large eggs
      Eggs create structure and moisture. For a vegan option, substituting with flaxseed meal (1 tablespoon combined with 3 tablespoons water) can yield great results!

    • 1/2 cup (120g) Greek yogurt
      This is the star of our recipe! It adds creaminess and tang. For dairy-free brownies, try using almond-based yogurt or coconut yogurt; just keep an eye on your flavor profile.

    • 1/4 cup (60ml) vegetable oil
      A little oil adds moisture. Melted coconut oil is a fantastic substitute, providing a subtle coconut flavor that enhances the brownie!

    • 1 teaspoon vanilla extract
      Pure vanilla extract elevates the flavor. For a fun twist, consider using almond extract or even orange zest for something vibrant.

    • 1/2 cup (90g) chocolate chips
      No brownie is complete without chocolate! You can play around with milk chocolate, dark chocolate, or even white chocolate chips based on your preferences.

    Step-by-Step Instructions

    Alright, let’s get to the good stuff—baking! Here’s the step-by-step process to make your Greek Yogurt Brownies:

    1. Preheat the Oven
      Start by preheating your oven to 350°F (175°C). Grease an 8-inch square baking pan or line it with parchment paper, leaving some overhang for easy removal later. Trust me: this little hack saves you on cleanup!

    2. Mix Dry Ingredients
      In a large mixing bowl, whisk together the sugar, cocoa powder, salt, and baking powder. This helps to ensure the dry ingredients are well combined and the cocoa isn’t lumpy. Make those brownie dreams come true from the very start!

    3. Combine Wet Ingredients
      In another bowl, beat together the eggs until they’re a little frothy. Add the Greek yogurt, oil, and vanilla extract, mixing until smooth and creamy. This mixture adds that luscious moisture we’re after.

    4. Combine Wet and Dry Mixtures
      Pour the wet mixture into the bowl with dry ingredients. Use a spatula to gently fold them together until just mixed. Be careful not to overmix—this keeps the texture nice and fudgy. If you want a little extra texture, feel free to fold in your chocolate chips!

    5. Pour and Spread
      Pour the brownie batter into your prepared baking pan. Use your spatula to spread it evenly and smooth the top. If you want those melted chocolate goodness pockets, sprinkle a few extra chocolate chips on top before baking.

    6. Bake to Perfection
      Pop those brownies into the oven and bake for 20-25 minutes, or until a toothpick inserted into the center comes out with a few moist crumbs (not wet batter!). The magic happens here—it’s where the batter transforms into a brownie beauty!

    7. Cool and Cut
      Once baked, remove the brownies from the oven and allow them to cool in the pan for at least 10-15 minutes. Then, carefully lift them out using the parchment paper overhang, transfer them to a cooling rack, and let them cool fully before slicing into squares. (But if you really can’t wait, go ahead and cut yourself a warm piece—no judgment here!)

    Serving Suggestions

    When it comes to serving these Greek Yogurt Brownies, the sky’s the limit! Here’s how I like to plate them for a touch of flair:

    • Classic Style
      Simply slice into squares and serve on a rustic wooden platter. Dust with a little powdered sugar for a simple yet elegant presentation.

    • A La Mode Twist
      Serve warm brownies with a scoop of vanilla ice cream and drizzle with chocolate or caramel sauce. The contrast between warm and cold is divine!

    • Berry Burst
      Top with fresh raspberries or strawberries for a pop of color and tartness that complements the sweetness of the brownies.

    • Nutty Crown
      Scatter some chopped nuts (like walnuts or pecans) on top, or serve with a side of nut butter for an added crunch and creaminess.

    Don’t forget to grab a fork and a friend—these brownies are best enjoyed with a buddy!

    Recipe Variations

    Here are a few fun twists to keep things interesting:

    1. Mint Chocolate Brownies
      Add a few drops of peppermint extract to the wet ingredients for a minty flair. Mix in some chocolate chips and top with crushed peppermint candies for a festive touch!

    2. Nut Butter Swirl
      Before baking, dollop spoonfuls of your favorite nut butter (like almond or peanut) across the top of the brownie batter. Use a knife to gently swirl it in for creamy pockets of goodness throughout.

    3. Spicy Kick
      For a bold twist, add a dash of cayenne pepper or a sprinkle of chili powder to the dry ingredients. This unexpected flavor hike will surprise and delight!

    4. Coconut Dreams
      Mix in shredded coconut to the batter or top the cooled brownies with a coconut ganache for a tropical treat.

    5. Pumpkin Spice Brownies
      Substitute half of the Greek yogurt with pumpkin puree and add some pumpkin spice for a fall-inspired version. They’ll be perfect for cozy gatherings!

    Chef’s Notes

    As every good baker knows, experimenting is part of the joy! When I first played around with Greek yogurt in brownies, I was struck by how transforming this ingredient is. It brings moisture without making the brownies oily, and the slight tang balances the sweetness beautifully. I still have fond memories of reading countless recipes to create this version, and whenever I bake them, I reminisce fondly about my early baking days with my mom.

    Brownies have always been my go-to treat for birthdays, gatherings, or just a cozy night in; they make every occasion a bit more special. And now, with a healthier spin, I can indulge without the guilt!

    FAQs and Troubleshooting

    1. Why are my brownies dry?

    Overbaking can make brownies dry, so it’s crucial to keep an eye on them during the last few minutes. If you’re unsure, it’s better to underbake slightly rather than overbake.

    2. Can I freeze these brownies?

    Absolutely! Wrap them tightly in plastic wrap and store them in an airtight container—frozen, they’ll keep for about 3 months. Just thaw them at room temperature when you’re ready to enjoy.

    3. How can I tell if my brownies are done?

    Insert a toothpick in the center; it should come out with a few moist crumbs. If it comes out clean, they may be overcooked. Remember, they’ll continue to cook slightly after being removed from the oven.

    4. What can I use instead of Greek yogurt?

    You can swap it for any type of yogurt, including non-dairy options. Just keep in mind that flavors may vary, so choose something delicious that complements chocolate.

    Nutritional Info (per brownie, based on 16 servings)

    • Calories: Approximately 150
    • Protein: 3g
    • Carbohydrates: 23g
    • Fat: 6g
    • Sugars: 10g
    • Fiber: 2g

    These brownies offer a satisfying treat while providing a bit of protein from the Greek yogurt and a good dose of flavor without excessive sugar. Perfect for a snack or dessert that won’t derail your healthy eating habits!

    Final Thoughts

    I hope you’re as excited to bake these Greek Yogurt Brownies as I am to share them with you! Let’s create some delicious memories together, whether it’s for family gatherings, a cozy date night, or just a treat for yourself after a long day. Remember, baking is not just about the end product; it’s about the laughter, the mishaps, and the love poured into the process.

    So grab your ingredients, channel your inner baker, and let’s get those ovens humming! Don’t forget to share your creations with me; I’d love to see how your brownies turn out. Happy baking, everyone! 🍫🥳

    — Chef Emily

    Print

    Indulgent Greek Yogurt Brownies

    Rich, fudgy Greek Yogurt Brownies that combine the indulgence of classic brownies with a healthier twist using Greek yogurt.

    • Author: emmawhitaker
    • Prep Time: 15 minutes
    • Cook Time: 25 minutes
    • Total Time: 40 minutes
    • Yield: 16 servings 1x
    • Category: Dessert
    • Method: Baking
    • Cuisine: American
    • Diet: Vegetarian

    Ingredients

    Scale
    • 1 cup (200g) granulated sugar
    • 1/2 cup (100g) unsweetened cocoa powder
    • 1/2 teaspoon salt
    • 1 teaspoon baking powder
    • 2 large eggs
    • 1/2 cup (120g) Greek yogurt
    • 1/4 cup (60ml) vegetable oil
    • 1 teaspoon vanilla extract
    • 1/2 cup (90g) chocolate chips

    Instructions

    1. Preheat the oven to 350°F (175°C). Grease an 8-inch square baking pan or line with parchment paper.
    2. Mix together the sugar, cocoa powder, salt, and baking powder in a large bowl.
    3. Combine the eggs in another bowl and beat until frothy. Add the Greek yogurt, oil, and vanilla extract and mix until smooth.
    4. Pour the wet mixture into the dry ingredients and gently fold them together until just mixed.
    5. Pour the brownie batter into the prepared baking pan and smooth the top.
    6. Bake for 20-25 minutes, or until a toothpick inserted comes out with a few moist crumbs.
    7. Cool in the pan for 10-15 minutes then remove and let cool fully before slicing.

    Notes

    These brownies can be enjoyed warm or chilled, and they can be frozen for up to 3 months.

    Nutrition

    • Serving Size: 1 brownie
    • Calories: 150
    • Sugar: 10g
    • Sodium: 150mg
    • Fat: 6g
    • Saturated Fat: 1g
    • Unsaturated Fat: 5g
    • Trans Fat: 0g
    • Carbohydrates: 23g
    • Fiber: 2g
    • Protein: 3g
    • Cholesterol: 30mg

    Keywords: brownies, dessert, healthy dessert, Greek yogurt brownies, fudgy brownies

    Did you make this recipe?

    Share a photo and tag us — we can’t wait to see what you’ve made!

  • Healthy Banana Brownies

    Healthy Banana Brownies

    Healthy Banana Brownies: The Sweet Treat You’ve Been Waiting For!

    Hey there, fellow food lover! 🎉 Are you ready to indulge without the guilt? If you’re anything like me, you might have a soft spot for brownies. They’re rich, fudgy, and oh-so-comforting, but let’s be real—sometimes a decadent dessert isn’t the healthiest choice. That’s where these Healthy Banana Brownies come in, and trust me: they’re a game changer!

    Imagine taking all the greatness of a classic brownie but giving it a health-conscious twist so you can feel good about every delicious bite. This recipe is packed with ripe bananas, cocoa, and just the right touch of sweetener. The end result? A scrumptious treat that’s great for an afternoon snack, a post-workout pick-me-up, or even a late-night sweet tooth satisfaction!

    In this blog post, we’ll walk through everything you need to know to whip up these delightful brownies, complete with some of my personal stories, tips and tricks, and variations to keep things exciting. So grab your apron, put on your favorite tunes, and let’s get cooking!


    My Sweet Banana Memory

    Ah, bananas and brownies—a combo I’m absolutely obsessed with! My love for sunny bananas goes all the way back to my childhood days. I remember whenever we had overripe bananas in the house, my Grandma would whip up her famous banana bread. I’d sit at the kitchen table, that delicious aroma wafting through the air, watching her glide around the kitchen like a culinary wizard.

    One day, I decided I wanted to keep that same promise of deliciousness but put a twist on it. Brownies were my favorite guilty pleasure, so I thought: Why not combine my childhood nostalgia with a dessert I adore? It was a slam-dunk idea that turned into these luscious Healthy Banana Brownies. Each bite takes me back to those sunlit kitchen mornings, but now—with the bonus of being a bit healthier!


    Ingredients

    Before we dive into the baking, let’s take a look at the ingredients you’ll need to create these mouthwatering brownies. I’ll share a few chef insights along the way, so you’ll feel like a pro in your kitchen!

    • Ripe Bananas (2 large)

      • Look for bananas with lots of brown spots. The riper, the sweeter! If you’re short on time, you can microwave unripe bananas for about 30 seconds to soften them up.
    • Cocoa Powder (½ cup)

      • Unsweetened cocoa powder will give your brownies a rich, chocolaty flavor. If you prefer a lighter taste, you can use Dutch-processed cocoa for a milder profile.
    • Almond Flour (1 cup)

      • Great for keeping things gluten-free and adding a nutty flavor. If you don’t have almond flour, you can substitute it with whole wheat flour or oat flour, though the texture will slightly change.
    • Maple Syrup (⅓ cup)

      • This natural sweetener adds depth and moisture. You can swap it with honey or agave syrup, but keep in mind, they have slightly different sweetness levels. Adjust accordingly!
    • Eggs (2 large)

      • Egg act as a binder and provides structure. For a vegan version, you can use unsweetened applesauce (¼ cup per egg).
    • Baking Soda (1 tsp)

      • This helps the brownies rise just enough to achieve that perfect fudginess.
    • Vanilla Extract (1 tsp)

      • A must for enhancing flavors! If you want to switch it up, you can use almond extract for a different depth of flavor.
    • Salt (¼ tsp)

      • A little salt enhances sweetness, so don’t skip it! You can use sea salt or kosher salt based on what you have on hand.

    Step-by-Step Instructions

    Ready to bake your new favorite healthy treat? Let’s get started!

    1. Preheat Your Oven: Set it to 350°F (175°C). This is super important for getting that perfect bake. A nicely preheated oven sets the stage for rising and fluffiness.

    2. Prep Your Dish: Grab an 8×8-inch baking pan and line it with parchment paper or lightly grease it. This way, your brownies will pop out easily, and nobody wants sticky brownies stuck to the bottom!

    3. Mash Those Bananas: In a large bowl, mash your ripe bananas until smooth. Use a fork or a potato masher. The more mashed they are, the sweeter your brownies will taste!

    4. Mix Your Wet Ingredients: Into the mashed bananas, add in your eggs, maple syrup, and vanilla extract. Whisk until everything is well combined. This is your flavor foundation!

    5. Combine Dry Ingredients: In a separate bowl, whisk together the cocoa powder, almond flour, baking soda, and salt. Doing this separately helps distribute the leavening agents evenly throughout your brownies.

    6. Fold Together: Gradually add the dry ingredients to the wet mixture, stirring gently. Careful not to overmix; we’re aiming for a gooey texture! If you’re craving some texture, fold in some walnuts or dark chocolate chips at this stage.

    7. Pour into Baking Dish: Go ahead and pour your brownie batter into the prepared baking dish, smoothing it out with a spatula for an even bake.

    8. Bake: Pop your brownies into the oven and let them bake for about 20-25 minutes, or until a toothpick comes out clean (or with just a few crumbs!). The edges will be set, but the center should still be fudgy.

    9. Cool Down: A crucial step! Let the brownies cool in the pan for about 10 minutes, then remove them using the parchment paper (if you used it) and transfer them to a wire rack to cool completely. This wait is totally worth it!

    10. Slice and Serve: Once cooled, slice into delicious squares and feast your eyes on that fudgy goodness!


    Serving Suggestions

    These Healthy Banana Brownies are fantastic on their own, but let’s jazz things up a little! Here are some serving suggestions to elevate your brownie experience:

    • With a Scoop of Ice Cream: Dark chocolate or vanilla ice cream adds a delightful creaminess that contrasts beautifully with the dense brownie texture.

    • Drizzle of Nut Butter: A drizzle of almond or peanut butter adds richness and healthy fats. Plus, it complements the banana flavor so well!

    • Fresh Berries on Top: Add a handful of fresh strawberries or raspberries for a burst of freshness and tartness that brightens every bite.

    • Sprinkle of Sea Salt: For a sweet-salty combo that will have you swooning, sprinkle a tiny bit of flaky sea salt on top just before serving.


    Recipe Variations

    Feeling adventurous? Here are some creative twists to keep your Healthy Banana Brownies fresh and exciting:

    1. Nutty Delight: Add chopped nuts, such as pecans or walnuts, into the brownie batter for a crunchy texture contrast.

    2. Coconut Chocolate Brownies: Incorporate unsweetened shredded coconut into the batter for a tropical vibe, and top with a sprinkle of coconut before baking.

    3. Minty Fresh: Add a few drops of peppermint extract for a delicious mint chocolate twist—perfect for after-dinner treats!

    4. Zesty Orange: A hint of orange zest in the batter brightens the chocolate flavor and adds a lovely citrus note.

    5. Spicy Kick: Add a pinch of chili powder or cayenne for a little heat! It complements chocolate beautifully and will surprise your taste buds.


    Chef’s Notes

    These Healthy Banana Brownies have evolved with me over time; what started as a simple idea in my kitchen has turned into an absolute fan favorite—trust me, kiddos and adults alike devour them! I remember the first time I brought a batch to a picnic. I was nervous because I had warned everyone they were "healthy." But wouldn’t you know, they were the first thing to disappear!

    Also, this recipe has proven to be incredibly forgiving; let’s say you forgot to get almond flour and just had some old whole wheat flour lying around—that works too! Cooking and baking should always be an adventure, so don’t hesitate to experiment!


    FAQs and Troubleshooting

    Got questions? Let’s address some common ones you might have while preparing your Healthy Banana Brownies:

    1. My brownies are dry. What did I do wrong?

    • Overbaking is the typical culprit! Make sure to check them with a toothpick at around 20 minutes. If it comes out clean but not dry, you’re golden.

    2. Can I double this recipe?

    • Absolutely! Just use a 9×13-inch pan and keep an eye on the baking time; it might need an extra 5–10 minutes.

    3. How do I store leftovers?

    • Keep them in an airtight container at room temperature for about 2-3 days or refrigerated for up to a week. You can also freeze them for a later treat—just ensure they are tightly wrapped!

    4. Can I make them vegan?

    • Yes! Substitute the eggs with unsweetened applesauce, and you’re good to go. Make sure your maple syrup is vegan-friendly as well!

    Nutritional Info

    While indulging in something sweet, it’s always helpful to know what you’re getting nutritionally. Here’s a rough estimate per serving (assuming 12 servings):

    • Calories: 100 kcal
    • Protein: 2g
    • Carbohydrates: 20g
    • Sugar: 5g
    • Fat: 3g
    • Fiber: 3g

    These Healthy Banana Brownies pack a punch of nutrients, thanks to the bananas and almond flour, making them a guilt-free option that you can enjoy without any fuss!


    Final Thoughts

    There you have it—your ultimate guide to creating scrumptious Healthy Banana Brownies! Whether you’re whipping these up for a party, a cozy night in, or just to satisfy your sweet tooth, I’m sure they’ll become a treasured staple in your home.

    Cooking, for me, is more than just following a recipe—it’s about the memories we make and the love we share through food. I hope these brownies bring joy to your kitchen as much as they have for mine. Don’t forget to share the love—send a batch to a friend, or better yet, invite them over to bake together; because nothing says love like a sweet treat made with care.

    So go on! Get those bananas mashing, stir up some chocolate goodness, and say hello to your new favorite guilt-free dessert! Happy baking! 🍌❤️

    Print

    Healthy Banana Brownies

    Indulge in these Healthy Banana Brownies, a guilt-free twist on a classic treat, packed with ripe bananas and cocoa for a deliciously fudgy dessert.

    • Author: emmawhitaker
    • Prep Time: 10 minutes
    • Cook Time: 25 minutes
    • Total Time: 35 minutes
    • Yield: 12 servings 1x
    • Category: Dessert
    • Method: Baking
    • Cuisine: American
    • Diet: Vegetarian

    Ingredients

    Scale
    • 2 large Ripe Bananas
    • ½ cup Cocoa Powder
    • 1 cup Almond Flour
    • ⅓ cup Maple Syrup
    • 2 large Eggs
    • 1 tsp Baking Soda
    • 1 tsp Vanilla Extract
    • ¼ tsp Salt

    Instructions

    1. Preheat your oven to 350°F (175°C).
    2. Prep an 8×8-inch baking pan with parchment paper or grease it.
    3. Mash the ripe bananas in a large bowl until smooth.
    4. Mix in eggs, maple syrup, and vanilla extract until well combined.
    5. Combine the dry ingredients in a separate bowl: cocoa powder, almond flour, baking soda, and salt.
    6. Fold the dry ingredients into the wet mixture gently.
    7. Pour the brownie batter into the prepared baking dish and smooth it out.
    8. Bake for 20-25 minutes or until a toothpick comes out clean.
    9. Cool in the pan for 10 minutes before transferring to a wire rack.
    10. Slice into squares and serve.

    Notes

    For a vegan version, substitute eggs with unsweetened applesauce. Store leftovers in an airtight container or freeze for up to a week.

    Nutrition

    • Serving Size: 1 serving
    • Calories: 100
    • Sugar: 5g
    • Sodium: 80mg
    • Fat: 3g
    • Saturated Fat: 0.5g
    • Unsaturated Fat: 2.5g
    • Trans Fat: 0g
    • Carbohydrates: 20g
    • Fiber: 3g
    • Protein: 2g
    • Cholesterol: 0mg

    Keywords: brownies, banana, healthy dessert, gluten-free, guilt-free treat

    Did you make this recipe?

    Share a photo and tag us — we can’t wait to see what you’ve made!

  • Oatmeal Fudge Bars

    Oatmeal Fudge Bars

    Delightfully Chewy Oatmeal Fudge Bars: A Sweet Treat for All Ages!

    Hey there, fellow food lovers! 👋 Today, I’m sharing a recipe that brings back a whirlwind of sweet memories from my childhood—a dish that intertwines comfort, nostalgia, and pure deliciousness: Oatmeal Fudge Bars! These bars are a delightful concoction of chewy oats, rich chocolatey fudge, and a sprinkle of love that’ll have you reaching for seconds (and thirds!).

    Oatmeal fudge bars are more than just a dessert; they are a veritable hug in food form. I remember vividly the first time I dug into a warm, gooey square of these bars—how the perfectly baked oat crust melded beautifully with that rich chocolate fudge, creating a symphony of flavors that I still crave to this day.

    This recipe is tailor-made for busy weeknights, family gatherings, or just your everyday cravings for something sweet without all the fuss. They’re super easy to whip up, using simple ingredients that you probably have in your pantry right now. Plus, kids and adults alike just can’t resist the chewy texture paired with luscious fudge filling.

    Picture this: It’s a cozy Sunday afternoon, the sun is streaming in through the kitchen window, and the smell of these bars baking fills your home. You can almost hear the soft giggles of family members as they eagerly wait for their warm piece straight out of the oven. Seriously, can it get better than this? So, let’s roll up our sleeves, grab that mixing bowl, and dive into the fabulous world of oatmeal fudge bars!

    Personal Story

    Not all kitchen memories are flawless, but that’s what makes them special, right? I have a fond memory of making oatmeal fudge bars with my grandma. It was one of those rainy Saturday mornings when everything outside was washed in gray. Armed with mismatched measuring cups and a recipe card, we set out to create our masterpiece.

    As we mixed, my grandma shared stories of her own childhood and her attempts at kitchen magic, many of which went hilariously awry. Like the time she accidentally used salt instead of sugar in her cake batter! We laughed as we tried to avoid making the same mistakes, and in between giggles, we crafted the most magical blend of oats and chocolate.

    When the bars came out of the oven, we could hardly wait until they cooled. That first bite was pure bliss. It tasted like a promise—of Saturday afternoons spent together, filled with laughter, stories, and a kitchen that transformed into our magical kingdom. Today, I honor that memory by sharing this recipe so you can create your own sweet moments, just like I did.

    Ingredients

    Here’s what you’ll need to whip up these delightful oatmeal fudge bars:

    • Old-Fashioned Oats (2 cups): The star of our recipe! Old-fashioned oats provide a wonderful texture. If you’re gluten-free, make sure to use certified gluten-free oats!

    • All-Purpose Flour (1 cup): This is the binding agent that will help hold everything together. You can swap it out for whole wheat flour for a nuttier flavor.

    • Brown Sugar (1 cup, packed): The secret to that fabulous chewiness. If you’re looking for a lower sugar option, coconut sugar can work in a pinch.

    • Granulated Sugar (1/2 cup): For balance! Feel free to reduce the amount if you prefer a less sweet bar.

    • Butter (1 cup, softened): Butter adds a wonderful richness. If you’re aiming for a vegan version, use coconut oil or a vegan butter substitute.

    • Eggs (2 large): They help bind the bars together and add moisture. For a vegan twist, you can use flax eggs (1 tbsp ground flaxseed + 2.5 tbsp water = 1 egg).

    • Chocolate Chips (1 cup): It wouldn’t be fudge without chocolate! Semisweet or dark chocolate works perfectly here, but white chocolate or peanut butter chips could also be fun!

    • Baking Soda (1 tsp): Essential for a little lift.

    • Vanilla Extract (2 tsp): A must to elevate the flavors. Feel free to experiment with almond or other extracts for a unique twist.

    • Salt (1/2 tsp): To enhance all the flavors in your bars.

    Do you see how versatile these ingredients are? Customize them based on what you have at hand or what suits your taste buds!

    Step-by-Step Instructions

    Step 1: Preheat & Prep Your Pan (10 minutes)

    First things first, preheat that oven to 350°F (175°C). While it’s warming up, grab an 8×8 inch baking pan and line it with parchment paper. This not only helps with easy removal later but also gives those bars a perfect finish.

    Step 2: Mix the Dry Ingredients (5 minutes)

    In a large mixing bowl, combine the old-fashioned oats, all-purpose flour, baking soda, and salt. Use a whisk to break up any clumps and ensure everything is evenly mixed. Trust me, this little step makes a huge difference!

    Step 3: Cream the Sugars and Butter (5 minutes)

    In another bowl, cream together the softened butter, brown sugar, and granulated sugar until light and fluffy. This is where the magic happens! The air incorporated here will help give your bars a lovely texture. Add the eggs one at a time, mixing well after each addition, followed by the vanilla extract.

    Step 4: Combine the Mixtures (5-7 minutes)

    Now that your wet ingredients are ready and the dry ingredients are prepped, it’s time to unite them! Gradually add the dry mixture to the wet ingredients, stirring gently until just combined. It should turn into a lovely dough. Don’t overmix; you want those delicious oats to shine!

    Step 5: Fold in the Chocolate Chips (5 minutes)

    This is my favorite part—fold in the chocolate chips! You can even reserve a few to sprinkle on top for that extra chocolatey goodness.

    Step 6: Bake Time (25-30 minutes)

    Spread the mixture evenly into the prepared baking pan. Bake your bars in the preheated oven for 25-30 minutes or until the edges are golden brown and a toothpick inserted in the center comes out with a few moist crumbs (not gooey!). Your kitchen will smell heavenly by now!

    Step 7: Cool and Slice (15 minutes)

    Once you pull your bars from the oven, let them cool in the pan for about 10 minutes. Carefully lift them out using the parchment paper, transfer to a wire rack, and cool completely before cutting into squares. Try to resist the temptation to dive in—just for a moment!

    Chef Tip:

    If you’re impatient like I am, you can serve them warm with a scoop of vanilla ice cream on top! YUM!

    Serving Suggestions

    When it comes to serving your oatmeal fudge bars, I encourage you to think outside the box. Arrange them on a beautiful platter, dust with a touch of powdered sugar for an elegant look, or drizzle some melted chocolate and caramel over the top. A dollop of whipped cream served alongside never hurt anyone either!

    For a neat touch, you can use a sharp knife to create clean lines when slicing. Serve these bars as an afternoon snack with a cup of coffee or as a fun dessert at your next gathering. They’re great for lunchboxes or packed for a road trip too! There’s something simply buoyant about indulging in homemade goodness that warms your heart.

    Recipe Variations

    Now, let’s explore some fun twists to make these oatmeal fudge bars your own:

    1. Nutty Delight: Add 1 cup of chopped nuts like walnuts or pecans for some crunch.
    2. Decadent Swirls: Mix in 1/2 cup of creamy peanut butter into the batter for a decadent flavor.
    3. Fruity Surprise: Toss in 1 cup of dried fruits such as cranberries or raisins for a chewy and sweet surprise.
    4. Cocoa Powder Kick: Replace 1/4 cup of flour with unsweetened cocoa powder for a chocolatey base.
    5. Spiced Oatmeal Bars: Sprinkle in a teaspoon of cinnamon or a pinch of nutmeg for a warm, spiced flavor.

    Feel free to unleash your creativity in the kitchen!

    Chef’s Notes

    These oatmeal fudge bars are a testament to how simple ingredients can come together to create something truly magical. Over the years, I’ve honed this recipe, slowly adjusting the sugar levels, experimenting with different mix-ins, and perfecting the baking time. I’ve had my fair share of baking mishaps—like the time I forgot to add eggs and ended up with a crumbly disaster my dog thoroughly enjoyed!

    Every time I make these bars, I’m reminded of my grandma’s laughter. These little nuggets of joy have become a tradition in our family, and I hope they make their way into your homes too!

    FAQs and Troubleshooting

    Q1: My oatmeal fudge bars turned out too dry. What went wrong?

    If your bars are dry, it’s likely you overbaked them. Oven temperatures can vary, so keep an eye on them during the last few minutes of baking.

    Q2: Can I store these bars for later?

    Absolutely! Once cooled, store your bars in an airtight container at room temperature for up to a week or in the fridge for longer freshness.

    Q3: How do I know when they’re done baking?

    To check for doneness, insert a toothpick into the center. If it comes out with a few moist crumbs (not gooey batter), they’re ready to come out!

    Q4: Can I make these vegan?

    Yes, you can! Substitute the butter with coconut oil or vegan butter, and use flax eggs instead of regular eggs.

    Nutritional Info (approx. per bar)

    • Calories: 215
    • Total Fat: 10g
    • Saturated Fat: 5g
    • Cholesterol: 35mg
    • Carbohydrates: 29g
    • Fiber: 2g
    • Sugar: 10g
    • Protein: 3g

    These numbers can vary based on ingredients and portion size, but they give you a ballpark idea of what to expect!

    Final Thoughts

    There you have it! Oatmeal Fudge Bars that not only warm your heart but also satisfy that sweet tooth in the most delightful way. I hope you enjoyed this recipe as much as I have enjoyed sharing it with you. My wish is for you to bring a little piece of joy and sweetness into your home, just as my grandma did for me.

    So grab your ingredients, call up a friend or family member, and let’s dive into an adventure of flavor and love. Don’t forget to share your creations with me—I’d love to hear your stories and see your delicious fudge bars.

    Until next time, keep cooking with love! 💖

    Happy baking!
    —Emily

    Print

    Delightfully Chewy Oatmeal Fudge Bars

    A nostalgic recipe for chewy oatmeal fudge bars that combines rich chocolatey fudge with a soft oat crust, perfect for sweet cravings.

    • Author: emmawhitaker
    • Prep Time: 20 minutes
    • Cook Time: 30 minutes
    • Total Time: 50 minutes
    • Yield: 16 servings 1x
    • Category: Dessert
    • Method: Baking
    • Cuisine: American
    • Diet: Vegetarian

    Ingredients

    Scale
    • 2 cups Old-Fashioned Oats
    • 1 cup All-Purpose Flour
    • 1 cup Brown Sugar, packed
    • 1/2 cup Granulated Sugar
    • 1 cup Butter, softened
    • 2 large Eggs
    • 1 cup Chocolate Chips
    • 1 tsp Baking Soda
    • 2 tsp Vanilla Extract
    • 1/2 tsp Salt

    Instructions

    1. Preheat the oven to 350°F (175°C) and prepare an 8×8 inch baking pan with parchment paper.
    2. Mix the old-fashioned oats, all-purpose flour, baking soda, and salt in a large mixing bowl.
    3. Cream together the softened butter, brown sugar, and granulated sugar until light and fluffy. Add eggs one at a time, mixing well, followed by vanilla extract.
    4. Combine the dry mixture into the wet mixture gradually, stirring gently until just combined.
    5. Fold in the chocolate chips, reserving a few to sprinkle on top if desired.
    6. Bake in the preheated oven for 25-30 minutes until the edges are golden brown and a toothpick comes out with moist crumbs.
    7. Cool in the pan for 10 minutes, then transfer to a wire rack to cool completely before cutting into squares.

    Notes

    For a fun twist, consider adding nuts, dried fruits, or even peanut butter for a unique flavor.

Nutrition

Keywords: oatmeal bars, fudge bars, dessert, sweet treat, chewy dessert

  • Lemon Oatmeal Crumble Bars

    Lemon Oatmeal Crumble Bars

    Lemon Oatmeal Crumble Bars: A Sweet Tangy Delight!

    Hey there, fellow food lovers! 🍋✨ If you’re anything like me, you understand the sheer joy that comes from a bite of something sweet yet tangy. Today, I’m excited to share with you one of my all-time favorite recipes that perfectly marries the bright flavor of lemons with the comforting texture of oats: Lemon Oatmeal Crumble Bars!

    Imagine this: a sunny afternoon, the aroma of fresh lemons wafting through the kitchen, and the sweet anticipation of a delicious treat that invites friends and family to gather around the table. These bars are not just a dessert; they’re a slice of nostalgia, a piece of sunshine, and that little bit of happiness we all deserve in our lives.

    Lemon Oatmeal Crumble Bars are incredibly versatile, making them the perfect companion for any occasion—whether it’s a picnic in the park, a cozy night in front of the TV, or a cheerful brunch gathering. Imagine sinking your teeth into a soft, buttery base, topped with a zesty lemon filling, and finished off with a satisfying crumble. It’s like a warm hug for your taste buds!

    But before we dive into the kitchen, let me tell you a little story about how these delightful bars came to be a cherished part of my recipe collection.


    Personal Story

    A few years ago, I found myself in one of life’s messy but beautiful seasons—a whirlwind of long workdays, forgotten grocery lists, and a growing craving for comfort food. One sunny Saturday, I decided to raid my pantry, which was sporting a collection of oats, some nearly expired lemons, and a bit of sugar that was just begging to be turned into something delightful.

    I could practically hear my grandma’s voice guiding me, reminding me not to waste a single thing. Her old wooden spoon was waiting for its moment in my hand, and off I went, channeling my inner chef. I set out to create something that reflected both the warmth of my childhood and the zest of adulting—hence, the birth of these Lemon Oatmeal Crumble Bars!

    As soon as I pulled them out of the oven, my kitchen was filled with a tangy aroma that immediately whisked me back to the days of baking with my grandma. Sitting on the warm counter, a slice of sunny sweetness found its way into my hands. It was light, tangy, and oh-so-delicious. I couldn’t stop at just one! I invited friends over, and their smiles and satisfied nods became the ultimate stamp of approval.

    Now, every time I whip up a batch, it’s not just about the bars themselves—it’s a celebration of those cozy kitchen memories and the joy of sharing love through food. So, let’s get to it and create some unforgettable Lemon Oatmeal Crumble Bars together!


    Ingredients

    Here’s what you need to whip up these heavenly outdoor-friendly bars:

    • Old-fashioned oats: About 2 cups of these hearty oats create the perfect crumble base. They add texture and chewiness. If you’re gluten-free, just substitute with certified gluten-free oats!

    • All-purpose flour: You’ll need about 1 cup. It serves as the backbone of our crumble. If you’re looking for a gluten-free alternative, almond flour or a 1:1 gluten-free baking mix works great.

    • Brown sugar: ¾ cup to sweeten things up and add a hint of molasses for that rich flavor. Feel free to swap it with coconut sugar if you need a refined sugar-free option.

    • Granulated sugar: About ½ cup to give our lemon filling the sweetness it needs to balance the tartness. You can use honey or maple syrup for a natural sweetener!

    • Unsalted butter: ½ cup (1 stick), melted. This adds flakiness and richness to our crumble. You can also use coconut oil for a dairy-free option.

    • Lemons: You’re going to need 2 large lemons—both the juice and zest! The zest brings so much brightness. If you’re in a pinch, bottled lemon juice can work too, but fresh is always best.

    • Egg: Just one! It binds everything together in our filling. If you need an egg substitute, you can use a flax egg (1 tablespoon flaxseed meal mixed with 2.5 tablespoons water) for a plant-based version.

    • Baking powder: 1 teaspoon to give our bars a light lift.

    • Salt: ½ teaspoon to enhance all those lovely flavors.


    Step-by-Step Instructions

    Now that we have our ingredients lined up, let’s roll up our sleeves and get started on these zesty treats!

    1. Preheat the Oven: First things first, preheat your oven to 350°F (175°C). This is essential for creating that perfect golden crust.

    2. Prepare Your Baking Dish: Grab a 9×9-inch (or 8×8-inch) baking pan and line it with parchment paper, allowing a little overhang on the sides for easy lifting later. A bit of non-stick spray will ensure these bars come out beautifully.

    3. Mix the Dry Ingredients: In a large bowl, combine the old-fashioned oats, flour, brown sugar, granulated sugar, baking powder, and salt. Stir it all together until it looks well-blended. Take a moment to appreciate that nutty, sweet smell!

    4. Add in the Butter: Pour the melted butter into the dry mixture. Using a fork or your hands, mix until everything clumps together and resembles coarse crumbs. Leave some chunks for that lovely crumble texture!

    5. Set Aside the Crumble Mixture: Scoop out about 1.5 cups of this mixture and set it aside in a small bowl. This will be our crumble topping.

    6. Press the Crust: Using the remaining mixture, press it evenly into the bottom of your prepared baking dish, ensuring a firm layer that will hold our luscious filling.

    7. Make the Lemon Filling: In another bowl, whisk together the egg, lemon juice, lemon zest, and granulated sugar (the ½ cup you set aside earlier) until fully combined. This is where the magic happens; the aroma will make it hard to resist tasting!

    8. Pour it Over the Crust: Pour this sunny lemon mixture over the pressed crust. Don’t worry if it looks a bit thin; it’ll set beautifully when baked.

    9. Top with Crumble: Gently sprinkle the reserved crumble mixture over the lemon filling. It doesn’t have to be perfect—some gaps are totally fine! This will create those flaky, crispy bits we love.

    10. Bake to Perfection: Pop your dish into the preheated oven and bake for 30-35 minutes, or until the top is lightly golden and the filling is just set. You’ll know they’re ready when the smell wafts through your home, making everyone think dinner is done!

    11. Cool and Slice: Once ready, remove the bars from the oven and let them cool in the pan for about 10 minutes. Then, lift them out using the parchment overhang, place them on a wire rack, and allow them to cool completely before slicing into those delicious squares.


    Serving Suggestions

    As these delightful bars cool, you might find yourself daydreaming about how to serve them. To really elevate your presentation and oh-so-fresh flavors, here are a few of my favorite serving suggestions:

    1. Dust with Powdered Sugar: Before serving, lightly dust the tops with powdered sugar for a dreamy, delicate finish. It’s such a simple touch that goes a long way in making them look even more enticing!

    2. Fresh Berries: Pair these bars with a side of fresh berries like strawberries, blueberries, or raspberries. Their tartness complements the sweetness of the bars perfectly.

    3. A Dollop of Whipped Cream: If you want to turn these lemon oat bars into an elevated dessert, add a dollop of freshly whipped cream or a scoop of vanilla ice cream on the side. Talk about indulgence!

    4. Herbal Garnish: To add an extra touch, garnish with fresh mint leaves or basil. The green notes can accentuate the lemon flavor and make your dessert look extra fancy!


    Recipe Variations

    Feeling a little adventurous? Here are some creative twists to make these bars your own:

    1. Blueberry Lemon Oat Bars: Add 1 cup of fresh or frozen blueberries to the lemon filling. The combinations of flavors will make your taste buds dance!

    2. Zesty Ginger: Add a teaspoon of grated ginger to the lemon filling for a spicy kick that pairs beautifully with the tartness.

    3. Lemon Coconut Crumble Bars: Mix shredded unsweetened coconut into the crumble for an added texture and tropical vibe. You could also use coconut oil instead of butter for a dairy-free option!

    4. Maple Lemon Crumble Bars: Swap out granulated sugar with maple syrup for a rich, earthy sweetness. Note that you may need to reduce some of the liquid in the filling to account for the additional moisture.

    5. Cherry Lemon Oat Bars: Swap blueberries for fresh cherries! Either pitted and halved sour cherries or sweet ones will work wonders.


    Chef’s Notes

    Making these Lemon Oatmeal Crumble Bars has become a cherished ritual in my kitchen. I often find myself indulging in a little experimentation! One time, I even added some crushed almond in the crumble—wow, did that speed things up in the flavor department. These bars are incredibly forgiving; if you’re missing an ingredient, you can often find a clever substitute that turns out just as delightful.

    And, let’s face it—sometimes they don’t even last the day in my household! Friends and family gather, stories are shared, and everyone gets a slice of joy. Each batch seems to have its own unique character, thanks to everything from the juiciness of the lemons to the exact sweetness of that particular batch of brown sugar. It’s all these little surprises that truly keep my heart in the kitchen.


    FAQs and Troubleshooting

    Q: Can I make these bars ahead of time?
    A: Absolutely! These bars keep well in an airtight container in the fridge for about a week. Just be sure to let them cool completely before storing.

    Q: What if my bars don’t seem to set as they should?
    A: This can be due to a few factors—make sure to use fresh lemons (not bottled juice) and check that you used the correct egg size. You may have also underbaked them; if they jiggle too much, give them a few more minutes.

    Q: How can I tell when they’re done baking?
    A: You’re looking for a light golden brown top, and the lemon filling should be set, not jiggly. A toothpick inserted into the center should come out clean.

    Q: Can I freeze the leftover bars?
    A: Yes! Just make sure they are fully cooled, cut them into squares, and wrap them tightly in plastic wrap, followed by aluminum foil, before freezing. When you’re ready to enjoy, let them thaw in the fridge overnight!


    Nutritional Info

    Each Lemon Oatmeal Crumble Bar contains approximately:

    • Calories: 180
    • Total Fat: 7g
    • Saturated Fat: 4g
    • Cholesterol: 30mg
    • Sodium: 80mg
    • Total Carbohydrates: 26g
    • Dietary Fiber: 2g
    • Sugars: 10g
    • Protein: 3g

    These bars are a tasty treat, and while they’re not necessarily a "health food," they’re a much better option than a store-bought cookie or dessert. Enjoying them in moderation is key!


    Final Thoughts

    There you have it, friends! A slice of sunshine filled with nostalgic flavors that brings warmth to kitchens everywhere. Let these Lemon Oatmeal Crumble Bars be a reminder that delicious treats don’t have to be complicated. Whether it’s a cozy gathering with friends or a quiet evening by yourself with a warm cup of tea, these bars are the perfect treat for any occasion.

    So, the next time you need a pick-me-up or want to impress your friends, don’t hesitate to whip up a batch of these lovely bars. Cook with joy, share with love, and remember—every bite is an opportunity to connect with those you adore. Happy baking, and as always, let’s make something delicious together! 🍋✨


    I can’t wait to hear how your Lemon Oatmeal Crumble Bars turn out! Don’t forget to share your stories and pics with our Tasty Chow community!

    Print

    Lemon Oatmeal Crumble Bars

    Delicious bars combining the bright flavor of lemons with a comforting oatmeal crumble.

    • Author: emmawhitaker
    • Prep Time: 15 minutes
    • Cook Time: 35 minutes
    • Total Time: 50 minutes
    • Yield: 16 servings 1x
    • Category: Dessert
    • Method: Baking
    • Cuisine: American
    • Diet: Vegetarian

    Ingredients

    Scale
    • 2 cups old-fashioned oats
    • 1 cup all-purpose flour
    • ¾ cup brown sugar
    • ½ cup granulated sugar
    • ½ cup unsalted butter, melted
    • 2 large lemons (juice and zest)
    • 1 egg
    • 1 teaspoon baking powder
    • ½ teaspoon salt

    Instructions

    1. Preheat your oven to 350°F (175°C).
    2. Prepare a 9×9-inch baking pan with parchment paper.
    3. Mix the old-fashioned oats, flour, brown sugar, granulated sugar, baking powder, and salt in a large bowl.
    4. Add the melted butter and combine until it resembles coarse crumbs.
    5. Set aside 1.5 cups of the crumble mixture for topping.
    6. Press the remaining mixture into the bottom of the baking pan.
    7. Make the lemon filling by whisking together the egg, lemon juice, lemon zest, and granulated sugar.
    8. Pour the lemon mixture over the crust.
    9. Top with the reserved crumble mixture.
    10. Bake for 30-35 minutes, until golden.
    11. Cool for 10 minutes before transferring to a wire rack.

    Notes

    Dust with powdered sugar or serve with fresh berries for a delightful finish.

    Nutrition

    • Serving Size: 1 bar
    • Calories: 180
    • Sugar: 10g
    • Sodium: 80mg
    • Fat: 7g
    • Saturated Fat: 4g
    • Unsaturated Fat: 2g
    • Trans Fat: 0g
    • Carbohydrates: 26g
    • Fiber: 2g
    • Protein: 3g
    • Cholesterol: 30mg

    Keywords: lemon dessert, crumble bars, oatmeal bars, baking, sweet treats

    Did you make this recipe?

    Share a photo and tag us — we can’t wait to see what you’ve made!

  • Peanut Butter Oatmeal Bars

    Peanut Butter Oatmeal Bars: A Cozy Recipe to Satisfy Your Sweet Tooth

    Introduction

    Hey there, culinary companions! 👋 Are you bracing for that mid-morning slump, craving something sweet and satisfying? Or maybe you’re on the hunt for a guilt-free treat to stash in your kids’ lunch boxes? Either way, let me introduce you to the ultimate answer: Peanut Butter Oatmeal Bars!

    These bars are the epitome of comfort food—just the right amount of chewy, with the full-bodied flavor of peanut butter that wraps around your taste buds like a warm hug. They’re not just delicious; they’re also packed with wholesome ingredients that make guilt-free snacking a breeze. Whip these up on a lazy Sunday afternoon or when you need a quick grab-and-go breakfast during the hectic week ahead! Trust me, once you make these bad boys, they’ll become a staple in your house, much like my well-loved, cinnamon roll-scented childhood kitchen.

    Imagine walking into your kitchen, the aroma wafting through the air as these bars bake to golden perfection. Are you picturing it? Because I certainly am! Let’s roll up our sleeves and dive into the magic that transforms simple pantry staples into bite-sized happiness. Ready? Let’s get cooking!


    Personal Story

    Growing up, my kitchen was a whirlwind of laughter and chaos, thanks to my full-house family and food-loving friends. One fond memory that stands out is baking with my mom during our summer vacations. She would mix everything in our rustic kitchen with a wooden spoon that had definitely seen better days. One of our favorite go-to recipes? You guessed it—peanut butter treats!

    I remember one sunny afternoon, my sister and I tried to improvise and add chocolate chips to the mix. Mom had her doubts, but after a few delightful bites, that batch became our family tradition. Those peanut buttery, chewy morsels were basically the dessert we dreamed about all day.

    It’s those little moments in the kitchen—experimenting and laughing—that instilled my lifelong passion for cooking and baking. Fast forward to today, and I’m excited to share with you a recipe that ties in that same warmth and nostalgia: Peanut Butter Oatmeal Bars. So let’s turn on that oven and stir up some memories that can be shared with your family!


    Ingredients

    Ready to gather your ingredients? Here’s what you’ll need to create these delightful Peanut Butter Oatmeal Bars.

    • Old-Fashioned Oats (2 cups)
      Oats provide the base of this recipe, lending a chewy texture and that heartiness we all love. Feel free to swap in quick oats if that’s what you have on hand, but the texture will be slightly different.

    • Natural Peanut Butter (1 cup)
      The star of the show! Opt for creamy or chunky—whichever you prefer. You can substitute with almond or cashew butter for a nut-free twist, but be sure to check for allergens if you’re serving these to someone else.

    • Honey or Maple Syrup (½ cup)
      These serve as your sweetener and help bind everything together. Feel free to adjust the amount to suit your sweet tooth. Agave syrup works as a great substitute if you’re looking for a vegan option.

    • Banana (1 ripe)
      Mashed banana adds moisture and a natural sweetness to the bars. If you’re not a fan of banana flavor, try using unsweetened applesauce in a 1:1 swap.

    • Vanilla Extract (1 teaspoon)
      A splash of vanilla brings a layer of warmth to the flavor profile. Always use pure extract for the best result—your kitchen deserves it!

    • Baking Powder (½ teaspoon)
      This is the leavening agent that gives your bars a nice rise.

    • Salt (½ teaspoon)
      Just a pinch enhances all the sweet and nutty flavors.

    • Chopped Nuts or Chocolate Chips (optional, ½ cup)
      These are completely customizable! Prefer your bars with a crunch? Toss in some chopped walnuts or almonds. Need something sweeter? Mini chocolate chips can elevate these bars to heavenly status!


    Step-by-Step Instructions

    Now that we have our ingredients lined up like little soldiers, let’s get started on making these gooey, delicious Peanut Butter Oatmeal Bars! Follow these steps, and let your inner chef shine.

    Step 1: Preheat Your Oven

    First things first—preheat your oven to 350°F (175°C). This ensures your bars bake evenly, so don’t skip this important step!

    Step 2: Prepare the Baking Dish

    Grab an 8×8 inch baking pan and line it with parchment paper, leaving some overhang—this will make removing the bars a breeze later on. If you don’t have parchment, you can always grease the pan with a touch of coconut oil or non-stick spray.

    Step 3: Mix the Wet Ingredients

    In a large mixing bowl, combine the mashed banana and natural peanut butter until smooth and creamy. I love using a whisk here; it really helps to break up any lumps and creates a fluffy mixture! Add in the honey (or maple syrup) and vanilla extract, and mix until everything is well-blended and inviting.

    Step 4: Combine the Dry Ingredients

    In a separate bowl, whisk together the oats, baking powder, and salt. This helps distribute the ingredients evenly throughout the bars, making for a consistent texture and taste.

    Step 5: Combine the Mixtures

    Now gently fold the dry ingredients into the wet mixture. You want to combine them until just blended—avoid over-mixing, as this can make your bars tough. If you’re including nuts or chocolate chips, now’s the time to fold those in too!

    Step 6: Pour and Spread

    Transfer your delicious mixture into the prepared baking dish, spreading it out evenly. Use a spatula to press it down gently; this will help your bars hold together beautifully.

    Step 7: Bake to Perfection

    Pop the dish in the oven and bake for 25-30 minutes or until the edges are lightly browned and the center firms up. Your kitchen will soon be filled with the lovely aroma of peanut butter goodness.

    Step 8: Cool and Slice

    Once your bars are out of the oven, let them cool in the pan for about 10 minutes, then transfer them to a wire rack to cool completely. Once cool, lift the bars out using the parchment overhang and slice them into squares or rectangles—whatever tickles your fancy!


    Serving Suggestions

    These Peanut Butter Oatmeal Bars are a treat on their own, but a little creativity can elevate them even more! Here are some fun serving ideas:

    • Drizzle It Up: Melt some dark chocolate or additional peanut butter in the microwave for about 30 seconds until pourable. Drizzle it over the cooled bars for a decadent touch.

    • Top It Off: Serve these bars with a dollop of Greek yogurt and fresh fruit for a wholesome breakfast or snack option. Berries or banana slices pair beautifully.

    • Snack Pack: Individually wrap bars in parchment or foil for easy snacks on-the-go. You’ll have a perfect energy booster for school mornings or midday work slumps!


    Recipe Variations

    Now, if you want to shake things up a little, here are some fun variations you can try:

    1. Chocolate Chip Madness: Add a full cup of mini chocolate chips for a sweet twist that’s bound to delight chocolate lovers.

    2. Nutty Burst: Mix in your favorite chopped nuts—think almonds, pecans, or hazelnuts—for added texture and nutrition.

    3. Tropical Vibes: Stir in shredded coconut and dried pineapple for a bit of island flair. Perfect for summer vibes!

    4. Spiced Up: Toss in a teaspoon of cinnamon for a warm, cozy flavor that’s especially welcoming in fall and winter.

    5. Peanut-Free Alternative: Replace peanut butter with sunflower seed butter to make these bars nut-free and still luscious.


    Chef’s Notes

    Oh boy, where do I begin? This recipe has come a long way! Originally, I made these bars in a mad rush before hosting a gathering. I used whatever ingredients I had on hand, and they were an instant hit! Since then, I’ve honed the recipe to perfection—and every time, I’m reminded of those summer afternoons spent baking.

    It’s a reminder that the kitchen is a place of experimentation and joy. I often challenge myself to use ingredients that might seem to clash, and it’s led to some delightful surprises over the years. So don’t be afraid to get creative!


    FAQs and Troubleshooting

    1. My bars turned out crumbly; what happened?
    If your bars are crumbly, it might be due to not enough binding ingredients. You can increase the peanut butter or honey next time or mash another banana into the mix.

    2. Can I freeze these bars?
    Absolutely! Once cooled, wrap each bar tightly in plastic wrap and place them in an airtight container. They’ll keep well in the freezer for up to three months. Just thaw in the refrigerator before enjoying!

    3. Why did my bars burn on the edges?
    Every oven is different, so keep an eye on your bars as they bake. Consider reducing the baking time or placing the dish in the center of the oven.

    4. Can I substitute other nut butters?
    Yes! Feel free to experiment with almond butter, cashew butter, or even sunflower seed butter. Just make sure the nut butter you choose is smooth and creamy!


    Nutritional Info

    Let’s talk numbers! Each Peanut Butter Oatmeal Bar is packed with nutrition thanks to its wholesome ingredients. Here’s a rough estimate per bar (assuming you cut them into 12 equal pieces):

    • Calories: 160
    • Protein: 6g
    • Carbohydrates: 20g
    • Fat: 7g
    • Fiber: 2g
    • Sugar: 5g

    These bars are loaded with good-for-you ingredients offering a satisfying balance of nutrients. They’re great as a quick breakfast or an energizing snack!


    Final Thoughts

    There you have it! Your ticket to creating a delectable batch of Peanut Butter Oatmeal Bars bursting with flavor and comfort. I hope you enjoy every delightful bite and evoke a few fond memories of your own along the way. Don’t forget to share these bars with your friends and family; they’ll be begging for the recipe in no time.

    So, roll up those sleeves, unleash your inner chef, and let’s bake up some kitchen magic! Cheers to tasty creations and wonderful kitchen adventures! Until next time, happy cooking! 🥳

    — Emily

    Print

    Peanut Butter Oatmeal Bars

    Delicious and wholesome Peanut Butter Oatmeal Bars, perfect for a quick snack or breakfast.

    • Author: emmawhitaker
    • Prep Time: 10 minutes
    • Cook Time: 30 minutes
    • Total Time: 40 minutes
    • Yield: 12 servings 1x
    • Category: Snack
    • Method: Baking
    • Cuisine: American
    • Diet: Vegetarian

    Ingredients

    Scale
    • 2 cups Old-Fashioned Oats
    • 1 cup Natural Peanut Butter
    • ½ cup Honey or Maple Syrup
    • 1 ripe Banana
    • 1 teaspoon Vanilla Extract
    • ½ teaspoon Baking Powder
    • ½ teaspoon Salt
    • ½ cup Chopped Nuts or Chocolate Chips (optional)

    Instructions

    1. Preheat your oven to 350°F (175°C).
    2. Prepare an 8×8 inch baking pan by lining it with parchment paper.
    3. Mix the mashed banana and peanut butter until smooth in a large bowl, then add honey and vanilla.
    4. Combine the oats, baking powder, and salt in a separate bowl.
    5. Fold the dry ingredients into the wet mixture until just blended.
    6. Transfer the mixture into the baking dish and spread it evenly.
    7. Bake for 25-30 minutes until the edges are browned.
    8. Cool in the pan for 10 minutes, then transfer to a wire rack to cool completely.

    Notes

    These bars can be customized with various nuts, chocolate chips, or flavor variations like cinnamon or coconut.

    Nutrition

    • Serving Size: 1 bar
    • Calories: 160
    • Sugar: 5g
    • Sodium: 90mg
    • Fat: 7g
    • Saturated Fat: 1g
    • Unsaturated Fat: 6g
    • Trans Fat: 0g
    • Carbohydrates: 20g
    • Fiber: 2g
    • Protein: 6g
    • Cholesterol: 0mg

    Keywords: Peanut Butter, Oatmeal Bars, Healthy Snack, Easy Recipe, Baking

    Did you make this recipe?

    Share a photo and tag us — we can’t wait to see what you’ve made!

  • Strawberry Oatmeal Bars

    # Delicious Strawberry Oatmeal Bars Recipe: A Sweet Tribute to Nostalgia
    
    ## Introduction
    
    Hey there, fellow food lovers! 🌟 Are you ready to embark on a culinary adventure that combines nostalgia, sweetness, and comfort? Today, we’re diving into the delightful world of Strawberry Oatmeal Bars! These scrumptious treats are perfect for breakfast, snack time, or even dessert. With a perfectly chewy oatmeal base, a luscious layer of fresh strawberries, and an irresistible crumb topping, these bars are like a hug from a dear friend.
    
    You might be wondering, what makes Strawberry Oatmeal Bars so special? Well, for me, it’s all about the memories they evoke. Picture this: You’ve just come home from school, the sun streaming through the kitchen window, and the aroma of baked goods wafting through the air. That’s right! These bars remind me of weekends spent helping my grandma in her cozy little kitchen. She was the queen of comfort food, and I loved watching her whip up her famous oatmeal bars while sharing stories and laughter.
    
    When you make these Strawberry Oatmeal Bars, you’re not just following a recipe—you’re participating in a beautiful tradition of warmth and love that fills the heart. Whether you're baking for yourself, your family, or a gathering of friends, these bars are sure to bring joy and satisfaction to those you share them with. So, let’s roll up our sleeves, grab our ingredients, and get ready to make something seriously delicious!
    
    ## Personal Story
    
    Growing up in a small-town kitchen, I had the joy of spending countless afternoons with my grandma, who was my culinary mentor and partner in crime. One of my favorite memories was the day we decided to experiment with her classic oatmeal bar recipe. We had some fresh strawberries on hand from the local farmer’s market, and instead of sticking to the usual recipe, we decided to mix things up and add a fruity twist. 
    
    As we chopped the strawberries, their sweet, juicy scent filled the air, and Grandma shared stories about how she used to make similar treats for her kids. I remember giggling as we debated whether to add more sugar or keep it less sweet—despite Grandma's tendency to pack in the sweetness, that day, we found the perfect balance! 
    
    When those bars came out of the oven, golden and bubbling, I watched as my family savored every bite. They were an instant hit, and from that day on, Strawberry Oatmeal Bars became a beloved family favorite. Now, every time I bake a batch, I can’t help but smile as I remember the laughter, the stories, and the delicious aroma that filled the kitchen. Let's make some memories of our own, shall we?
    
    ## Ingredients
    
    Here’s what you’ll need to bring these delightful Strawberry Oatmeal Bars to life:
    
    - **2 cups rolled oats**  
      Perfect for achieving that chewy texture. If you're gluten-free, opt for certified gluten-free oats!
    
    - **1 cup all-purpose flour**  
      This is the backbone of your bars; it provides structure. If you prefer a healthier option, you can substitute half with whole wheat flour.
    
    - **1/2 cup brown sugar**  
      For that warm, caramel undertone. You can replace it with coconut sugar for a refined-sugar-free option.
    
    - **1/2 teaspoon baking powder**  
      This will help your bars rise just a bit. Baking soda works in a pinch if you can’t find baking powder.
    
    - **1/4 teaspoon salt**  
      Enhances flavor! Always a good idea to keep a pinch of salt handy in sweet recipes.
    
    - **1/2 cup unsalted butter, melted**  
      Adds richness and flavor. You can substitute coconut oil for a dairy-free version.
    
    - **1 cup fresh strawberries, hulled and chopped**  
      The star of the show! If strawberries are out of season, frozen berries will work just fine; just thaw and drain them first.
    
    - **1 teaspoon vanilla extract**  
      A little splash goes a long way in adding depth to the flavor.
    
    ## Step-by-Step Instructions
    
    ### Step 1: Preheat the Oven
    Preheat your oven to 350°F (175°C) and grease an 8x8-inch baking pan or line it with parchment paper for easy removal later. Trust me; your future self will thank you!
    
    ### Step 2: Combine Dry Ingredients
    In a large bowl, mix together the rolled oats, flour, brown sugar, baking powder, and salt. This will form the base of your bars. I like to give them a gentle stir—just enough to combine.
    
    ### Step 3: Add the Wet Ingredients
    Pour in the melted butter and vanilla extract. Mix until everything is well combined. The mixture might look a bit crumbly, but that’s okay; we’ll bring it all together with a little elbow grease!
    
    ### Step 4: Set Aside Some Crust Mixture
    Take about 1 cup of the oat mixture and set it aside. This will be your crumb topping later. 
    
    ### Step 5: Press the Base Into the Pan
    With the remaining mixture, press it evenly into the bottom of the greased baking pan. Pro tip: Use the back of a measuring cup to squish it down to ensure it sticks together and creates a solid foundation.
    
    ### Step 6: Layer the Strawberries
    Spread the chopped strawberries evenly over the oatmeal base. If you’re feeling adventurous, toss them in a teaspoon of sugar to bring out their sweetness!
    
    ### Step 7: Crumb Topping Time!
    Sprinkle the reserved crumb mixture evenly over the strawberries. This creates a lovely little topping that gets golden brown and delicious in the oven.
    
    ### Step 8: Bake to Perfection
    Pop the pan in the oven and bake for about 25-30 minutes, or until the top is lightly golden and the strawberries are bubbly. The smell that wafts through your kitchen will have everyone clamoring for a taste!
    
    ### Step 9: Cool and Slice
    Once baked, remove the bars from the oven and let them cool in the pan for at least 10-15 minutes before slicing into squares. If you try to cut them too soon, you might lose that perfect shape!
    
    ## Serving Suggestions
    
    These Strawberry Oatmeal Bars are incredibly versatile! Serve them warm with a scoop of vanilla ice cream for an indulgent dessert or on their own for a satisfying snack. 
    
    For a breakfast treat, pair them with a dollop of Greek yogurt and a drizzle of honey, or enjoy them alongside your morning coffee. If you really want to impress, sprinkle some powdered sugar on top for a charming presentation. 
    
    Feel free to pack these bars into lunchboxes or wrap them up as a delightful gift for friends and family—you’ll definitely win some hearts with these beauties!
    
    ## Recipe Variations
    
    Here are a few creative ways to put your own spin on these bars:
    
    1. **Berry Medley**: Swap out strawberries for a mix of blueberries, raspberries, and blackberries. A rainbow of berries works exceptionally well!
      
    2. **Peanut Butter Bliss**: Drizzle some peanut butter over the strawberry layer for a nutty twist that pairs perfectly with the oats.
       
    3. **Choco-Chip Surprise**: Add a handful of chocolate chips to the filling for a rich, decadent treat. Who doesn’t love chocolate?
      
    4. **Nutty Goodness**: Mix in some chopped nuts like walnuts or almonds for added crunch and flavor.
    
    5. **Herbaceous Hint**: Add a dash of lemon or basil to the strawberry layer for a refreshing twist. It’s a tasty surprise!
    
    ## Chef’s Notes
    
    Is there anything better than the smell of baked goods wafting through the air? I still vividly recall the thrill of pulling these warm bars out of the oven with Grandma. Over the years, I’ve experimented with various fruits and toppings, but there’s just something undeniably special about strawberries.
    
    This recipe continues to evolve in my kitchen, and I love trying it out with different flavor profiles. Don’t be afraid to switch things up! Cooking is all about creativity, and I guarantee that imbibing a little of your personality into the recipe will create something even more wonderful.
    
    ## FAQs and Troubleshooting
    
    ### **Q1: My bars are too crumbly! What went wrong?**
    Make sure your butter is fully melted and evenly distributed. If they’re still crumbly, they might need a tad more moisture. A splash of milk can help! 
    
    ### **Q2: How do I store leftovers?**
    Store in an airtight container at room temperature for up to 3 days or in the fridge for up to a week. They also freeze well—just wrap them tightly, and they’ll stay fresh for up to 3 months!
    
    ### **Q3: Can I make these bars vegan?**
    Absolutely! Substitute the butter with coconut oil and use maple syrup instead of brown sugar. Make sure your oats are certified gluten-free as well!
    
    ### **Q4: What if I don’t have strawberries?**
    No problem! Feel free to use any fruit you have on hand—apples, peaches, or even a mixed berry blend will work wonderfully.
    
    ## Nutritional Info (if applicable)
    
    These Strawberry Oatmeal Bars provide a delightful blend of nutrients, making them a well-rounded treat. Each serving contains approximately:
    
    - **Calories**: 180
    - **Total Fat**: 7g
    - **Saturated Fat**: 4g
    - **Cholesterol**: 15mg
    - **Sodium**: 60mg
    - **Total Carbohydrates**: 26g
    - **Dietary Fiber**: 2g
    - **Sugars**: 8g
    - **Protein**: 3g
    
    They're perfect if you're looking for a go-to snack that keeps you fueled throughout your day!
    
    ## Final Thoughts
    
    There you have it, my friends—an easy, delicious, and heartwarming recipe for Strawberry Oatmeal Bars that will surely become a staple in your kitchen. Whether you savor them solo, share them with loved ones, or whip them up for a gathering, these bars are bound to attract smiles and happy bellies.
    
    Cooking is a journey, and I’m thrilled to be on this flavorful adventure with you. So, the next time you find yourself in the kitchen, feel free to adapt and create. Remember, food is all about joy, connection, and love. Let's keep sharing our love for delicious recipes, and as always, happy cooking! 
    
    Print

    Delicious Strawberry Oatmeal Bars

    A nostalgic and sweet treat perfect for breakfast, snacks, or dessert, featuring a chewy oatmeal base and luscious strawberries.

    • Author: emmawhitaker
    • Prep Time: 15 minutes
    • Cook Time: 30 minutes
    • Total Time: 45 minutes
    • Yield: 9 servings 1x
    • Category: Dessert
    • Method: Baking
    • Cuisine: American
    • Diet: Vegetarian

    Ingredients

    Scale
    • 2 cups rolled oats
    • 1 cup all-purpose flour
    • 1/2 cup brown sugar
    • 1/2 teaspoon baking powder
    • 1/4 teaspoon salt
    • 1/2 cup unsalted butter, melted
    • 1 cup fresh strawberries, hulled and chopped
    • 1 teaspoon vanilla extract

    Instructions

    1. Preheat the oven to 350°F (175°C) and grease an 8×8-inch baking pan or line it with parchment paper.
    2. Combine the rolled oats, flour, brown sugar, baking powder, and salt in a large bowl.
    3. Add the melted butter and vanilla extract, mixing until well combined.
    4. Set aside about 1 cup of the oat mixture for the crumb topping.
    5. Press the remaining mixture into the bottom of the greased baking pan.
    6. Layer the chopped strawberries evenly over the oatmeal base.
    7. Sprinkle the reserved crumb mixture evenly over the strawberries.
    8. Bake for about 25-30 minutes, until the top is golden and the strawberries are bubbly.
    9. Cool in the pan for at least 10-15 minutes before slicing into squares.

    Notes

    Serve warm with ice cream or yogurt. These bars also freeze well for later enjoyment.

    Nutrition

    • Serving Size: 1 bar
    • Calories: 180
    • Sugar: 8g
    • Sodium: 60mg
    • Fat: 7g
    • Saturated Fat: 4g
    • Unsaturated Fat: 2g
    • Trans Fat: 0g
    • Carbohydrates: 26g
    • Fiber: 2g
    • Protein: 3g
    • Cholesterol: 15mg

    Keywords: strawberry bars, oatmeal bars, dessert, summer recipes, snacks

    Did you make this recipe?

    Share a photo and tag us — we can’t wait to see what you’ve made!

  • No-bake Chocolate Oatmeal Cookies

    No-bake Chocolate Oatmeal Cookies

    No-Bake Chocolate Oatmeal Cookies: A Sweet Journey Without the Oven

    Hey there, fellow food lovers! 👋 If there’s one thing I adore more than whipping up a mouthwatering meal, it’s the thrill of discovering a no-bake recipe that ticks all the boxes for ease and flavor. Today, I’m ecstatic to share with you the ultimate sweet treat: No-Bake Chocolate Oatmeal Cookies! Picture this: a chewy, chocolatey delight that comes together in just a few minutes, requires no oven, and promises to bring smiles to every cookie lover’s face.

    These cookies are a dream come true for busy weeknights, last-minute cravings, or even a fun afternoon baking project with the kids. The pairing of rich cocoa and heart-healthy oats creates a treat that not only satisfies your sweet tooth but also packs a bit of nutritional punch. I mean, who wouldn’t want a cookie that feels a tad virtuous?

    Now, I remember the first time I made these delicious no-bake cookies; I was a teenager experimenting in the kitchen. My mom had a busy schedule, and I wanted to surprise her with a sweet treat after school. I rummaged through our pantry, found some oats, sugar, cocoa powder, and peanut butter (always a staple in our home), and voila! A frenzy of mixing, stirring, and chilling resulted in what can only be described as a moment of pure bliss. As soon as I took that first bite, I knew I had struck culinary gold!

    Join me as we dive into the world of no-bake chocolate oatmeal cookies. Grab your apron, roll up your sleeves, and let’s get to creating something irresistibly delicious together!

    Personal Story

    It was one of those late afternoons after school when I had a light bulb moment — a full-on experiment I was determined to tackle! The kitchen was my playground, and I was ready to create something magical. I vividly recall grabbing a mixing bowl, dumping in some oats, and pouring in that luscious, gooey peanut butter. As a teenager, the joy of mixing ingredients and tasting along the way felt like discovering a secret recipe; to this day, I can’t help but chuckle at how messy I got in the process!

    I remember the satisfaction on my mom’s face as she walked into the kitchen to find me proudly presenting my no-bake cookies on a colorful plate. One bite in, and her eyes lit up! The delightful combination of crunchy oats, rich chocolate, and creamy peanut butter had won her over completely. That day, I learned that cooking is not just about the food itself—it’s about the heartfelt moments and memories created around the dining table. I’ve carried this experience into my culinary journey, always hoping to evoke those same warm feelings with my recipes.

    Ingredients

    Alright, let’s gather our ingredients! Here’s what you’ll need to whip up these easy No-Bake Chocolate Oatmeal Cookies:

    • 2 cups old-fashioned oats
      These oats give the cookies their chewy texture. They absorb moisture beautifully, so you end up with a delightful crunch. If you’re in a pinch, quick oats will work but may give a slightly different texture.

    • 1 cup creamy peanut butter
      The star of our show! Peanut butter adds richness and binds the cookies together. If you have nut allergies, feel free to substitute with sunflower seed butter or almond butter for a nut-free version!

    • 1 cup granulated sugar
      This sweet, luscious sugar brings all the flavors together. For a healthier option, consider coconut sugar or even maple syrup (though with syrup, you may need to adjust the dry ingredients slightly to maintain texture).

    • 1/2 cup unsweetened cocoa powder
      The magical ingredient that turns these cookies into a chocolaty delight! For a sweeter taste, try using Dutch-processed cocoa powder.

    • 1/2 cup milk (or dairy-free milk)
      Adding a bit of milk helps blend everything nicely. Almond milk, coconut milk, or oat milk works beautifully too!

    • 1 teaspoon vanilla extract
      A splash of vanilla adds depth to the flavors. If you want to elevate your game, try infusing it with a touch of almond extract for a unique twist!

    • 1/4 teaspoon salt
      Just a pinch to brighten the flavors and balance the sweetness. Trust me, it lifts everything up!

    Step-by-Step Instructions

    Now that we’ve lined up our ingredients, it’s time for the fun part—the cooking! Follow these steps, and soon enough, you’ll find yourself indulging in these delightful cookies.

    1. Get Your Situation Ready:
      Grab a large mixing bowl and a medium saucepan. You’ll want to have some wax paper or parchment ready too because the assembly gets real here!

    2. Melt the Good Stuff:
      In the saucepan, combine the sugar, milk, and unsweetened cocoa powder. Put it over medium heat and bring this glorious mixture to a gentle boil. Remember to stir occasionally! It should boil for about 2 minutes until it’s all glossy and bubbling. This step is crucial as it helps the sugar dissolve fully into the mixture, making the cookies fudgy and divine.

    3. Add the Peanut Butter:
      Once it’s boiling up nicely, pull the saucepan off the heat. Stir in the creamy peanut butter and vanilla extract. This is where the magic happens—mix it until it’s all smooth and melted together. Ah, that rich aroma; it’s heavenly!

    4. Toss in the Oats and Salt:
      Now, throw in the old-fashioned oats and the salt. Stir, stir, stir! Get everything coated so that each oat is a little chocolatey parcel of delight. Yes, it will look a little wild and chaotic, but that’s part of the charm!

    5. Scoop and Chill:
      Using a spoon or a cookie scoop (for neatness), drop spoonfuls of the cookie mixture onto the wax paper or parchment. You can shape them a bit if you’d like, but they don’t need to be perfect. Just get them onto the sheet so they can chill! The cookies will need about 30–60 minutes in the fridge to set, just enough time to sip on some post-cookie-baking coffee!

    6. Taste Test Time!
      After they have set, it’s time to dive in! They’ll be chewy, chocolaty, and just sweet enough—truly a treat worth indulging in! You’ll find that no-bake cookies have a unique texture that’s different but delightful.

    Serving Suggestions

    When it comes to serving these cookies, simplicity is key. Arrange them on a colorful platter or in a fun decorative jar for a rustic touch. Sweeten the experience by pairing them with a glass of cold milk or a warm mug of hot cocoa. For the extra fancy touch, you can even sprinkle a pinch of sea salt on top of the cookies right before serving. It elevates the taste and adds a visual flair!

    Feeling extra indulgent? Try them in a cookie sandwich by placing a scoop of ice cream between two cookies for a delectable dessert that truly impresses!

    Recipe Variations

    If you’re feeling adventurous, here are some fun twists and variations you can explore with these cookies:

    • Nutty Additions: Fold in some chopped nuts like walnuts or pecans for a crunchy texture. Or, if you want to keep it nut-free, try some sunflower seeds or sesame seeds!

    • Scoop of Fun: Add mini chocolate chips or butterscotch chips to the mixture for extra sweetness, or even drizzle some melted chocolate on top for a more decadent version.

    • ** Oat Substitution:** If you’re craving a gluten-free option, simply use certified gluten-free oats, or mix in some rice puffs for a unique twist!

    • Flavor Infusion: Switch up the peanut butter with almond butter or cashew butter for a different flavor profile. You can even try adding a dash of cinnamon or espresso powder for a little kick!

    • Dark Chocolate Delight: For all the dark chocolate lovers, replace half the normal cocoa with dark cocoa powder for an ultra-rich taste!

    Chef’s Notes

    Ah, the nostalgia as I whip up this recipe! Over the years, I’ve experimented with different add-ins and substitutions, which has made these cookies even more versatile. Sometimes, I even add a splash of cold brew coffee, and trust me, it takes them to a whole new level!

    Another fun memory comes to mind; I once had an impromptu cookie party with friends, and we decided to top them with sprinkles, shredded coconut, and even crushed pretzels. The creativity that came from those kitchen experiments was simply magical. It’s a reminder that cooking is not just about following a recipe; it’s about enjoying the process and letting our imaginations roam free.

    FAQs and Troubleshooting

    Q: My cookies didn’t set properly. What did I do wrong?
    A: If your cookies are too soft, you might have missed the boiling time. Make sure to let the mixture boil for at least 2 minutes before adding the oats. If they’re still too gooey, you can try refrigerating them a bit longer.

    Q: Can I use quick oats instead of old-fashioned oats?
    A: Yes, but keep in mind that quick oats will yield a slightly different texture! They may result in a softer cookie, but still delicious!

    Q: How do I store my no-bake cookies?
    A: Store them in an airtight container in the fridge for up to a week. You can also freeze them for up to two months if you want to save some for later!

    Q: Can I make them dairy-free?
    A: Absolutely! Use dairy-free milk and a vegan alternative for peanut butter or even tahini, and you’re good to go!

    Nutritional Info

    These No-Bake Chocolate Oatmeal Cookies pack a punch when it comes to flavor and nutrition. Each cookie contains:

    • Calories: Approximately 120-140 calories (based on size)
    • Protein: About 3g from peanut butter
    • Fiber: Around 1.5g from oats
    • Fat: Approximately 7g (mostly healthy fats from peanut butter)

    With oats providing complex carbohydrates and peanut butter adding a dose of protein, these cookies aren’t just desserts; they can be a quick post-workout snack for those needing a boost!

    Final Thoughts

    And there you have it, my fabulous friends—a delightful journey into the world of No-Bake Chocolate Oatmeal Cookies! I hope you’ll give these a try and bask in the joy they bring. Remember, it’s not just about making a delicious treat; it’s about creating moments and memories in the kitchen, sharing laughter, and enjoying every bite.

    So, the next time you need a quick sweet fix or want to elicit smiles from your loved ones, you know this recipe is a winner! Don’t forget to experiment, explore, and maybe even bring your own flair to this classic recipe! As always, let’s keep that kitchen cozy and full of flavor. Happy cooking, and I can’t wait to hear about your adventures with this no-bake cookie magic! 🍪❤️

    Print

    No-Bake Chocolate Oatmeal Cookies

    A chewy, chocolatey delight that comes together easily without an oven, perfect for satisfying sweet cravings.

    • Author: emmawhitaker
    • Prep Time: 15 minutes
    • Cook Time: 10 minutes
    • Total Time: 25 minutes
    • Yield: 24 cookies 1x
    • Category: Dessert
    • Method: No-Bake
    • Cuisine: American
    • Diet: Vegetarian

    Ingredients

    Scale
    • 2 cups old-fashioned oats
    • 1 cup creamy peanut butter
    • 1 cup granulated sugar
    • 1/2 cup unsweetened cocoa powder
    • 1/2 cup milk (or dairy-free milk)
    • 1 teaspoon vanilla extract
    • 1/4 teaspoon salt

    Instructions

    1. Get your situation ready: Grab a large mixing bowl and a medium saucepan, with wax paper or parchment ready.
    2. Melt the good stuff: In the saucepan, combine the sugar, milk, and cocoa powder. Bring to a gentle boil for about 2 minutes, stirring occasionally.
    3. Add the peanut butter: Remove from heat and stir in the peanut butter and vanilla extract until smooth.
    4. Toss in the oats and salt: Stir until all oats are coated in the chocolate mixture.
    5. Scoop and chill: Drop spoonfuls onto wax paper or parchment and chill for 30-60 minutes until set.
    6. Taste test time! Enjoy your chewy, chocolaty cookies after they have set.

    Notes

    For a healthier option, consider using coconut sugar or maple syrup. Substitute peanut butter with sunflower seed butter for a nut-free version.

    Nutrition

    • Serving Size: 1 cookie
    • Calories: 130
    • Sugar: 10g
    • Sodium: 75mg
    • Fat: 7g
    • Saturated Fat: 1.5g
    • Unsaturated Fat: 5g
    • Trans Fat: 0g
    • Carbohydrates: 15g
    • Fiber: 2g
    • Protein: 3g
    • Cholesterol: 0mg

    Keywords: no-bake cookies, chocolate cookies, oatmeal cookies

    Did you make this recipe?

    Share a photo and tag us — we can’t wait to see what you’ve made!

  • Best Keto Brownies

    Best Keto Brownies

    Best Keto Brownies: Rich, Fudgy, and Guilt-Free!

    Hey there, fellow food lovers! 👋 Are you ready to dive into a world of chocolatey goodness without the carbs? Today, I’m sharing an absolutely delightful recipe for Keto Brownies that will make your taste buds sing and your belly cheer. It’s the kind of treat that feels like an indulgence but fits perfectly into your low-carb lifestyle. Imagine biting into a fudgy, rich brownie that melts in your mouth—all while keeping your keto goals in check. Ready to get baking? Let’s go!

    A Choco-Lover’s Delight

    Let me tell you about the first time I fell head over heels for brownies. I was just a kid, standing on a stool in my grandma’s cozy kitchen, trying to reach the countertop. There, I spotted a tempting pan of freshly baked chocolate brownies that filled the air with a heavenly aroma. It didn’t take long before I was stuck in an epic battle—my grandma against my inevitable “just one more bite.” Of course, being the cute grandchild had its perks, and soon, I was devouring those luscious brownies with my fingers.

    Fast forward to today, and I still have that strong affection for brownies, but I’ve made a little tweak to the classic recipe to fit my keto lifestyle. These Keto Brownies are just as fudgy, just as chocolatey, and just as crave-able as the ones from my childhood, but without all the guilt! So grab your apron, and let’s create a batch that will bring back those sweet memories.

    Ingredients

    Gathering your ingredients is the fun part! Here’s what you’ll need to whip up the best Keto Brownies.

    • Almond Flour (1 cup)

      • A fantastic low-carb alternative to traditional flour, almond flour adds moisture and a nutty flavor. Look for finely ground almond flour for the best texture. If you’re in a pinch, you can use coconut flour, but remember: it’s much denser, so you’d only need about 1/4 cup.
    • Cocoa Powder (1/2 cup)

      • This is where the magic happens! Cocoa powder gives the brownies their rich chocolate flavor. Go for unsweetened cocoa powder—trust me, you’ll want to control the sweetness. If you’re feeling adventurous, try Dutch-processed cocoa for a smoother taste.
    • Sweetener (3/4 cup)

      • You can use erythritol, monk fruit sweetener, or your favorite keto-friendly sweetener. Each one has its own unique flavor profile, so feel free to experiment! Just be cautious with stevia; it’s much sweeter, so you’ll need less.
    • Eggs (3 large)

      • Eggs are crucial for binding the brownies and giving them that fudgy texture we all love. If you’re vegan, you can use flax eggs as a substitute (1 tablespoon ground flaxseed mixed with 2.5 tablespoons water = 1 egg). Just let it sit for a few minutes until it thickens!
    • Butter (1/2 cup, melted)

      • Butter gives these brownies a rich, moist consistency. If you’re looking for a dairy-free option, coconut oil works great! The flavor will slightly differ, but it will still yield a delicious treat.
    • Vanilla Extract (2 teaspoons)

      • This adds depth to the chocolate flavor, making these brownies irresistible. Feel free to substitute with almond extract for a new twist!
    • Baking Powder (1 teaspoon)

      • A little baking powder is needed for leavening, helping to give your brownies a slight lift. If you’re out of baking powder, a pinch of baking soda will work, but it might change the texture slightly.
    • Salt (1/4 teaspoon)

      • Don’t skip the salt! A dash of salt enhances the sweetness and balances the flavors. If you love that salty-sweet combo, sprinkle a tiny bit of sea salt on top before baking.

    Now that we have everything ready, we can start cooking! 🎉

    Step-by-Step Instructions

    Grab your mixing bowls and let’s get to it!

    1. Preheat Your Oven: Start by preheating the oven to 350°F (175°C). This ensures that your brownies bake evenly and come out perfectly fudgy.

    2. Prepare the Pan: While the oven is heating, grab an 8×8-inch baking pan and line it with parchment paper. This step makes for easy removal and cleaning later on. A cooking spray, if you’re out of parchment, does the trick too!

    3. Mix the Wet Ingredients: In a large mixing bowl, combine the melted butter and your choice of sweetener. Whisk them together until you see a nice, smooth consistency. Next, add in the eggs and vanilla extract, mixing thoroughly until everything’s combined. Pro tip: Use a hand mixer for extra fluffiness!

    4. Blend the Dry Ingredients: In another bowl, whisk together the almond flour, cocoa powder, baking powder, and salt. This helps to eliminate clumps and ensures an even distribution of dry ingredients.

    5. Combine the Mixtures: Gently fold the dry ingredients into the wet mixture. Use a spatula or wooden spoon for this—mix until just combined. Be careful not to overmix; you want that lovely fudgy texture we’re aiming for!

    6. Transfer to Baking Pan: Pour the brownie batter into your prepared pan. Use your spatula to spread it evenly. Don’t forget to lick the bowl. Just kidding… or am I? 😉

    7. Bake Time: Pop the pan into the oven and let them bake for 20-25 minutes, or until a toothpick inserted into the center comes out with a few moist crumbs (not wet batter!). Every oven is different, so keep an eye on them. You want these guys to be perfectly chewy!

    8. Cool and Cut: Once baked, let the brownies cool in the pan on a wire rack for about 10-15 minutes. Then, lift them out with the parchment overlay and cool completely before slicing into squares. This wait is torturous, but trust me, it’ll be worth it!

    Serving Suggestions

    Now that your brownies are out of the oven and cooled off, it’s time to serve up some deliciousness! Cut your brownies into squares (or rectangles, who’s judging?) and plate them up. Here are a few fun ways to serve:

    • Classic Style: Just enjoy them as is with a light dusting of powdered erythritol on top for the classic brownie look.

    • Almond Butter Drizzle: For a nutty flavor kick, drizzle some warmed almond butter over the top right before serving. It’s ooey-gooey and oh-so-delicious!

    • Whipped Cream: Serve with a dollop of unsweetened whipped cream on the side for a creamy contrast. Feel free to add a sprinkle of cocoa to fancy it up!

    • Berry Burst: Fresh raspberries or strawberries add a lovely tartness that pairs perfectly with the chocolaty brownie. Plus, they add a pop of color to the plate!

    • A Scoop of Ice Cream: For an indulgent treat, serve with a scoop of keto-friendly ice cream on the side. Chocolate and mint flavors are particularly divine!

    Recipe Variations

    Want to mix it up a little? Here are some fun variations to try:

    • Nutty Brownies: Fold in 1/2 cup of chopped pecans or walnuts into the batter for added crunch and flavor. Nuts are an excellent source of healthy fats!

    • Mint Chocolate Brownies: Add a few drops of peppermint extract to your batter for a delightful minty flavor. These will be perfect for satisfying that mint chocolate craving!

    • Peanut Butter Swirl: Before baking, drop spoonfuls of peanut butter onto the brownie batter and swirl with a knife for a creamy surprise in every bite.

    • Chewy Coconut Brownies: Toss in 1/2 cup of unsweetened shredded coconut to the batter for a tropical twist.

    • Chocolate Chip Brownies: Fold in some sugar-free chocolate chips for a nice melty surprise throughout. Who can resist that extra chocolate goodness?

    Chef’s Notes

    These keto brownies have been a work of love and experimentation in my kitchen! Over the years, I’ve gone through countless versions to arrive at this perfect fudgy goodness. The first time I made these, I accidentally used baking soda instead of baking powder, and although it didn’t ruin the batch, it taught me to stick to my recipe.

    Also, remember, the sweetener you choose does affect the end result, so feel free to get crafty! Baking is all about experimenting—don’t shy away from it. Each time I bake these brownies, I can’t help but think of that small-town kitchen and my grandma’s warm hugs. So, whenever you create this recipe, I hope it’s filled with love and a dash of nostalgia!

    FAQs and Troubleshooting

    Q: Why are my brownies too dry?
    A: This can happen if you overshot the baking time. Check them a few minutes early and remove them when they’re still a bit fudgy in the center.

    Q: Can I make these brownies dairy-free?
    A: Absolutely! Swap the butter for coconut oil or a dairy-free butter substitute, and you’ll be good to go!

    Q: How can I store the brownies?
    A: These brownies keep well in an airtight container at room temperature for 3-4 days. If you need them to last longer, pop them in the fridge for up to a week.

    Q: What if I don’t have almond flour?
    A: If you’re in a bind, you can try using coconut flour as an alternative, but remember to reduce the quantity since coconut flour is more absorbent.

    Nutritional Info

    For those watching their macros, here’s the estimated nutritional breakdown per brownie (based on making 16 brownies):

    • Calories: 120
    • Fat: 9g
    • Protein: 4g
    • Total Carbohydrates: 6g
    • Fiber: 2g
    • Net Carbs: 4g

    These numbers may vary based on your specific ingredients and brands used. Always check labels when you’re sticking to a precise keto diet!

    Final Thoughts

    So there you have it—my recipe for the best Keto Brownies that will satisfy your chocolate cravings without derailing your healthy lifestyle. These treats are not just indulgent; they’re a journey back to my grandma’s kitchen and the joy of sharing delicious food with loved ones. So next time you’re in the mood for something sweet and fudgy, remember this easy recipe and enjoy every delicious bite guilt-free!

    Happy baking, my fellow flavor fans! And remember, cooking is all about having fun and creating memories. Share your brownie moments with me on social media; I want to see those lovely creations. Grab a fork, dig in, and let’s chow down together! 🍫❤️ — Cheers, Emily!

    Print

    Best Keto Brownies

    These Keto Brownies are fudgy, rich, and guilt-free—perfect for satisfying your chocolate cravings without derailing your healthy lifestyle.

    • Author: emmawhitaker
    • Prep Time: 15 minutes
    • Cook Time: 25 minutes
    • Total Time: 40 minutes
    • Yield: 16 servings 1x
    • Category: Dessert
    • Method: Baking
    • Cuisine: American
    • Diet: Keto

    Ingredients

    Scale
    • 1 cup Almond Flour
    • 1/2 cup Cocoa Powder
    • 3/4 cup Sweetener (erythritol, monk fruit, or your favorite keto-friendly sweetener)
    • 3 large Eggs
    • 1/2 cup Butter (melted)
    • 2 teaspoons Vanilla Extract
    • 1 teaspoon Baking Powder
    • 1/4 teaspoon Salt

    Instructions

    1. Preheat your oven to 350°F (175°C).
    2. Prepare an 8×8-inch baking pan by lining it with parchment paper.
    3. Mix the melted butter and sweetener together in a bowl. Add in the eggs and vanilla extract, whisking until smooth.
    4. Blend the almond flour, cocoa powder, baking powder, and salt in a separate bowl.
    5. Combine the dry ingredients into the wet mixture gently until just mixed.
    6. Transfer the brownie batter to the prepared pan and spread evenly.
    7. Bake for 20-25 minutes or until a toothpick comes out with moist crumbs.
    8. Cool in the pan for 10-15 minutes, then lift out and cool completely before slicing.

    Notes

    Feel free to customize with nuts, extracts, or sugar-free chocolate chips for added flavor!

    Nutrition

    • Serving Size: 1 brownie
    • Calories: 120
    • Sugar: 0g
    • Sodium: 50mg
    • Fat: 9g
    • Saturated Fat: 5g
    • Unsaturated Fat: 3g
    • Trans Fat: 0g
    • Carbohydrates: 6g
    • Fiber: 2g
    • Protein: 4g
    • Cholesterol: 50mg

    Keywords: keto brownies, low-carb dessert, chocolate dessert, fudgy brownies

    Did you make this recipe?

    Share a photo and tag us — we can’t wait to see what you’ve made!

  • Banana Oatmeal Bars

    Banana Oatmeal Bars

    Banana Oatmeal Bars: A Slice of Sweet Nostalgia

    Introduction

    Hey there, fellow food lovers! If your kitchen is anything like mine, you probably have days when ripe bananas lurk around, just waiting for a delicious fate instead of heading straight to the compost pile. And let me tell you, my friends, we’ve got a perfect solution that combines health, flavor, and nostalgia into one delightful package: Banana Oatmeal Bars! 🍌✨

    These bars are not just a snack; they’re a hug in food form. Picture this: you’re cozied up on the couch with a book or rushing out the door in the morning with a busy day ahead. Whatever your scenario, these chewy, wholesome bars work like magic. They’re packed with wholesome ingredients, sweetened naturally, and oh-so-easy to throw together. They are perfect for breakfast on the go, a midday pick-me-up, or even a healthy dessert option.

    Each bite is like a little trip down memory lane. I can still remember my grandma whipping up a delicious batch of banana bread or oatmeal cookies, filling the house with a scent that only cozy kitchens can create. These bars evoke that same heartwarming feeling yet are super easy to make!

    So, if you’re ready to embark on a fun culinary adventure, put on your apron and let’s make some Banana Oatmeal Bars together. Trust me, you’ll want to share these with everyone you know (or keep them all to yourself—no judgment here!).


    Personal Story

    Growing up, my weekends were often spent in my grandma’s sunny kitchen, where the walls were lined with photos of family, and the air carried the irresistible aroma of baked goods. One of my favorite memories is when she would take me thrifting for vintage baking dishes—those deep glass bowls with the beautiful floral designs that made everyone feel at home. We’d come back, toss on our aprons, and get to work.

    One time, I remember a particularly ripe bunch of bananas sitting on the counter. “We can’t let those go to waste,” she said as she grabbed a couple. And just like that, we were on a mission to create banana everything—a sweetened bread here, some cookies there. We discovered that the banana flavored things weren’t just great to eat; they also created warm, sticky moments that would stick with me forever.

    Now, I love bringing that same energy into my kitchen with these Banana Oatmeal Bars. They’re an homage to those fun-filled afternoons, and they’re just as easy to make! You won’t find any fancy ingredients here, just good old oats, bananas, and a sprinkle of magic (and, well, some chocolate chips if you want to be extra!).


    Ingredients

    Gather these simple ingredients that will make your bars a delightful treat:

    • 2-3 ripe bananas: Choose bananas that are heavily speckled. They’re naturally sweeter and full of flavor. If you’re short on bananas, you can substitute them with unsweetened applesauce (1/2 cup for every banana).

    • 1 cup oats: Rolled oats work best for this recipe because they provide a chewy texture. Quick oats will work too, but they may result in a softer bar. For a gluten-free option, make sure to use certified gluten-free oats.

    • 1/4 cup almond butter (or peanut butter): This adds creaminess and protein. If you have nut allergies, feel free to swap it out for sunflower seed butter or tahini.

    • 1/4 cup honey or maple syrup: Natural sweeteners like honey or maple syrup will provide that kick of sweetness. If you’re looking for a vegan option, stick with maple syrup.

    • 1/2 teaspoon vanilla extract: This little addition enhances the flavor profile of the bars. It’s worth it, trust me!

    • 1 teaspoon baking powder: This helps the bars rise just a bit and gives them a nice fluffy texture.

    • 1/2 teaspoon cinnamon: It’s optional, but cinnamon gives that warm hug feeling. Feel free to play around with spices—nutmeg or a pinch of ginger could work wonders!

    • 1/2 cup dark chocolate chips (optional): You know I can’t resist the sweet addition of chocolate! These are optional, but they bring your bars to the next level. Use dairy-free chocolate chips for a vegan-friendly treat.

    Now that you’ve got your ingredients ready, it’s time to mix some magic into these wholesome treats!


    Step-by-Step Instructions

    Let’s dive right into the how-tos of creating your Banana Oatmeal Bars. It’s easier than you think!

    1. Preheat Your Oven: First things first, preheat your oven to 350°F (175°C). This helps to ensure even cooking later on. And trust me, you want those delicious scents wafting through your entire home.

    2. Mash the Bananas: In a large mixing bowl, mash those ripe bananas with a fork until they’re smooth. Don’t worry about getting it perfectly creamy—some little chunks are okay! This is a banana bar, after all. It’s about texture as much as taste.

    3. Mix in the Wet Ingredients: Add in your almond butter, honey (or maple syrup), and vanilla extract. Use a spatula or a whisk to mix it together well. The mixture should be creamy and cohesive.

    4. Combine the Dry Ingredients: In a separate bowl, whisk together your oats, baking powder, cinnamon, and some salt (about a pinch or two). This helps distribute the leavening agent evenly, ensuring your bars rise just right.

    5. Combine Wet and Dry: Gradually add the dry oat mixture into the wet banana mixture. Stir until everything is just incorporated. Be careful not to overmix—like in life, you want just the right balance!

    6. Add the Chocolate Chips (if using): Now comes the fun part! Gently fold in the chocolate chips. You can also hold some back for topping later if you want to make it look super tempting.

    7. Prepare Your Baking Dish: Grab an 8×8-inch baking pan, and grease it lightly with cooking spray or line it with parchment paper for easy removal.

    8. Pour and Smooth: Transfer your delicious mixture into the prepared pan and use a spatula to spread it evenly. Make sure there are no gaps, and it’s all evenly distributed.

    9. Bake: Pop it in the preheated oven for about 25–30 minutes, or until the edges are golden brown and a toothpick inserted into the center comes out clean (or with just a few crumbs).

    10. Cool and Slice: Once baked, remove from the oven and allow the bars to cool for about 15-20 minutes in the pan. Once cooled, slice them into squares or rectangles—whatever suits your fancy!

    And voilà! You’ve got yourself a batch of scrumptious Banana Oatmeal Bars ready to be devoured!


    Serving Suggestions

    These bars are as versatile as they come! Here are a few serving suggestions to elevate your Banana Oatmeal Bars experience:

    • On-the-Go Breakfast: Wrap them up individually and make them a part of your morning routine. Pair with a piece of fruit or a smoothie to kickstart your day!

    • Snack Attack: Populate your stock of good-for-you snacks. Keep them in an airtight container in your pantry or fridge for an easy on-the-go treat.

    • Dessert Mode: Drizzle some melted dark chocolate on top or serve with a scoop of dairy-free ice cream for a fun dessert twist. Maybe sprinkle some coconut flakes for an extra touch of decadence!

    • Toppings Galore: Top with Greek yogurt, a dollop of nut butter, or a sprinkle of seeds and berries for added nutrients and a delightful contrast of textures.

    • Gifting: Slice them up, package them in a charming bakery box, and gift them to friends or family for that sweet touch of kindness.

    These bars are perfect for every occasion and are guaranteed to bring smiles to everyone’s faces!


    Recipe Variations

    Get creative! Here are some fun twists and variations you can try with your Banana Oatmeal Bars:

    1. Nutty Banana Bars: Add a mix of chopped nuts—like walnuts and pecans—into your bar mixture for added crunch and protein.

    2. Fruit Mix-Up: Mix in some dried fruits, like cranberries or apricots, for a burst of flavor and chewiness. You can also add fresh berries for a refreshing touch!

    3. Spiced-Up Bars: Want to amp up the flavor? Add a bit more cinnamon, a pinch of nutmeg, or even a little bit of cardamom for an exotic flair.

    4. Coconut Lover’s Delight: Stir in some unsweetened shredded coconut for a chewy texture that pairs beautifully with the banana flavor. You could use it as a topping too!

    5. Peanut Butter Swirl: Before baking, dollop some extra peanut butter or almond butter on top of the batter and swirl it in for that marbled look and extra flavor.

    Feel free to play around with these variations. The beauty of this recipe is its adaptability—make it your own!


    Chef’s Notes

    One of the most delightful things about these Banana Oatmeal Bars is that they evolve as you do! I initially made these bars to use up overripe bananas, and over the years, I’ve learned to swap in different flavor profiles and textures thanks to my kitchen adventures.

    I have to be honest, though; there was that one time I got a little too adventurous and added too many spices, and they came out tasting like a cinnamon bun gone wrong. Try experimenting, but beware of overcomplicating!

    They’ve been a staple in my kitchen for years now. I whip them up on weekends, throw them in school lunches, and they even make an occasional appearance at my brunch gatherings. Trust me, the moment guests catch a whiff of these as they bake, they will immediately gravitate toward the kitchen!


    FAQs and Troubleshooting

    Q1: Why are my Banana Oatmeal Bars too dry?
    If your bars turn out dry, it’s likely due to overbaking or too much oat flour. Make sure to monitor the baking time closely and test with a toothpick before the 30-minute mark.

    Q2: Can I freeze these bars?
    Absolutely! These bars freeze beautifully. Just wrap them in plastic wrap, then place them in an airtight freezer bag. To enjoy, simply thaw them overnight in the fridge or pop them in the microwave for quick heating.

    Q3: Can I substitute honey with agave syrup?
    Yes! Agave syrup can be used as a 1:1 substitute for honey, keeping in mind it’s a bit sweeter. Adjust accordingly!

    Q4: Why did my bars not rise?
    If your bars are flat, it could be due to stale baking powder or mixing the batter too much. Ensure your ingredients are fresh, and mix until just combined to retain their fluffy texture.


    Nutritional Info

    Here’s a quick overview of the nutritional value for each Banana Oatmeal Bar (based on 12 bars per batch):

    • Calories: About 120 per bar
    • Total Fat: 5g (with used almond butter)
    • Carbohydrates: 18g
      • Dietary Fiber: 2g
      • Sugars: 5g (natural sugars from bananas and honey)
    • Protein: 3g

    These bars pack a good balance of carbs, healthy fats, and protein, making them perfect for an energizing snack or breakfast.


    Final Thoughts

    So there you have it, folks! These Banana Oatmeal Bars have the potential to become your new favorite snack or on-the-go breakfast. They are delicious, customizable, and bring back those warm memories we all cherish from time spent in the kitchen.

    Whether you share them with loved ones or hoard them all to yourself (no judgment, remember?), they’ll surely delight everyone who takes a bite. Keep experimenting, smiling, and whipping up those good vibes in the kitchen.

    Grab your fork, get cozy, and let’s chow down together! Happy baking!

    —Chef Emily 🍽️💖

    Print

    Banana Oatmeal Bars

    Deliciously wholesome Banana Oatmeal Bars that are perfect for breakfast, snacks, or dessert. Easy to make and customizable!

    • Author: emmawhitaker
    • Prep Time: 10 minutes
    • Cook Time: 30 minutes
    • Total Time: 40 minutes
    • Yield: 12 servings 1x
    • Category: Snack
    • Method: Baking
    • Cuisine: American
    • Diet: Vegetarian

    Ingredients

    Scale
    • 23 ripe bananas
    • 1 cup rolled oats
    • 1/4 cup almond butter (or peanut butter)
    • 1/4 cup honey or maple syrup
    • 1/2 teaspoon vanilla extract
    • 1 teaspoon baking powder
    • 1/2 teaspoon cinnamon
    • 1/2 cup dark chocolate chips (optional)

    Instructions

    1. Preheat your oven to 350°F (175°C).
    2. Mash the bananas in a large mixing bowl with a fork until smooth.
    3. Mix in the almond butter, honey (or maple syrup), and vanilla extract until well combined.
    4. Combine the oats, baking powder, cinnamon, and salt in a separate bowl.
    5. Gradually add the dry ingredients into the wet mixture, stirring until just incorporated.
    6. Fold in the chocolate chips if using.
    7. Prepare an 8×8-inch baking pan by greasing it or lining it with parchment paper.
    8. Pour the mixture into the pan and smooth it out evenly.
    9. Bake for 25-30 minutes until golden brown.
    10. Cool for 15-20 minutes before slicing into squares.

    Notes

    These bars are great for on-the-go breakfasts and can be frozen for later enjoyment. Feel free to experiment with add-ins like nuts or dried fruits.

    Nutrition

    • Serving Size: 1 bar
    • Calories: 120
    • Sugar: 5g
    • Sodium: 50mg
    • Fat: 5g
    • Saturated Fat: 1g
    • Unsaturated Fat: 4g
    • Trans Fat: 0g
    • Carbohydrates: 18g
    • Fiber: 2g
    • Protein: 3g
    • Cholesterol: 0mg

    Keywords: banana, oatmeal, bars, snack, healthy, dessert

    Did you make this recipe?

    Share a photo and tag us — we can’t wait to see what you’ve made!

  • Banana Brownies

    Banana Brownies

    Indulge in Decadence: The Perfect Banana Brownies Recipe!

    Hey there, fellow food lover! 🍌 If you’ve ever sat with a few overripe bananas wondering what to do with them, you’re in for a real treat—because today, we’re diving into one of the most delightful concoctions you can whip up: Banana Brownies!

    Now, let’s be real. Brownies are a cherished classic in the baking universe—rich, chocolatey, and utterly irresistible. But mix in some sweet, ripe bananas, and you have a recipe that takes everything to the next level. These Banana Brownies not only cut down on the sugar (hello, natural sweetness!) but also bring a moist, fudgy texture that will make your heart sing and your taste buds dance!

    Imagine a cozy afternoon where the comforting smell of chocolate wafts through your house, wrapping you in a warm embrace. And if you’re anything like me, you’ll find yourself sneaking bites straight from the pan—because let’s be honest, there’s nothing quite like the gooeyness of a freshly baked brownie.

    This recipe is simple, fun, and a wonderful way to use up those bananas that are a bit too ripe for your morning smoothie. Plus, it’s an excuse to indulge in dessert that feels just a tad healthier. So, grab your apron and let’s embark on this delicious journey together!

    Personal Story

    Growing up, my grandmother always had a magical knack for turning simple ingredients into gastronomic masterpieces. I can still picture her bustling about the kitchen, the scents of vanilla and chocolate blending with those of freshly baked banana bread. It was during one of my weekend visits that she introduced me to the concept of banana brownies.

    One particularly rainy afternoon, she pulled out a bowl of mushy bananas and said with a twinkle in her eye, “Let’s make something sweet!” I watched in awe as she smashed the bananas, stirring in chocolate batter, while regaling me with tales of her own baking adventures. We ended up creating a recipe that not only satisfied our sweet tooth but also brought laughter and warmth to our cozy kitchen. The best part? Those brownies were so gooey and indulgent, they felt like a warm hug after a long day.

    Let’s recreate that blissful memory together—trust me, your own kitchen can feel just as magical!

    Ingredients

    Here’s the lineup for your Banana Brownies! Trust me; you’ll want to gather these delicious ingredients before we get started!

    • 2 ripe bananas: The riper, the better! They should be spotty and soft for maximum sweetness. If you don’t have ripe bananas, you can speed the ripening process by placing them in a brown paper bag overnight.

    • 1/2 cup unsalted butter: This gives our brownies that rich, fudgy texture. If you’re looking for a lighter option, feel free to substitute with coconut oil, which will add a subtle tropical flavor.

    • 1 cup granulated sugar: While the bananas provide natural sweetness, the sugar helps achieve that perfect brownie texture. For a healthier alternative, you could try using coconut sugar or a sugar substitute like Stevia.

    • 2 large eggs: Eggs are essential here; they bind everything together, creating a moist brownie. If you’re vegan or egg-free, using a flaxseed meal or applesauce can work as a substitute (1 tablespoon of flaxseed meal + 2.5 tablespoons of water for each egg).

    • 1 teaspoon vanilla extract: This adds depth to our brownies. Always opt for pure vanilla extract for the best flavor, but in a pinch, imitation vanilla works too.

    • 1/2 cup all-purpose flour: While this is the base for our brownies, you can swap in whole wheat flour or almond flour for a different flavor profile and texture.

    • 1/2 cup unsweetened cocoa powder: The star ingredient, giving those brownies their deep chocolaty essence. Make sure to sift to avoid lumps—nobody likes a lumpy brownie!

    • 1/4 teaspoon baking soda: This will help our brownies rise, giving them the perfect chewiness. Baking powder could also be used here, but make sure to double the quantity.

    • 1/4 teaspoon salt: A pinch of salt enhances flavors beautifully, balancing the sweetness of the brownies. If you’re using salted butter, feel free to skip this ingredient.

    Let’s roll up those sleeves and dive into the baking fun!

    Step-by-Step Instructions

    We’re ready to get mixing! Here’s how to transform those simple ingredients into mouthwatering Banana Brownies.

    1. Preheat Your Oven: First things first! Preheat your oven to 350°F (175°C). If you forget this step, don’t worry; just pop those brownies in when your oven is ready to go—though I promise they’ll bake better if you’re patient!

    2. Prepare Your Baking Dish: While the oven warms up, grab an 8×8-inch baking pan (or a similar size). Grease it with a touch of butter or line it with parchment paper for easy removal later. Trust me; you’ll want to do this unless you’re feeling adventurous!

    3. Smash the Bananas: In a mixing bowl, mush those ripe bananas until they are mostly smooth. I like to use a fork or potato masher for this—channel your inner child! This step is key to creating that elegant fudgy texture. (A few small lumps add character!)

    4. Melt the Butter: In a microwave-safe bowl, melt the butter until it’s just about liquid. (Around 30-40 seconds should do the trick.) Allow it to cool down slightly, so it doesn’t cook your eggs when mixed together.

    5. Mix Wet Ingredients: In your bowl with the mashed bananas, stir in the melted butter, eggs, and vanilla extract. Whisk everything together until well combined. You want a nice smooth mixture—this is where the magic begins!

    6. Combine Dry Ingredients: In a separate bowl, whisk together the flour, cocoa powder, baking soda, and salt. Make sure you’re doing this step separately to avoid flour lumps! Gradually add this dry mix to your wet mixture, folding it with a spatula until just combined. That’s crucial—overmixing can lead to tough brownies, and nobody wants that!

    7. Pour and Spread: Pour the brownie batter into your prepared baking dish, using a spatula to spread it evenly. Let’s get every nook and cranny filled with rich chocolate goodness!

    8. Bake: Pop those babies into the preheated oven and let them bake for about 20-25 minutes. You’ll know they’re done when a toothpick inserted into the center comes out with a few moist crumbs (not wet batter!).

    9. Cool and Cut: Once baked, remove the brownies from the oven and let them cool in the pan for at least 15 minutes. Lift them out using the parchment paper if you lined your pan. Now, slice them into squares, but be warned: they’re best served warm!

    Serving Suggestions

    Oh, the fun doesn’t stop at the baking! Here are some creative serving ideas to take your Banana Brownies from delicious to WOW:

    • A Scoop of Ice Cream: Serve a warm brownie topped with your favorite ice cream—vanilla is a classic choice, but hey, why not banana or chocolate for a double banana delight?

    • Drizzle of Chocolate Sauce: For the ultimate indulgence, drizzle melted chocolate or hot fudge over your brownie before serving. It adds that extra luxurious touch!

    • Whipped Cream and Fresh Berries: Fancy it up with a dollop of whipped cream and a handful of berries. The tartness of the berries complements the sweetness of the brownies beautifully!

    • Sprinkle of Nuts: If you’re a fan of texture, sprinkle some chopped walnuts or pecans on top. They add a crunch that elevates each bite.

    • Coconut Flakes: For a tropical vibe, sprinkle toasted coconut flakes on top. It adds both flavor and a visually pleasing touch.

    Recipe Variations

    Feeling adventurous? Here are some fun variations and flavor twists you can try:

    1. Nutty Banana Brownies: Stir in 1/2 cup of chopped nuts, like walnuts or pecans, for an extra crunch that contrasts beautifully with the soft brownie texture.

    2. Hint of Spice: Add a teaspoon of cinnamon or nutmeg to the batter for a warm, cozy flavor that’s perfect for fall!

    3. Chocolate Chip Extravaganza: Stir in 1/2 cup of chocolate chips into the batter right before pouring it into the pan. Double the chocolate means double the deliciousness!

    4. Peanut Butter Swirl: Take 1/4 cup of creamy peanut butter and gently swirl it into the brownie batter before baking. This creates a delightful twist that’s a crowd-pleaser!

    5. Dietary-Friendly: For a healthier version, use almond flour instead of all-purpose flour and coconut oil or applesauce as a butter substitute. Reduce sugar to keep things light while still enjoying a sweet treat!

    Chef’s Notes

    Oh, the stories I could share! I remember the first time I served these Banana Brownies at a family gathering. Initially, everyone was skeptical. “Bananas in brownies? Really?” But once those brownies made their way around the table, you could practically hear the collective “OMG” of delight. They disappeared in minutes!

    This recipe has gone through several evolutions over the years. At one point, I even made mini versions in muffin tins for a bite-sized treat. And trust me—those were a hit too! What I love most about baking is how much room there is for creativity. So don’t feel confined to my guidelines; let your inner chef shine!

    FAQs and Troubleshooting

    1. What if my brownies are too dry?
      Don’t worry; it happens to the best of us! Next time, cut back on the baking time by a minute or two. Remember, they continue to cook a little after you take them out!

    2. How do I store leftover brownies?
      Keep them in an airtight container at room temperature for up to 3 days. You can also freeze them for later enjoyment—just wrap them tightly in plastic wrap!

    3. Can I use frozen bananas?
      Absolutely! Just make sure to thaw and drain excess moisture before using them for the best texture.

    4. How do I know when they are done?
      Check them a couple of minutes before the baking time is up. The toothpick test is key: it should come out with a few moist crumbs but not wet batter.

    Nutritional Info

    (Per serving, assuming 16 brownies from this recipe):

    • Calories: 157
    • Protein: 2g
    • Fat: 7g
    • Carbohydrates: 22g
    • Fiber: 1g
    • Sugar: 10g

    These delightful brownies not only satisfy your sweet cravings, but they also offer a bit of nourishment from the bananas, making them a wholesome treat (in moderation, of course!).

    Final Thoughts

    So there you have it, dear food lover! Banana Brownies are not just a recipe; they’re a delightful way to bring joy and warmth to your kitchen. Every bite is a reminder of the simple pleasures of life—good food, good friends, and sweet memories.

    I can’t wait for you to try this recipe! Whether you’re baking for yourself, for a loved one, or just to treat your taste buds, these Banana Brownies are sure to become a new favorite. So go ahead, don that apron, get a little messy, and let’s chow down on some happiness!

    Peace, love, and brownies,
    — Emily 🍫

    Print

    Banana Brownies

    Deliciously moist and fudgy Banana Brownies made with ripe bananas, perfect for using up overripe fruit while indulging your sweet tooth.

    • Author: emmawhitaker
    • Prep Time: 15 minutes
    • Cook Time: 25 minutes
    • Total Time: 40 minutes
    • Yield: 16 servings 1x
    • Category: Dessert
    • Method: Baking
    • Cuisine: American
    • Diet: Vegetarian

    Ingredients

    Scale
    • 2 ripe bananas
    • 1/2 cup unsalted butter
    • 1 cup granulated sugar
    • 2 large eggs
    • 1 teaspoon vanilla extract
    • 1/2 cup all-purpose flour
    • 1/2 cup unsweetened cocoa powder
    • 1/4 teaspoon baking soda
    • 1/4 teaspoon salt

    Instructions

    1. Preheat your oven to 350°F (175°C).
    2. Prepare an 8×8-inch baking pan, greasing it or lining it with parchment paper.
    3. Smash the ripe bananas in a mixing bowl until mostly smooth.
    4. Melt the butter in a microwave-safe bowl until liquid and let it cool slightly.
    5. Mix the melted butter, eggs, and vanilla into the mashed bananas, whisking until smooth.
    6. Combine the flour, cocoa powder, baking soda, and salt in a separate bowl, then add to the wet mixture and fold until just combined.
    7. Pour the batter into the prepared pan, spreading it evenly.
    8. Bake for 20-25 minutes or until a toothpick comes out with a few moist crumbs.
    9. Cool in the pan for at least 15 minutes before cutting into squares.

    Notes

    For extra richness, consider adding chocolate chips or nuts to the batter. Adjust baking time if you prefer gooier brownies.

    Nutrition

    • Serving Size: 1 brownie
    • Calories: 157
    • Sugar: 10g
    • Sodium: 40mg
    • Fat: 7g
    • Saturated Fat: 4g
    • Unsaturated Fat: 3g
    • Trans Fat: 0g
    • Carbohydrates: 22g
    • Fiber: 1g
    • Protein: 2g
    • Cholesterol: 30mg

    Keywords: brownies, banana brownies, dessert, chocolate dessert, baking with bananas

    Did you make this recipe?

    Share a photo and tag us — we can’t wait to see what you’ve made!