Blog

  • Cinnamon Roll Oatmeal Bars

    Cinnamon Roll Oatmeal Bars

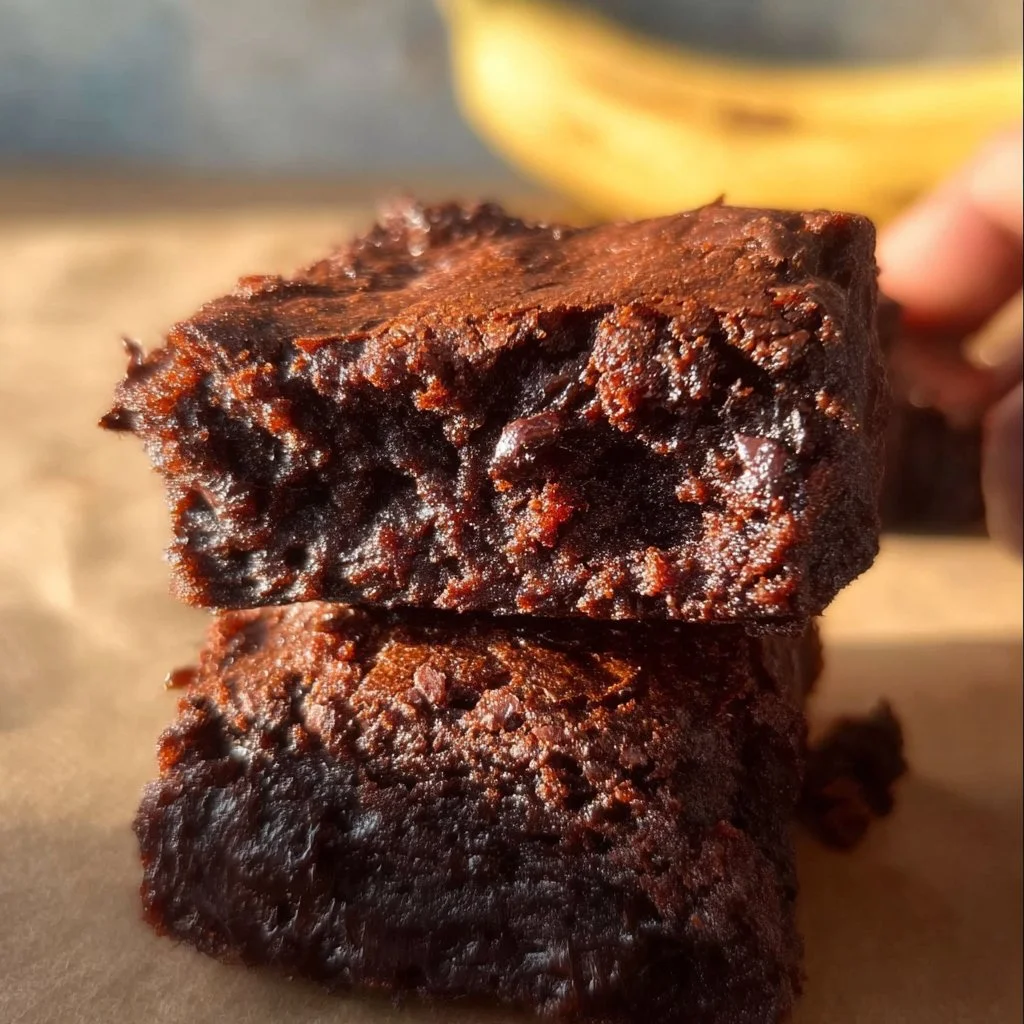
    Cozy Up with Cinnamon Roll Oatmeal Bars: A Delicious Morning Treat

    Hey there, tasty explorers! If you find yourself waking up on a lazy weekend morning, craving the comforting blend of spices and sweetness that defines a classic cinnamon roll, then do I have a treat for you! Picture yourself surrounded by the tantalizing aroma of cinnamon wafting through your home, as you bite into a chewy yet crumbly bar that tastes just like your beloved breakfast pastry. Yes, you’ve guessed it right—let’s whip up some delightful Cinnamon Roll Oatmeal Bars!

    These bars are not just any ordinary recipe. They’re meant to be a shared experience, a chance to gather around the kitchen with family and friends, reminiscing about the good ol’ days when you would help Grandma roll out dough and sprinkle cinnamon. With these oatmeal bars, you’re going to relive those heartwarming moments while embracing the fun of baking. Just imagine biting into a warm, gooey bar, the rich taste of cinnamon filling your mouth, as you dive back into your childhood memories.

    The best part? They are incredibly easy to make. No fancy baking techniques or intricate steps here! You don’t have to be a pastry chef to pull these off—just a love for good food and a few simple ingredients will do the trick. With creamy oatmeal, luscious cinnamon, and the irresistible sweetness of brown sugar, these Cinnamon Roll Oatmeal Bars promise to be the star of your breakfast table. Or any time of day, if we’re being honest!

    Join me as we embark on this baking journey filled with flavor, warmth, and a sprinkle of love. So, grab your apron, roll up your sleeves, and let’s make some magic happen in the kitchen!


    Personal Story

    Ah, cinnamon rolls! They bring back some of my most cherished kitchen memories. I can vividly remember visiting my grandma’s cozy farmhouse every Sunday morning. The sun would barely peek through the curtains, but the smell of sweet cinnamon was already wafting through the halls, like a warm hug that pulled me into the kitchen.

    Grandma had this old, well-used cookbook. It was dog-eared and splattered with flour—every recipe was a labor of love. One morning, she decided to share her famous cinnamon roll recipe with me. I can still picture her standing by the kitchen counter, gracefully kneading the dough while I fumbled with mixing the ingredients, flour dust clouding the air like a delicious fog.

    We would often share those rolls over coffee, talking about everything under the sun. Fast forward to today, and those memories inspired me to create these Cinnamon Roll Oatmeal Bars—a quicker, easier nod to those delightful mornings. They fuel my passion for cooking while capturing all the flavors of Grandma’s kitchen in a conveniently portable form. So, let’s recreate that nostalgic taste, shall we?


    Ingredients

    For our Cinnamon Roll Oatmeal Bars, you’re going to need a handful of simple ingredients. Here’s what you’ll need to gather:

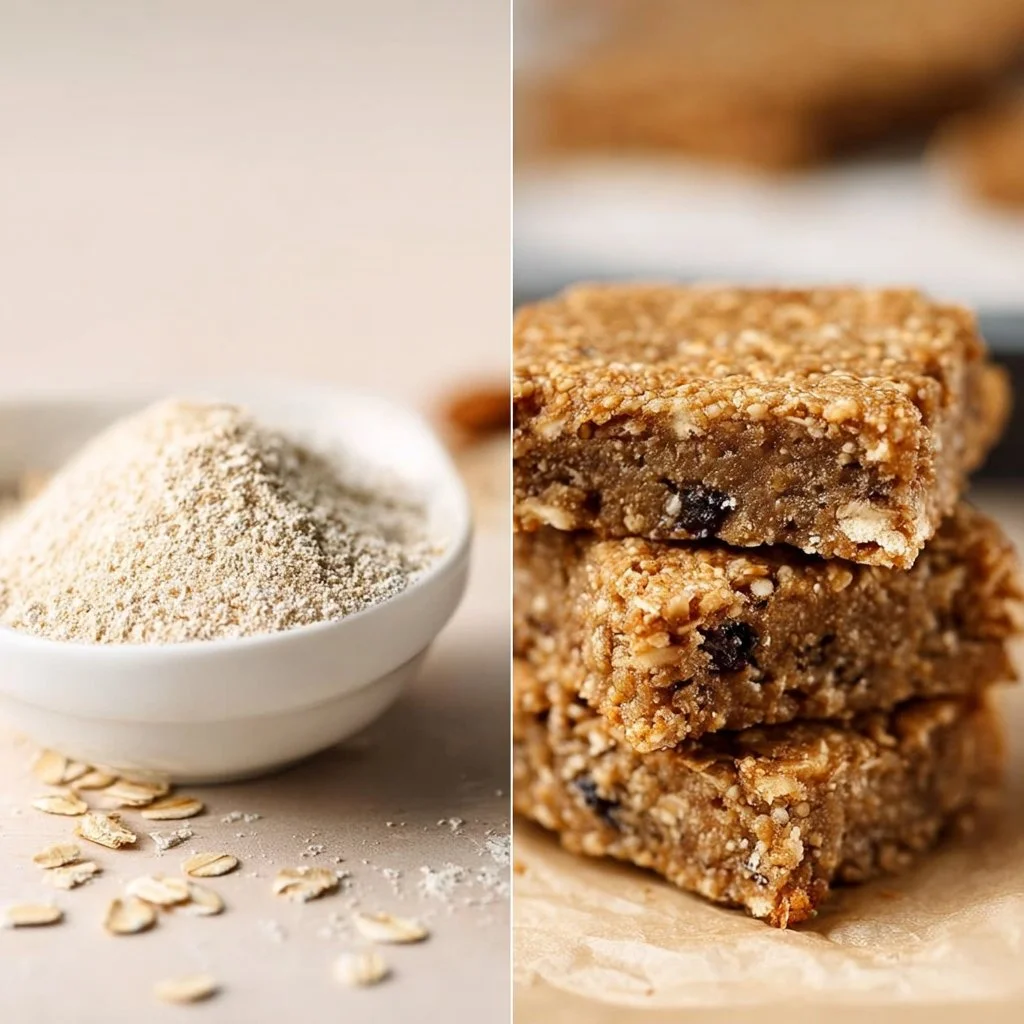
    • Rolled Oats (2 cups): These form the heart and soul of our bars! They provide a chewy, satisfying texture. If you’re gluten-free, simply swap them out for certified gluten-free oats.

    • Whole Wheat Flour (1 cup): This adds a nutty flavor and makes the bars heartier. For a gluten-free option, use almond flour or a gluten-free baking mix.

    • Brown Sugar (1/2 cup): This is where the magic happens! The rich, molasses-like flavor of brown sugar complements cinnamon perfectly. If you prefer, coconut sugar can be a great alternative!

    • Baking Powder (1 tsp): This magical little ingredient gives our bars a nice lift, making them fluffy. Double-check the date on your baking powder; old baking powder can lead to dense bars!

    • Ground Cinnamon (2 tsp): The star of the show! Cinnamon is essential for that warm, inviting flavor. If you’re feeling adventurous, try adding a pinch of nutmeg or cardamom for an aromatic kick.

    • Milk (1 cup): Milk adds moisture and richness. You can use any variety—cow, almond, oat, or soy work wonderfully!

    • Egg (1 large): This helps bind everything together. If you’re vegan, a flaxseed egg (1 tablespoon of ground flaxseed mixed with 3 tablespoons of water) is a great substitute.

    • Vanilla Extract (2 tsp): This little bottle of magic enhances all the flavors. Opt for pure vanilla extract for the best results.

    • Maple Syrup or Honey (1/4 cup): For added sweetness and a hint of flavor. Maple syrup gives a fantastic depth compared to granulated sugar.

    • Chopped Pecans or Walnuts (optional): These add a great crunch. Feel free to leave them out if nuts aren’t your thing, or swap them for chocolate chips for an indulgent twist!

    With these ingredients, you’re set to whip up some heavenly cinnamon roll oatmeal bars that will bring everyone to the kitchen!


    Step-by-Step Instructions

    Ready to dive into the wonderful world of baking? Let’s tackle these Cinnamon Roll Oatmeal Bars step by step.

    Step 1: Preheat Your Oven

    First thing’s first: Preheat your oven to 350°F (175°C) and grease a 9×9-inch baking pan, or line it with parchment paper for easy removal. This ensures your bars turn out perfectly baked and divine.

    Step 2: Mix the Dry Ingredients

    In a large mixing bowl, whisk together the rolled oats, whole wheat flour, brown sugar, baking powder, ground cinnamon, and a pinch of salt. This ensures all those dry ingredients are evenly distributed and that your cinnamon flavor jumps out in every bite.

    Chef Tip 🧑‍🍳: Always whisk dry ingredients well! This helps prevent clumps of baking powder.

    Step 3: Combine the Wet Ingredients

    In a separate bowl, beat together the milk, egg, vanilla extract, and maple syrup or honey until well combined. You want these to blend beautifully, creating a lovely mixture to bring your dry ingredients to life.

    Step 4: Join Wet and Dry Ingredients

    Pour the wet mixture into the dry ingredients, stirring gently until just combined. Don’t overmix—keep those oats intact! You want a cohesive mix without any dry patches.

    Step 5: Optional Add-Ins

    If you’re using chopped pecans or walnuts, fold them in at this point. It adds a delightful crunch and depth to your bars.

    Step 6: Transfer to the Baking Pan

    Spoon the mixture into your greased or lined baking pan and spread it evenly. Use a spatula to smooth out the top, encouraging an even bake.

    Step 7: Bake to Perfection

    Pop the pan into the preheated oven and bake for 25-30 minutes or until the edges are golden brown and the center is set. You can do the toothpick test—insert one in the center, and if it comes out clean, you’re good to go!

    Step 8: Cool and Slice

    Once done, remove the pan from the oven and let it cool for about 10 minutes. This step is super important; it allows the bars to firm up a bit. After that, carefully lift the bars out of the pan (if using parchment) or slice them directly in the pan.

    Step 9: Enjoy!

    Serve warm with a drizzle of maple syrup or a dollop of yogurt on top! These bars also make for a perfect grab-and-go breakfast or snack throughout the week.

    Chef Hack 🧑‍🍳: Store leftovers in an airtight container for up to a week. You can reheat them in the microwave for a quick morning indulgence!


    Serving Suggestions

    When it comes to presenting your Cinnamon Roll Oatmeal Bars, let’s get creative! Here are a few fun ways to plate and serve them to wow your family or share on social media:

    1. Classic Serving: Place a warm bar on a plate, drizzle with a little extra maple syrup, and sprinkle some chopped nuts or flaky sea salt for contrast.

    2. Berry Delight: Top the bars with fresh berries—raspberries or blueberries work beautifully. Their tartness balances perfectly with the sweetness of the bars.

    3. Yogurt Parfait: Cut the bars into bite-sized squares and layer them with your favorite yogurt and fruits in a glass for a delightful breakfast parfait.

    4. Midday Snack: Pair them with a cup of coffee or tea for the perfect afternoon pick-me-up. Add a stroke of icing over the top for that classic cinnamon roll vibe!

    No matter how you choose to serve them, these oatmeal bars will certainly steal the show!


    Recipe Variations

    Want to mix things up a bit? Here are some creative twists and variations to customize your Cinnamon Roll Oatmeal Bars:

    1. Fruity Twist: Try adding shredded carrots or grated apples into the mix for a subtle fruity kick! It’ll give an aroma that’s straight out of a cozy bakery.

    2. Chocolate Lovers Unite: Toss in some chocolate chips for an indulgent take. Dark chocolate or even white chocolate works like a charm!

    3. Pumpkin Spice Version: Substitute half of the flour with pumpkin puree and add a teaspoon of pumpkin spice for a fall-inspired treat.

    4. Nutty Delight: Use any nut butter (like almond or peanut) instead of maple syrup to add a rich, nutty flavor and extra protein!

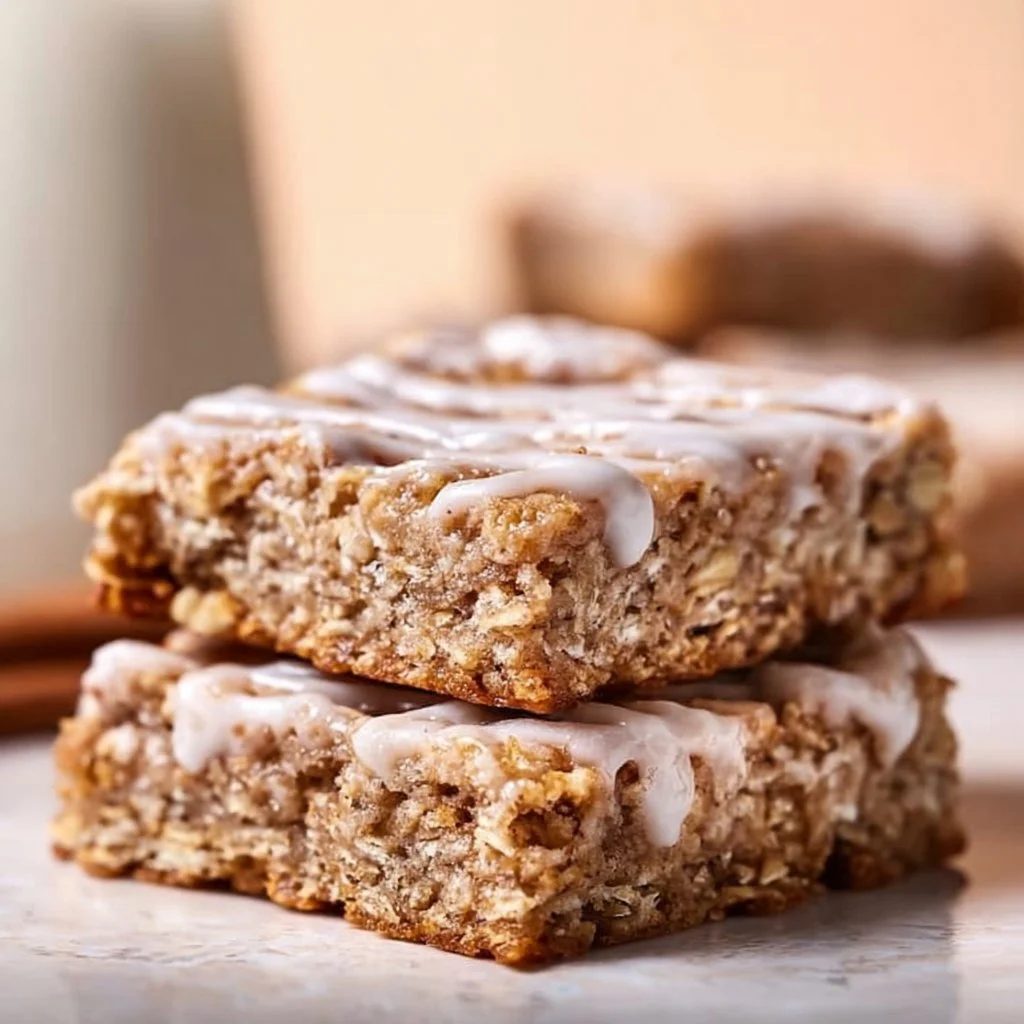
    5. Healthy Glaze: Mix powdered sugar with a little milk to create a thin glaze to drizzle over the top—a perfect touch for those who love a sweet finishing touch!


    Chef’s Notes

    As I’ve experimented with this recipe over the years, it’s evolved into the go-to dish in my kitchen. What started as a simple concoction has now become a family favorite, and I can’t count how many times I’ve shared these bars at gatherings.

    Here’s a fun little story: the first time I made these, I accidentally added double the cinnamon! I panicked but had my friends taste them anyway. To my surprise, they loved it and dubbed it “Cinnamon Roll Dream Bars.” Now, whenever I make these, I add a little more cinnamon than the recipe calls for—because why not go bold?

    These bars embody everything I love about cooking: the ability to experiment and create joy and comfort in every bite.


    FAQs and Troubleshooting

    1. Why are my oatmeal bars too crumbly?

    If your bars are crumbly, it might be due to too much flour or not enough binding. Make sure you’re measuring ingredients correctly; a kitchen scale works wonders here! Add a tad more milk next time to help bind the mix.

    2. Can I use quick oats instead of rolled oats?

    Absolutely! Quick oats will work, though your bars will have a slightly softer texture. Just be cautious not to overmix, as quick oats tend to break down faster.

    3. How can I store leftovers?

    Keep your bars in an airtight container at room temperature for up to a week, or refrigerate for a longer shelf life (up to two weeks). You can also freeze them for up to three months—just thaw before munching!

    4. What if I don’t have eggs?

    No worries! You can substitute one egg with a flaxseed egg (1 tablespoon ground flaxseed mixed with 3 tablespoons water), or use unsweetened applesauce as a binder (1/4 cup).


    Nutritional Info

    For those keeping an eye on nutrition (though don’t forget: comfort comes first!), let’s break it down a bit. One piece of Cinnamon Roll Oatmeal Bars typically contains:

    • Calories: Approximately 150-170
    • Protein: 4g
    • Fat: 5g
    • Carbohydrates: 27g
    • Fiber: 3g
    • Sugar: 8g

    These bars are a great source of healthy carbohydrates, offering quick energy! By using options like whole wheat flour and adding nuts or seeds, you can boost the nutritional profile even further.


    Final Thoughts

    As the sweet aroma of cinnamon and oats fills your kitchen, remember this isn’t just about making a breakfast bar; it’s about creating memories. These Cinnamon Roll Oatmeal Bars are your ticket to reliving the cozy mornings of your childhood—and hopefully making new memories along the way. Share them with loved ones, enjoy them on your own, or take them to your next potluck. They’re sure to be a hit!

    Thanks for joining me on this baking adventure! When you try making these delicious bars, I invite you to share your experiences and adaptations. After all, cooking is best done together, and I can’t wait to hear how they turn out for you. Happy baking, food lovers! 🍽️✨

    Print

    Cinnamon Roll Oatmeal Bars

    Deliciously easy cinnamon roll oatmeal bars that capture the warm flavors of classic cinnamon rolls in a chewy, crumbly treat.

    • Author: emmawhitaker
    • Prep Time: 10 minutes
    • Cook Time: 30 minutes
    • Total Time: 40 minutes
    • Yield: 9 servings 1x
    • Category: Breakfast
    • Method: Baking
    • Cuisine: American
    • Diet: Vegetarian

    Ingredients

    Scale
    • 2 cups Rolled Oats
    • 1 cup Whole Wheat Flour
    • 1/2 cup Brown Sugar
    • 1 tsp Baking Powder
    • 2 tsp Ground Cinnamon
    • 1 cup Milk
    • 1 large Egg
    • 2 tsp Vanilla Extract
    • 1/4 cup Maple Syrup or Honey
    • Chopped Pecans or Walnuts (optional)

    Instructions

    1. Preheat your oven to 350°F (175°C) and grease a 9×9-inch baking pan, or line it with parchment paper.
    2. Mix the dry ingredients: whisk together rolled oats, whole wheat flour, brown sugar, baking powder, ground cinnamon, and a pinch of salt in a large bowl.
    3. Combine the wet ingredients in a separate bowl: beat together the milk, egg, vanilla extract, and maple syrup or honey until well combined.
    4. Join the wet mixture to the dry ingredients, stirring gently until just combined.
    5. Optional: Fold in chopped pecans or walnuts if using.
    6. Transfer the mixture into the baking pan and spread it evenly, smoothing out the top.
    7. Bake for 25-30 minutes or until the edges are golden brown and the center is set.
    8. Cool for about 10 minutes before slicing and serving.
    9. Enjoy warm, with a drizzle of maple syrup or a dollop of yogurt on top!

    Notes

    Store leftovers in an airtight container for up to a week. You can reheat them in the microwave for a quick morning indulgence.

    Nutrition

    • Serving Size: 1 bar
    • Calories: 160
    • Sugar: 8g
    • Sodium: 200mg
    • Fat: 5g
    • Saturated Fat: 1g
    • Unsaturated Fat: 4g
    • Trans Fat: 0g
    • Carbohydrates: 27g
    • Fiber: 3g
    • Protein: 4g
    • Cholesterol: 34mg

    Keywords: cinnamon rolls, breakfast bars, oatmeal bars, cozy baking, easy breakfast

    Did you make this recipe?

    Share a photo and tag us — we can’t wait to see what you’ve made!

  • Banana Brownies

    Banana Brownies

    Indulge in Decadence: The Perfect Banana Brownies Recipe!

    Hey there, fellow food lover! 🍌 If you’ve ever sat with a few overripe bananas wondering what to do with them, you’re in for a real treat—because today, we’re diving into one of the most delightful concoctions you can whip up: Banana Brownies!

    Now, let’s be real. Brownies are a cherished classic in the baking universe—rich, chocolatey, and utterly irresistible. But mix in some sweet, ripe bananas, and you have a recipe that takes everything to the next level. These Banana Brownies not only cut down on the sugar (hello, natural sweetness!) but also bring a moist, fudgy texture that will make your heart sing and your taste buds dance!

    Imagine a cozy afternoon where the comforting smell of chocolate wafts through your house, wrapping you in a warm embrace. And if you’re anything like me, you’ll find yourself sneaking bites straight from the pan—because let’s be honest, there’s nothing quite like the gooeyness of a freshly baked brownie.

    This recipe is simple, fun, and a wonderful way to use up those bananas that are a bit too ripe for your morning smoothie. Plus, it’s an excuse to indulge in dessert that feels just a tad healthier. So, grab your apron and let’s embark on this delicious journey together!

    Personal Story

    Growing up, my grandmother always had a magical knack for turning simple ingredients into gastronomic masterpieces. I can still picture her bustling about the kitchen, the scents of vanilla and chocolate blending with those of freshly baked banana bread. It was during one of my weekend visits that she introduced me to the concept of banana brownies.

    One particularly rainy afternoon, she pulled out a bowl of mushy bananas and said with a twinkle in her eye, “Let’s make something sweet!” I watched in awe as she smashed the bananas, stirring in chocolate batter, while regaling me with tales of her own baking adventures. We ended up creating a recipe that not only satisfied our sweet tooth but also brought laughter and warmth to our cozy kitchen. The best part? Those brownies were so gooey and indulgent, they felt like a warm hug after a long day.

    Let’s recreate that blissful memory together—trust me, your own kitchen can feel just as magical!

    Ingredients

    Here’s the lineup for your Banana Brownies! Trust me; you’ll want to gather these delicious ingredients before we get started!

    • 2 ripe bananas: The riper, the better! They should be spotty and soft for maximum sweetness. If you don’t have ripe bananas, you can speed the ripening process by placing them in a brown paper bag overnight.

    • 1/2 cup unsalted butter: This gives our brownies that rich, fudgy texture. If you’re looking for a lighter option, feel free to substitute with coconut oil, which will add a subtle tropical flavor.

    • 1 cup granulated sugar: While the bananas provide natural sweetness, the sugar helps achieve that perfect brownie texture. For a healthier alternative, you could try using coconut sugar or a sugar substitute like Stevia.

    • 2 large eggs: Eggs are essential here; they bind everything together, creating a moist brownie. If you’re vegan or egg-free, using a flaxseed meal or applesauce can work as a substitute (1 tablespoon of flaxseed meal + 2.5 tablespoons of water for each egg).

    • 1 teaspoon vanilla extract: This adds depth to our brownies. Always opt for pure vanilla extract for the best flavor, but in a pinch, imitation vanilla works too.

    • 1/2 cup all-purpose flour: While this is the base for our brownies, you can swap in whole wheat flour or almond flour for a different flavor profile and texture.

    • 1/2 cup unsweetened cocoa powder: The star ingredient, giving those brownies their deep chocolaty essence. Make sure to sift to avoid lumps—nobody likes a lumpy brownie!

    • 1/4 teaspoon baking soda: This will help our brownies rise, giving them the perfect chewiness. Baking powder could also be used here, but make sure to double the quantity.

    • 1/4 teaspoon salt: A pinch of salt enhances flavors beautifully, balancing the sweetness of the brownies. If you’re using salted butter, feel free to skip this ingredient.

    Let’s roll up those sleeves and dive into the baking fun!

    Step-by-Step Instructions

    We’re ready to get mixing! Here’s how to transform those simple ingredients into mouthwatering Banana Brownies.

    1. Preheat Your Oven: First things first! Preheat your oven to 350°F (175°C). If you forget this step, don’t worry; just pop those brownies in when your oven is ready to go—though I promise they’ll bake better if you’re patient!

    2. Prepare Your Baking Dish: While the oven warms up, grab an 8×8-inch baking pan (or a similar size). Grease it with a touch of butter or line it with parchment paper for easy removal later. Trust me; you’ll want to do this unless you’re feeling adventurous!

    3. Smash the Bananas: In a mixing bowl, mush those ripe bananas until they are mostly smooth. I like to use a fork or potato masher for this—channel your inner child! This step is key to creating that elegant fudgy texture. (A few small lumps add character!)

    4. Melt the Butter: In a microwave-safe bowl, melt the butter until it’s just about liquid. (Around 30-40 seconds should do the trick.) Allow it to cool down slightly, so it doesn’t cook your eggs when mixed together.

    5. Mix Wet Ingredients: In your bowl with the mashed bananas, stir in the melted butter, eggs, and vanilla extract. Whisk everything together until well combined. You want a nice smooth mixture—this is where the magic begins!

    6. Combine Dry Ingredients: In a separate bowl, whisk together the flour, cocoa powder, baking soda, and salt. Make sure you’re doing this step separately to avoid flour lumps! Gradually add this dry mix to your wet mixture, folding it with a spatula until just combined. That’s crucial—overmixing can lead to tough brownies, and nobody wants that!

    7. Pour and Spread: Pour the brownie batter into your prepared baking dish, using a spatula to spread it evenly. Let’s get every nook and cranny filled with rich chocolate goodness!

    8. Bake: Pop those babies into the preheated oven and let them bake for about 20-25 minutes. You’ll know they’re done when a toothpick inserted into the center comes out with a few moist crumbs (not wet batter!).

    9. Cool and Cut: Once baked, remove the brownies from the oven and let them cool in the pan for at least 15 minutes. Lift them out using the parchment paper if you lined your pan. Now, slice them into squares, but be warned: they’re best served warm!

    Serving Suggestions

    Oh, the fun doesn’t stop at the baking! Here are some creative serving ideas to take your Banana Brownies from delicious to WOW:

    • A Scoop of Ice Cream: Serve a warm brownie topped with your favorite ice cream—vanilla is a classic choice, but hey, why not banana or chocolate for a double banana delight?

    • Drizzle of Chocolate Sauce: For the ultimate indulgence, drizzle melted chocolate or hot fudge over your brownie before serving. It adds that extra luxurious touch!

    • Whipped Cream and Fresh Berries: Fancy it up with a dollop of whipped cream and a handful of berries. The tartness of the berries complements the sweetness of the brownies beautifully!

    • Sprinkle of Nuts: If you’re a fan of texture, sprinkle some chopped walnuts or pecans on top. They add a crunch that elevates each bite.

    • Coconut Flakes: For a tropical vibe, sprinkle toasted coconut flakes on top. It adds both flavor and a visually pleasing touch.

    Recipe Variations

    Feeling adventurous? Here are some fun variations and flavor twists you can try:

    1. Nutty Banana Brownies: Stir in 1/2 cup of chopped nuts, like walnuts or pecans, for an extra crunch that contrasts beautifully with the soft brownie texture.

    2. Hint of Spice: Add a teaspoon of cinnamon or nutmeg to the batter for a warm, cozy flavor that’s perfect for fall!

    3. Chocolate Chip Extravaganza: Stir in 1/2 cup of chocolate chips into the batter right before pouring it into the pan. Double the chocolate means double the deliciousness!

    4. Peanut Butter Swirl: Take 1/4 cup of creamy peanut butter and gently swirl it into the brownie batter before baking. This creates a delightful twist that’s a crowd-pleaser!

    5. Dietary-Friendly: For a healthier version, use almond flour instead of all-purpose flour and coconut oil or applesauce as a butter substitute. Reduce sugar to keep things light while still enjoying a sweet treat!

    Chef’s Notes

    Oh, the stories I could share! I remember the first time I served these Banana Brownies at a family gathering. Initially, everyone was skeptical. “Bananas in brownies? Really?” But once those brownies made their way around the table, you could practically hear the collective “OMG” of delight. They disappeared in minutes!

    This recipe has gone through several evolutions over the years. At one point, I even made mini versions in muffin tins for a bite-sized treat. And trust me—those were a hit too! What I love most about baking is how much room there is for creativity. So don’t feel confined to my guidelines; let your inner chef shine!

    FAQs and Troubleshooting

    1. What if my brownies are too dry?
      Don’t worry; it happens to the best of us! Next time, cut back on the baking time by a minute or two. Remember, they continue to cook a little after you take them out!

    2. How do I store leftover brownies?
      Keep them in an airtight container at room temperature for up to 3 days. You can also freeze them for later enjoyment—just wrap them tightly in plastic wrap!

    3. Can I use frozen bananas?
      Absolutely! Just make sure to thaw and drain excess moisture before using them for the best texture.

    4. How do I know when they are done?
      Check them a couple of minutes before the baking time is up. The toothpick test is key: it should come out with a few moist crumbs but not wet batter.

    Nutritional Info

    (Per serving, assuming 16 brownies from this recipe):

    • Calories: 157
    • Protein: 2g
    • Fat: 7g
    • Carbohydrates: 22g
    • Fiber: 1g
    • Sugar: 10g

    These delightful brownies not only satisfy your sweet cravings, but they also offer a bit of nourishment from the bananas, making them a wholesome treat (in moderation, of course!).

    Final Thoughts

    So there you have it, dear food lover! Banana Brownies are not just a recipe; they’re a delightful way to bring joy and warmth to your kitchen. Every bite is a reminder of the simple pleasures of life—good food, good friends, and sweet memories.

    I can’t wait for you to try this recipe! Whether you’re baking for yourself, for a loved one, or just to treat your taste buds, these Banana Brownies are sure to become a new favorite. So go ahead, don that apron, get a little messy, and let’s chow down on some happiness!

    Peace, love, and brownies,
    — Emily 🍫

    Print

    Banana Brownies

    Deliciously moist and fudgy Banana Brownies made with ripe bananas, perfect for using up overripe fruit while indulging your sweet tooth.

    • Author: emmawhitaker
    • Prep Time: 15 minutes
    • Cook Time: 25 minutes
    • Total Time: 40 minutes
    • Yield: 16 servings 1x
    • Category: Dessert
    • Method: Baking
    • Cuisine: American
    • Diet: Vegetarian

    Ingredients

    Scale
    • 2 ripe bananas
    • 1/2 cup unsalted butter
    • 1 cup granulated sugar
    • 2 large eggs
    • 1 teaspoon vanilla extract
    • 1/2 cup all-purpose flour
    • 1/2 cup unsweetened cocoa powder
    • 1/4 teaspoon baking soda
    • 1/4 teaspoon salt

    Instructions

    1. Preheat your oven to 350°F (175°C).
    2. Prepare an 8×8-inch baking pan, greasing it or lining it with parchment paper.
    3. Smash the ripe bananas in a mixing bowl until mostly smooth.
    4. Melt the butter in a microwave-safe bowl until liquid and let it cool slightly.
    5. Mix the melted butter, eggs, and vanilla into the mashed bananas, whisking until smooth.
    6. Combine the flour, cocoa powder, baking soda, and salt in a separate bowl, then add to the wet mixture and fold until just combined.
    7. Pour the batter into the prepared pan, spreading it evenly.
    8. Bake for 20-25 minutes or until a toothpick comes out with a few moist crumbs.
    9. Cool in the pan for at least 15 minutes before cutting into squares.

    Notes

    For extra richness, consider adding chocolate chips or nuts to the batter. Adjust baking time if you prefer gooier brownies.

    Nutrition

    • Serving Size: 1 brownie
    • Calories: 157
    • Sugar: 10g
    • Sodium: 40mg
    • Fat: 7g
    • Saturated Fat: 4g
    • Unsaturated Fat: 3g
    • Trans Fat: 0g
    • Carbohydrates: 22g
    • Fiber: 1g
    • Protein: 2g
    • Cholesterol: 30mg

    Keywords: brownies, banana brownies, dessert, chocolate dessert, baking with bananas

    Did you make this recipe?

    Share a photo and tag us — we can’t wait to see what you’ve made!

  • Healthy Oatmeal Breakfast Bars

    Healthy Oatmeal Breakfast Bars

    Healthy Oatmeal Breakfast Bars: Your New Go-To Morning Treats!

    Introduction

    Hey there, fellow food lovers! 👋 If you’re anything like me, mornings can be a total whirlwind—trying to hit the snooze button one last time, getting dressed, and somehow finding time to eat a healthy breakfast all at once. Well, fear not! Today, I’m thrilled to share my recipe for Healthy Oatmeal Breakfast Bars. These life-saving, hearty bars are perfect for those busy mornings when you need something nutritious and delicious to kickstart your day.

    Picture this: it’s a beautiful Saturday morning, the sun is shining, and the scent of warm cinnamon fills the air. You’re cozy in your kitchen, stirring together wholesome ingredients that will nourish your body and delight your taste buds. Can you see it? That’s exactly the vibe I aim for with my breakfast bars—comforting, delightful, and super easy to make!

    These oatmeal bars are not only loaded with fiber and wholesome goodness, but they’re also incredibly versatile! Think about all the ways you can customize them with your favorite mix-ins—whether it’s crunchy nuts, sweet dried fruits, or a little chocolate for that extra touch of happiness. Plus, they’re the perfect grab-and-go option for busy weekdays or filling snacks for midday cravings.

    So, roll up those apron sleeves, and let’s dive into this recipe together! You’ll be amazed at how easy it is to whip up a batch of these breakfast bars, making your mornings a little brighter and a lot more delicious.

    Personal Story

    Growing up, breakfast was a big deal at my house. But as a kid, my taste buds were all over the place—a mix of sugary cereals and the occasional attempt to “sneak” a slice of my mom’s coffee cake before school. One memorable morning, I woke up to the warm, inviting aroma of homemade granola bars in the oven. My grandma had taken on the challenge of crafting the perfect breakfast treat that would grab us out of bed.

    She stood by the stove, mixing oats with peanut butter, honey, and a handful of chocolate chips—because let’s be honest, nothing beats chocolate for breakfast! After what felt like an eternity of hunger-laced waiting, we finally dug into those warm bars, filled with gooey goodness, and I felt an explosion of warmth and happiness. It was that moment I realized the power of a nutritious breakfast and how the kitchen can be a place of love and comfort.

    Now, as I create my own breakfast bars—this recipe inspired by Grandma’s beloved creation—I carry that nostalgia with me. These Healthy Oatmeal Breakfast Bars combine all those warm memories, helping you bring that cozy kitchen vibe right into your home. Trust me; they’re bound to become a treasured family favorite!

    Ingredients

    Let’s talk about what you’ll need to make these scrumptious bars! Here’s a quick rundown of the ingredients—each comes with some handy substitution ideas.

    • 2 cups rolled oats
      These provide the base for your bars, giving them that chewy texture. You can swap for quick oats, but note they might result in a slightly softer bar.

    • 1 cup almond butter (or nut butter of choice)
      Adds creaminess and healthy fat. Peanut butter is a great substitute if you’re feeling nostalgic or need something more affordable!

    • 1/3 cup honey or maple syrup
      Natural sweeteners for binding and flavor. If you’re looking for a vegan option, maple syrup is perfect!

    • 1 ripe banana, mashed
      A natural sweetener and moisture booster. You can use applesauce as a swap for a lower-calorie option.

    • 1 teaspoon vanilla extract
      For that dreamy aroma and depth of flavor. Feel free to use almond extract for a twist!

    • 1 teaspoon cinnamon
      Adds warmth and spice. If you’re a cinnamon lover, feel free to add more!

    • 1/2 teaspoon salt
      Enhances the overall flavor—don’t skip this step!

    • Optional mix-ins:
      – 1/2 cup mini chocolate chips
      – 1/3 cup chopped nuts (almonds, walnuts, etc.)
      – 1/3 cup dried fruit (raisins, cranberries)
      You can mix and match; be creative! Just ensure your total mix-in quantities are around 1 to 1.5 cups combined.

    Step-by-Step Instructions

    Ready to get cooking? It’s time for the fun part—let’s put everything together to make these delicious bars!

    1. Preheat Your Oven:
      Preheat your oven to 350°F (175°C). This is crucial because it ensures that your bars will bake evenly and give you that perfect golden color we all love.

    2. Prepare Your Pan:
      Grab an 8-inch square baking pan and line it with parchment paper or lightly grease it. This step is essential to prevent sticking and make it easier to remove the bars later. Just trust me on this one!

    3. Mix Dry Ingredients:
      In a large mixing bowl, combine the rolled oats, cinnamon, and salt. Mix them well so that the seasoning spreads evenly. This is also a great time to add your chopped nuts or chocolate chips if you’re using them!

    4. Combine Wet Ingredients:
      In another bowl, mash the ripe banana. Add the almond butter, honey (or maple syrup), and vanilla extract. Stir everything together until you have a smooth, creamy mixture. This step is where the magic begins—flavors meld together beautifully!

    5. Combine Wet and Dry:
      Pour your wet mixture into the bowl of dry ingredients. Stir until everything is fully incorporated. If your mixture seems too dry, a splash of almond milk or water can help moisten things up. We’re aiming for a thick but spreadable consistency.

    6. Transfer to Baking Pan:
      Spread your mixture evenly into the prepared pan. Use a spatula to press it down firmly; this will help the bars hold their shape when baked.

    7. Bake:
      Pop the pan into your preheated oven and bake for 20-25 minutes. The edges should be slightly golden and the center set.

    8. Cool and Slice:
      Allow the bars to cool in the pan for about 10 minutes before transferring them to a wire rack to cool completely. Once cool, slice them into squares (or rectangles, if you’re feeling adventurous), and serve.

    Serving Suggestions

    These Healthy Oatmeal Breakfast Bars are delicious on their own, but there are plenty of ways to serve them for a fun breakfast or snack experience! Here are my top serving ideas:

    • On Their Own: Perfect for on-the-go munching when you need a quick breakfast boost or snack!

    • With Yogurt: Crumble a bar over a bowl of Greek yogurt and fresh fruit for a filling parfait. The crunchiness pairs perfectly with creamy yogurt.

    • With Nut Butter Drizzle: Drizzle some extra almond or peanut butter on top for a satisfying extra hit of protein.

    • Pair with Milk: Treat them like cookies and have them with a glass of your favorite plant-based milk or regular milk for a cozy breakfast.

    • Toast Them: If you have a slice or two left over, heat them in the toaster just until they’re warm. Top with sliced bananas or a sprinkle of cinnamon for even more goodness!

    Recipe Variations

    Feeling creative? Here are some fun variations you can try to keep things fresh:

    1. Chocolate Chip Banana: Add mini chocolate chips for a sweet twist, and use chocolate almond butter for an indulgent flavor!

    2. Berry Bliss: Stir in a mix of dried berries (like cranberries and blueberries) for a fruity punch. You can even top them with fresh berries when serving!

    3. Coconut Crunch: Mix in unsweetened shredded coconut for a tropical vibe. It adds a delightful chewiness!

    4. Nutty Delight: Toss in different nuts or seeds—think chia or flaxseeds for an omega-3 boost, or try pecans for a sweeter nutty flavor.

    5. Spiced Pumpkin: Swapping out the banana, use pumpkin puree along with a bit of pumpkin spice to turn these bars into a seasonal treat!

    Chef’s Notes

    Cooking is all about experimentation and have a little fun along the way! This recipe for Healthy Oatmeal Breakfast Bars has evolved over the years. What started as a simple morning energy booster has transformed into a canvas for flavors and creativity, inspired by everything I love about food! I love to play around with seasonal ingredients and flavor profiles, and believe me, this is a recipe that can cater to whims! Feel free to share your favorite spins when you make these.

    And if you have any kitchen mishaps—hey, we’ve all been there! Just remember that kitchens are places of learning, laughter, and a little bit of mess every now and then.

    FAQs and Troubleshooting

    1. Why did my bars crumble?
    This can happen if there’s not enough binding agent. Make sure your mixture is sticky enough; consider adding a little more nut butter or a splash of milk.

    2. Can I use instant oats?
    You can use instant oats, but do keep in mind that the texture will be different—these may turn out softer or less chewy.

    3. How do I store the bars?
    Store them in an airtight container at room temperature for up to a week. For longer shelf life, you can freeze them for up to three months! Just remember to wrap each bar individually.

    4. What’s the best way to reheat them?
    Kickstart your morning with warm bars! Pop them in the microwave for about 10-15 seconds to warm them back up.

    Nutritional Info

    These Healthy Oatmeal Breakfast Bars are not only packed with flavor but also come with some impressive nutritional benefits. Each bar is loaded with fiber, thanks to the oats, which help keep you fuller for longer. The nut and seed offerings provide healthy fats and protein—making these bars a powerhouse breakfast option!

    A rough estimate (per bar for a 12-bar recipe, depending on mix-ins):

    • Calories: Approximately 150-200 (depends on ingredients)
    • Protein: 5-6g
    • Fiber: 3-4g
    • Fat: 7-9g (depending on the type of nut butter used)

    Final Thoughts

    And there you have it, my delightful friends! These Healthy Oatmeal Breakfast Bars are easy to whip up, versatile for whatever mood you’re in, and pack a nutritious punch. I can’t wait for you to try them; I’d love to hear how they turn out for you!

    So whether you grab one on your way out the door or serve a platter during a cozy brunch, these bars are bound to become a new staple in your morning routine. Embrace the kitchen joy, unleash your creativity, and remember, cooking is meant to be fun! So grab your ingredients, crank up your favorite playlist, and let’s make something delicious together. Happy cooking! 🍽️❤️

    Print

    Healthy Oatmeal Breakfast Bars

    Delicious and nutritious breakfast bars perfect for busy mornings, loaded with fiber and customizable with your favorite mix-ins.

    • Author: emmawhitaker
    • Prep Time: 10 minutes
    • Cook Time: 25 minutes
    • Total Time: 35 minutes
    • Yield: 12 servings 1x
    • Category: Snack
    • Method: Baking
    • Cuisine: American
    • Diet: Vegetarian

    Ingredients

    Scale
    • 2 cups rolled oats
    • 1 cup almond butter (or nut butter of choice)
    • 1/3 cup honey or maple syrup
    • 1 ripe banana, mashed
    • 1 teaspoon vanilla extract
    • 1 teaspoon cinnamon
    • 1/2 teaspoon salt
    • Optional mix-ins: 1/2 cup mini chocolate chips, 1/3 cup chopped nuts (almonds, walnuts), 1/3 cup dried fruit (raisins, cranberries)

    Instructions

    1. Preheat your oven to 350°F (175°C).
    2. Prepare an 8-inch square baking pan by lining it with parchment paper or lightly greasing it.
    3. Mix dry ingredients in a large bowl: rolled oats, cinnamon, and salt.
    4. Combine wet ingredients in another bowl: mashed banana, almond butter, honey (or maple syrup), and vanilla extract.
    5. Mix wet and dry ingredients together until fully incorporated.
    6. Transfer the mixture to the prepared baking pan and press it down firmly.
    7. Bake for 20-25 minutes until edges are slightly golden.
    8. Cool for 10 minutes before transferring to a wire rack to cool completely, then slice into squares.

    Notes

    Customize with your favorite mix-ins and store in an airtight container for a quick breakfast or snack.

    Nutrition

    • Serving Size: 1 bar
    • Calories: 175
    • Sugar: 8g
    • Sodium: 120mg
    • Fat: 9g
    • Saturated Fat: 1g
    • Unsaturated Fat: 7g
    • Trans Fat: 0g
    • Carbohydrates: 23g
    • Fiber: 4g
    • Protein: 5g
    • Cholesterol: 0mg

    Keywords: oatmeal bars, breakfast, healthy snack, easy recipe

    Did you make this recipe?

    Share a photo and tag us — we can’t wait to see what you’ve made!

  • Healthy Oat Bars

    Healthy Oat Bars

    Healthy Oat Bars: A Wholesome Treat for Every Occasion

    Hey there, fellow foodies! 👋 Grab a comfy chair and settle in, because today, we’re diving into a treat that’ll not only satisfy your sweet tooth but also keep you fueled throughout the day. Yes, we’re talking about Healthy Oat Bars! These bars are perfect for breakfast on-the-go, an afternoon pick-me-up, or even a guilt-free dessert. The best part? You can whip them up in no time, with ingredients you probably already have sitting in your pantry.

    Imagine starting your day with the comforting scent of baked oats wafting through your kitchen, or having a nutritious snack ready when those afternoon cravings hit. These bars are packed with all sorts of wholesome goodness, so you can feel good about treating yourself and your loved ones. Plus, they’re incredibly versatile—so whether you’re a minimalist, a flavor adventurer, or somewhere in between, I’ve got you covered!

    Now, you might be wondering—what makes these oat bars so special? Well, they’re not just oats and honey; we’re packing in flavors, textures, and a bit of fun. I can’t wait for you to try them and share the joy—and trust me, they’re bound to become a staple in your home just like they are in mine!

    So, preheat your oven, grab your mixing bowls, and let’s get ready to make some magic!

    Personal Story

    Let me take you back to one of my most cherished kitchen memories—one that involves my mom, a sun-drenched Saturday morning, and a batch of homemade granola bars. Growing up, I was always on the lookout for delicious snacks, and my mom had an incredible knack for whipping up goodies that were both health-conscious and scrumptious.

    I remember her pulling out an ancient, dog-eared cookbook filled with handwritten notes and spill marks—a true testament to its prior use. Together, we’d measure and mix, the sounds of laughter mingling with the sweet scent of vanilla and oats. As the bars baked away in the oven, we’d sneak spoonfuls of the dough, our faces lighting up with glee.

    Those bars were more than just a snack—they were a bonding experience. They taught me the importance of wholesome ingredients and patience in the kitchen. Fast forward to today, and I find myself in that same spirit of creating healthy yet delicious treats, but with my own twist. Let’s reformulate that beloved treat into today’s Healthy Oat Bars and create new memories for you and your family!

    Ingredients

    Here’s everything you need to whip up your own batch of Healthy Oat Bars:

    • Rolled Oats (2 cups)
      Rolled oats are the backbone of this recipe! They’re a whole grain, providing fiber and essential nutrients. If you prefer a gluten-free option, choose certified gluten-free oats!

    • Nut Butter (1/2 cup)
      Almond or peanut butter works beautifully here. Not only does it add creaminess and flavor, but it also bumps up the protein content. You could swap it for sun butter if you have nut allergies.

    • Honey or Maple Syrup (1/3 cup)
      We’re using this as our natural sweetener. Honey brings a lovely floral flavor, while maple syrup offers that classic warm sweetness. Need a vegan option? Maple syrup is your best friend!

    • Banana (2 medium, mashed)
      Overripe bananas add natural sweetness and moisture to the bars. If you’re not a fan of banana flavor, try using unsweetened applesauce instead.

    • Chia Seeds (1/4 cup)
      These little powerhouses pack a nutritional punch, providing omega-3 fatty acids and fiber. For a similar effect, you can replace them with flax seeds.

    • Dark Chocolate Chips (1/2 cup)
      A sprinkle of chocolate chips elevates these oat bars to the next level. Use dark chocolate for a healthier twist, or opt for carob chips if you’re avoiding chocolate.

    • Nuts & Seeds (1/2 cup, mixed)
      Chopped walnuts, almonds, or sunflower seeds add crunch and healthy fats. Feel free to mix and match based on what you have at home!

    • Salt (a pinch)
      A tiny bit of salt enhances all the flavors and balances the sweetness.

    That’s it! Get ready to mix and bake, and remember, these ingredients can be easily tailored to your taste. Don’t be afraid to get creative!

    Step-by-Step Instructions

    Let’s turn those ingredients into a delicious batch of Healthy Oat Bars! Follow these steps, and I’ll sprinkle in some tips along the way.

    Step 1: Preheat Oven

    Preheat your oven to 350°F (175°C). This step is crucial for ensuring evenly baked bars. If you’re like me and often forget this step, set a timer to avoid any surprises!

    Step 2: Prepare the Baking Dish

    Line an 8×8 inch (or similar) baking dish with parchment paper, allowing some overhang for easy bar removal later. This is one of my favorite chef hacks—it makes everything so much easier when it’s time to cut the bars!

    Step 3: Mix Wet Ingredients

    In a large mixing bowl, combine the mashed bananas, nut butter, and honey (or maple syrup). Using a fork or a spatula, mix until fully combined and smooth. If your nut butter is on the thicker side, feel free to pop it in the microwave for a few seconds to soften it up.

    Step 4: Combine Dry Ingredients

    In another bowl, mix the rolled oats, chia seeds, and a pinch of salt. If you’re adding nuts or seeds, now is the time! Stir well, ensuring everything is distributed evenly.

    Step 5: Combine Wet and Dry Mixtures

    Pour the dry mixture into the bowl with the wet ingredients. Gently fold them together using a spatula until just combined. Here’s a fun tip: try not to overmix. We want our bars to remain chewy and delicious, not dry and crumbly.

    Step 6: Add the Chocolate Chips

    Stir in the dark chocolate chips. This is where the magic happens! You want to make sure each bite has a bit of that chocolatey goodness.

    Step 7: Transfer to Baking Dish

    Spread the mixture evenly into your prepared baking dish. Make sure to press it down firmly to create a compact, solid bar structure. If it feels too crumbly, a few extra pats will help everything stick together!

    Step 8: Bake

    Pop your dish in the preheated oven and bake for about 25-30 minutes. Keep an eye on it! You want a light golden color on top for the bars to be perfectly chewy.

    Step 9: Cool Down

    Remove the baking dish from the oven and let it cool in the pan for 10 minutes. Then, lift the bars out using the parchment paper and allow them to cool on a wire rack. Trust me, the cooling step is key to achieving that perfect texture!

    Step 10: Slice and Serve

    Once cooled, slice your oat bars into squares or rectangles. I love using a sharp knife and a ruler for straight cuts—I promise it makes them look more professional!

    Voilà! You’ve created a batch of healthy oat bars that are ready to impress friends and family.

    Serving Suggestions

    These Healthy Oat Bars can be enjoyed in numerous ways. For a delightful breakfast, pair them with a dollop of Greek yogurt and fresh berries. Want to impress at a brunch gathering? Serve them alongside a vibrant fruit platter and some homemade smoothie or coffee.

    If you’re heading out for a hike or a picnic, pack these bars in a snack container for easy munching on-the-go. They are perfectly portable and satisfying!

    Recipe Variations

    Now, what fun would it be if we didn’t mix things up a bit? Here are some tasty variations to keep your Healthy Oat Bars fresh and exciting:

    1. Fruity Delight: Add in dried fruits like cranberries, raisins, or apricots for a chewy, fruity surprise.

    2. Nutty and Spicy: Toss in cinnamon, nutmeg, or pumpkin spice for a seasonal twist, and swap out half the oats for chopped nuts.

    3. Coconut Crunch: Stir in unsweetened shredded coconut for a tropical feel—just be sure to adjust the moisture content accordingly.

    4. Protein Boost: Add a couple of scoops of your favorite protein powder to the dry mix for a post-workout snack.

    5. Savory Twist: Swap out the honey for a drizzle of maple syrup and add in cheese and herbs for a savory oat bar!

    Feel free to mix and match these ideas to create the perfect oat bars for you!

    Chef’s Notes

    I’ve been making variations of these oat bars for years, and they have truly evolved over time. The original recipe was simple—just oats and honey—but as I’ve experimented, I discovered how versatile they can be. One memorable kitchen experiment involved a friend’s request for something healthy but indulgent. I ended up sneaking in peanut butter and chocolate chips, and oh my goodness, did they hit the spot!

    Now, I love to play around with flavors, testing both savory and sweet variations. Often, I make a double batch because they disappear so quickly in my household!

    FAQs and Troubleshooting

    Q1: Why are my bars sticking to the pan?
    Make sure you’re using parchment paper like we discussed! If you didn’t line the pan, they might stick. Always grease the pan if you’re skipping the parchment.

    Q2: Can I make this recipe without bananas?
    Absolutely! You can substitute the bananas with unsweetened applesauce or even yogurt. The bars might not be as moist, but they’ll still be delicious!

    Q3: My bars came out too crumbly; what went wrong?
    This could be due to not enough binding agent or too many dry ingredients. Next time, check for even mixing and consider increasing the nut butter or sweetener slightly.

    Q4: How should I store these bars?
    Once fully cooled, store them in an airtight container at room temperature for up to a week or refrigerate for longer freshness. You can also freeze them for up to three months—just wrap each bar individually for easy snacking!

    Nutritional Info

    While the specific nutrition will vary depending on your ingredient choices, here’s a basic overview of what a typical Healthy Oat Bar offers:

    • Calories: Approximately 150-200 per bar, depending on add-ins
    • Protein: Around 5-6g per bar, especially if you add nut butter or protein powder
    • Fiber: 3-4g for a solid dose of digestion-friendly fiber
    • Sugars: Naturally sweetened with honey or maple syrup, around 8-10g depending on your choices

    These bars are not only filling but also provide balanced energy, making them a great option for those looking to maintain a healthy diet.

    Final Thoughts

    And there you have it—your very own batch of Healthy Oat Bars, ready to satisfy your cravings and fuel your adventures! I hope you enjoyed this journey through flavor, fun, and a sprinkle of nostalgia. These bars are perfect for busy mornings, spontaneous outings, or just a delicious treat to enjoy with your morning coffee.

    As you create and customize your own oat bars, I encourage you to make it a family affair—get the kids involved in the mixing, or invite a friend over for a baking day. Food is best enjoyed when shared, after all!

    Now, don’t forget to share your creations with me! Snap a picture, tag Tasty Chow on social media, or send over a message. I’d love to see how you put your own spin on these Healthy Oat Bars.

    Get ready to chow down! 🍽️

    Print

    Healthy Oat Bars

    Wholesome oat bars perfect for breakfast, snacks, or guilt-free desserts, packed with flavors and nutrients.

    • Author: emmawhitaker
    • Prep Time: 15 minutes
    • Cook Time: 30 minutes
    • Total Time: 45 minutes
    • Yield: 12 servings 1x
    • Category: Snack
    • Method: Baking
    • Cuisine: American
    • Diet: Vegetarian

    Ingredients

    Scale
    • 2 cups Rolled Oats
    • 1/2 cup Nut Butter (Almond or Peanut)
    • 1/3 cup Honey or Maple Syrup
    • 2 medium Bananas (mashed)
    • 1/4 cup Chia Seeds
    • 1/2 cup Dark Chocolate Chips
    • 1/2 cup Nuts & Seeds (mixed)
    • a pinch Salt

    Instructions

    1. Preheat your oven to 350°F (175°C).
    2. Line an 8×8 inch baking dish with parchment paper.
    3. Combine the mashed bananas, nut butter, and honey (or maple syrup) in a large bowl.
    4. Mix the rolled oats, chia seeds, and salt in another bowl.
    5. Pour the dry mixture into the wet ingredients and fold gently.
    6. Stir in the dark chocolate chips.
    7. Spread the mixture evenly in the prepared baking dish.
    8. Bake for about 25-30 minutes until golden.
    9. Cool in the pan for 10 minutes before transferring to a wire rack.
    10. Slice into squares or rectangles once cooled.

    Notes

    Feel free to add dried fruits, nuts, or protein powder for different variations.

    Nutrition

    • Serving Size: 1 bar
    • Calories: 175
    • Sugar: 9g
    • Sodium: 50mg
    • Fat: 8g
    • Saturated Fat: 1g
    • Unsaturated Fat: 6g
    • Trans Fat: 0g
    • Carbohydrates: 23g
    • Fiber: 3g
    • Protein: 6g
    • Cholesterol: 0mg

    Keywords: healthy snacks, oat bars, breakfast on-the-go, no-bake recipes, gluten-free options

    Did you make this recipe?

    Share a photo and tag us — we can’t wait to see what you’ve made!

  • Hello world!

    Welcome to WordPress. This is your first post. Edit or delete it, then start writing!