emmawhitaker
The Joy of Amish White Bread: Baking a Slice of Happiness
Hey there, fellow food lover! Are you ready to knead your way into a slice of culinary happiness? Let’s talk about one of my all-time favorite bread recipes: Amish White Bread. This isn’t just any bread; it’s a warm, cozy hug straight out of the oven, ready to fill your home with delightful aromas and your belly with pure joy.
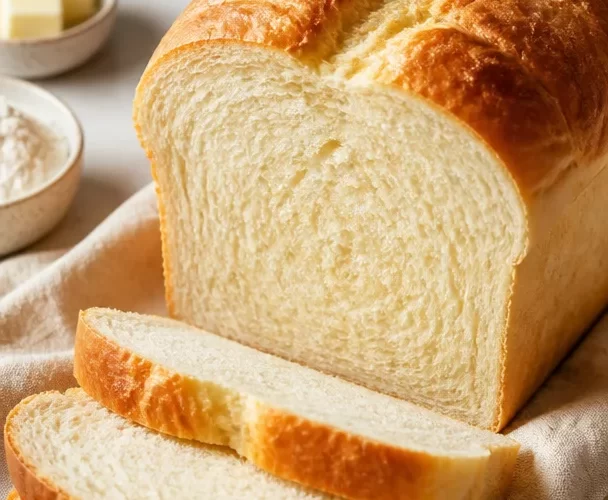
Imagine slicing into a loaf of freshly baked bread, the crust perfectly golden, and the inside so fluffy it almost melts in your mouth. That’s exactly what this Amish White Bread offers. Whether it’s slathered in butter, stacked with your favorite sandwich fixings, or simply enjoyed with a warm bowl of soup, it’s a versatile masterpiece that belongs in every home cook’s repertoire.
This recipe comes with a touch of nostalgia—back in my early baking days, I stumbled across a charming little Amish bakery during a summer road trip. The moment I stepped inside, those warm, bread-baking aromas wrapped around me like a cozy blanket. The friendly, apron-wearing bakers shared tips, stories, and of course, their treasured recipes. This Amish White Bread is inspired by that delightful experience, allowing you to replicate that warm, inviting bakery feel right in your own kitchen.
So grab your mixing bowl and let’s get started on this bread-baking journey together! Trust me; you’re going to feel like a rockstar chef when your kitchen fills with that irresistible, yeasty scent.
My Baking Journey: A Sweet Slice of Nostalgia
Ah, where do I begin? My earliest baking memories swirl around a little kitchen that resonated with laughter and the scent of sweet treats. I think about my grandma, standing tall against her worn-out countertop, her hands dusted with flour as she expertly mixed dough. One particular summer, we decided to bake bread together for the first time.
At first, I was intimidated—how could I ever master the art of bread-making like her? But she handed me the mixing spoon and, with a warm smile, told me that the secret to perfect bread isn’t just in the ingredients; it’s in the love you mix in with every knead. So we laughed, we kneaded, and we embraced the messiness of the kitchen. We had flour fights that left us both giggling and sticky, and finally, we pulled a beautiful golden loaf from the oven.
That bread was more than just a meal; it was about sharing moments and creating memories. Whenever I bake Amish White Bread, I’m transported back to that summer day, feeling my grandma’s warmth and love swirling around me. It’s a reminder that some memories can be baked into every loaf.
Ingredients
To make this heavenly Amish White Bread, you’ll need the following ingredients. Let’s chat about them:
-
Warm Water (1 ½ cups)
- This is crucial for activating the yeast. Check that it’s between 110°F and 115°F (too hot can kill the yeast!). Tap water usually does the trick, but if you’re on well water, consider using filtered.
-
Sugar (¼ cup)
- This helps the yeast rise and adds a hint of sweetness to the bread. If you’re feeling adventurous, try substituting brown sugar or honey for a different flavor profile.
-
Active Dry Yeast (2 ¼ teaspoons or 1 packet)
- This little powerhouse is what gives the bread its rise. You can use instant yeast if that’s all you have; there’s no need to dissolve it before mixing!
-
Salt (1 teaspoon)
- Salt not only enhances the flavor but also regulates yeast activity. Don’t skip it; bread without salt can taste bland!
-
Vegetable Oil (¼ cup)
- This keeps the bread soft and moist. If you prefer a different flavor, olive oil or melted butter can be excellent substitutes.
-
All-Purpose Flour (4-5 cups)
- The star of the show! Start with 4 cups, and add more as needed to create a soft, slightly sticky dough. Whole wheat flour can be a healthy swap, but you’ll want to adjust the water to keep it from being too dense.
Step-by-Step Instructions
Now, let’s dive into the delicious part—how to make this fantastic bread! Follow my guide, and let’s get that dough rising.
-
Activate the Yeast: In a large bowl, combine the warm water and sugar. Sprinkle the yeast on top, then let it sit for about 5-10 minutes until it’s frothy and bubbly. This is your yeast coming to life!
-
Mix in Ingredients: Add the salt and vegetable oil to your yeast mixture. Slowly start adding the all-purpose flour, one cup at a time. Mix until a soft dough forms. This part is perfect for channeling your inner baker! If you can get your hands in there, do it!
-
Knead the Dough: Transfer the dough to a lightly floured surface and knead for about 8-10 minutes. You’re looking for a smooth, elastic dough that springs back when poked. It should be slightly tacky but not overly sticky. Don’t be shy about using that flour!
-
First Rise: Place the kneaded dough in a greased bowl, turning it so all sides are coated. Cover with a cloth and let it rise in a warm area for about 1-2 hours or until doubled in size. This patience pays off, trust me!
-
Shape the Loaf: After it has risen, punch the dough down to release the gas. Turn it onto a lightly floured surface and shape it into a loaf. Tuck the ends under for a nice finish.
-
Second Rise: Place your shaped loaf into a greased 9×5-inch loaf pan. Cover and let it rise again for about 30-45 minutes until it’s puffed up and looks ready to bake.
-
Preheat the Oven: About 20 minutes into the final rise, preheat your oven to 350°F (175°C).
-
Bake: Pop that beauty into the oven and let it bake for 30-35 minutes, or until the top is golden brown and sounds hollow when tapped.
-
Cool: Once baked, transfer the bread to a wire rack and let it cool before slicing. The patience will be worth it!
Throughout this process, don’t forget to enjoy the scent wafting through your kitchen. Each step is a labor of love, and soon enough, you’ll be rewarded with a loaf that’s both comforting and delicious.
Serving Suggestions
Now that you’ve got a gorgeous loaf of Amish White Bread, let’s talk about how to serve it! Here are some delicious ideas to enjoy:
-
Classic Butter Slather: Simple is often best. Spread soft butter over a warm slice and let it melt into the bread. You won’t regret it!
-
Sandwich Delight: Use it for a scrumptious deli sandwich. Load it with your favorite meats, cheeses, and veggies, and you’ve got a lunch that’ll impress.
-
French Toast Extravaganza: Make French toast by soaking slices in a mixture of eggs, milk, and cinnamon. Pan-fry them for a delightful breakfast treat!
-
Toasty Garlic Bread: Slice it up, spread a mixture of garlic, butter, and fresh herbs on it, and toast it in the oven. Perfect for serving with pasta!
-
Soup’s Perfect Companion: Pair it with a hearty soup. There’s nothing quite like dipping fresh bread into your favorite bowl of goodness.
Recipe Variations
Want to switch things up a bit? Here are some fun variations to give your Amish White Bread a twist:
-
Honey Wheat Bread: Substitute half the all-purpose flour with whole wheat flour and replace some sugar with honey for a nutty flavor.
-
Herb Infused: Add 2 tablespoons of dried herbs like rosemary or basil for a fragrant bread that pairs beautifully with Italian dishes.
-
Cheesy Delight: Mix in 1 cup of shredded cheese like cheddar or mozzarella for a cheesy version that’s perfect for sandwiches.
-
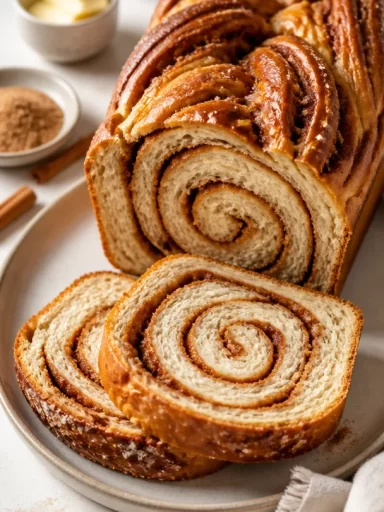
Cinnamon Swirl: Before shaping, sprinkle some cinnamon and sugar in the dough to create a delightful cinnamon swirl bread.
-
Nutty Goodness: Fold in chopped nuts like walnuts or pecans for added crunch and flavor.
Chef’s Notes
Reflecting on this recipe, I often chuckle at the little mishaps I’ve faced along the way. Like the time I was so excited about my bread that I accidentally added twice the amount of yeast—let’s just say it turned into a fluffy, doughy volcano! But that’s the beauty of baking; it’s about embracing the journey, and the occasional flops only make the perfect loaves that much sweeter.
Over the years, this recipe has evolved with my experiences, and each loaf holds a story. The joy of sharing it with friends and family is what keeps me coming back to this classic recipe.
FAQs and Troubleshooting
Here are some common questions and answers to guide you through your bread-making adventure:
-
Why isn’t my bread rising?
Make sure your yeast is fresh and your water temperature was warm, not hot. If your kitchen is cold, try placing the dough in a warm place to rise. -
The dough is too sticky; what do I do?
If your dough is excessively sticky after kneading, gradually add more flour, a tablespoon at a time, until you reach a tacky but manageable consistency. -
Can I freeze the bread?
Absolutely! Once cooled, slice the bread and wrap it tightly in plastic wrap, then aluminum foil before freezing. It should last up to 3 months. -
Why is my crust so hard?
If your bread crust is too hard, you might be baking it too long. Also, to soften the crust, you can cover the loaf with a damp cloth as it cools.
Nutritional Info
While I’m not a nutritionist, I can share a basic nutritional breakdown for a single slice of homemade Amish White Bread (based on 16 slices from one loaf):
- Calories: 120
- Total Fat: 2g (Saturated Fat: 0.3g)
- Cholesterol: 0mg
- Sodium: 150mg
- Total Carbohydrates: 22g (Dietary Fiber: 1g, Sugars: 1g)
- Protein: 3g
Remember, these values can vary based on specific ingredients and portion sizes!
Final Thoughts
Baking Amish White Bread is not just a culinary experience; it’s an emotional one. It’s about gathering around the kitchen, sharing stories, and enjoying simple pleasures. That first warm slice you cut is a moment to cherish, filled with the love and care you put into making it.
So, whether you’re a seasoned baker or a novice in the kitchen, I invite you to try this recipe and, more importantly, make it your own. Don’t be afraid to experiment, tell your stories, and share this warmth with your loved ones.
Happy baking! Let’s keep spreading the love, one loaf at a time.
PrintAmish White Bread
A warm and fluffy bread recipe that fills your home with delightful aromas and creates cherished memories.
- Prep Time: 15 minutes
- Cook Time: 35 minutes
- Total Time: 50 minutes
- Yield: 16 slices
- Category: Bread
- Method: Baking
- Cuisine: American
- Diet: Vegetarian
Ingredients
- Warm Water (1 ½ cups)
- Sugar (¼ cup)
- Active Dry Yeast (2 ¼ teaspoons or 1 packet)
- Salt (1 teaspoon)
- Vegetable Oil (¼ cup)
- All-Purpose Flour (4-5 cups)
Instructions
- Activate the yeast: In a large bowl, combine the warm water and sugar. Sprinkle the yeast on top, then let it sit for about 5-10 minutes until it’s frothy and bubbly.
- Mix in ingredients: Add the salt and vegetable oil to your yeast mixture. Slowly start adding the all-purpose flour, one cup at a time.
- Knead the dough: Transfer the dough to a lightly floured surface and knead for about 8-10 minutes until smooth and elastic.
- First rise: Place the kneaded dough in a greased bowl and let it rise for about 1-2 hours until doubled in size.
- Shape the loaf: Punch the dough down and shape it into a loaf.
- Second rise: Place your shaped loaf into a greased loaf pan and let it rise for about 30-45 minutes.
- Preheat the oven: Preheat your oven to 350°F (175°C).
- Bake: Bake for 30-35 minutes until golden brown and sounds hollow when tapped.
- Cool: Transfer the bread to a wire rack and let it cool before slicing.
Notes
For added flavor, consider trying variations like honey wheat or herb-infused bread.
Nutrition
- Serving Size: 1 slice
- Calories: 120
- Sugar: 1g
- Sodium: 150mg
- Fat: 2g
- Saturated Fat: 0.3g
- Unsaturated Fat: 1.7g
- Trans Fat: 0g
- Carbohydrates: 22g
- Fiber: 1g
- Protein: 3g
- Cholesterol: 0mg
Keywords: bread, baking, Amish white bread, homemade bread, easy bread recipe