emmawhitaker
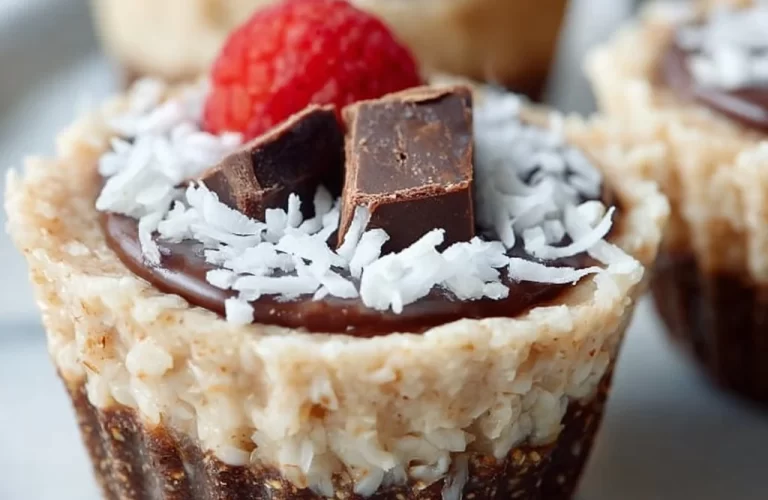
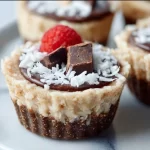
No-Bake Vegan Coconut Cups: A Sweet Escape
Hey there, fellow food lovers! 👋 Ready to elevate your dessert game without even turning on the oven? I’ve got a delightful treat that’s as refreshing as it is indulgent. Say hello to my No-Bake Vegan Coconut Cups! These little beauties are a perfect blend of creamy coconut goodness and a hint of sweetness, making them a fabulous option for anyone craving a guilt-free dessert. Whether you’re entertaining friends, treating yourself, or looking for a delightful snack to enjoy with a cup of tea, these coconut cups are sure to hit the spot.
Let’s dive into the creamy, dreamy world of coconut while I share my journey with you. But first, let’s set the stage—imagine a warm summer’s day, the sun is shining, and there’s a delightful hint of tropical breeze in the air. That’s just the vibe these No-Bake Vegan Coconut Cups bring to the table!
A Sweet Memory
Growing up, summer meant one thing in my house: family gatherings bursting with flavor and laughter. My grandma would make her famous coconut macaroons, which were a hit at every potluck. I remember standing on a stool, peering into the mixing bowl as she combined shredded coconut, sweetened condensed milk, and chocolate chips. The smell of melting chocolate and toasted coconut filled the kitchen, making our mouths water in anticipation.
As we’d gather around the dining table, my siblings and I could hardly keep our hands off those sweet treats. It was a time filled with joy, community, and an unshakeable love for food. Fast forward to today, my No-Bake Vegan Coconut Cups are inspired by those same warm memories—but crafted to fit a healthier lifestyle! Now, you can indulge in something sweet and satisfying without any guilt—perfect for sharing with family or enjoying all by yourself.
Ingredients
Let’s talk about what you’ll need to whip up these No-Bake Vegan Coconut Cups. Here’s a handy list for you:
-
Shredded Coconut: The star ingredient! Opt for unsweetened shredded coconut for a more balanced sweetness, or if you want to go all-out tropical, use sweetened coconut.
-
Coconut Oil: This acts as the binding agent and provides that luscious, creamy texture. If you’re not a fan of coconut flavor, you can substitute with neutral oils, but you’ll miss out on that tropical twist.
-
Maple Syrup: Natural sweetness that meshes beautifully with coconut. You can also use agave nectar or date syrup for a different flavor profile.
-
Almond Butter: Adds creaminess and a nutty flavor. If almond butter isn’t your jam, feel free to swap it out with peanut butter or sun butter (great for nut allergies).
-
Cocoa Powder: Not only does it add a rich chocolate flavor, but it also brings depth and sophistication to these cups. Use raw cacao for a superfood boost!
-
Vanilla Extract: A dash of this magic ingredient enhances all the flavors. Use pure vanilla extract if possible for the best taste.
-
Sea Salt: Don’t skip this! A pinch of salt brightens up the sweetness and balances the flavors beautifully.
Quick Chef Insight:
Feel free to play around with these ingredients! The beauty of no-bake desserts is their flexibility. Just make sure to keep the foundational ratio of wet to dry ingredients relatively stable for a good texture.
Step-by-Step Instructions
Ready to get those hands mixing? Let’s do this!
-
Prep Your Muffin Tin: Grab a standard muffin tin and line it with parchment paper or silicone muffin liners. This prevents sticking and makes it easy to pop the cups out later.
-
Mix the Coconut Base: In a medium bowl, combine 1 cup of shredded coconut, ½ cup of melted coconut oil, ⅓ cup of maple syrup, and ¼ cup of almond butter. Give it a good mix until everything is well combined. You want the mixture to be sticky but not runny!
Chef Tip: Don’t be afraid to get your hands in there! It’s the best way to make sure everything is mixed thoroughly.
-
Add Flavor Boosters: Mix in 2 tablespoons of cocoa powder, 1 teaspoon of vanilla extract, and a pinch of sea salt. Stir until everything is well blended and chocolatey goodness starts to emerge.
-
Spoon into Muffin Tin: Using a spoon or a small ice cream scoop, portion out the mixture into your muffin tin, pressing each cup down firmly to ensure they hold together. You want them tightly packed for the ultimate texture.
Chef Hack: Wet your hands slightly before pressing down the mixture to prevent it from sticking!
-
Chill: Pop the muffin tin into the freezer for about 20-30 minutes, or until firm. This helps the coconut cups set nicely and makes them easier to remove.
-
Unmold and Enjoy: Once the coconut cups are firm to the touch, gently peel away the parchment paper or silicone liners. You can even drizzle a little melted dark chocolate on top for that extra indulgent flair if you wish!
Congratulations, you’ve just made the most incredible No-Bake Vegan Coconut Cups!
Serving Suggestions
These coconut cups can be served in various ways, and they’re sure to be a crowd-pleaser!
-
On a Platter: Arrange them beautifully on a serving platter with fresh fruits like strawberries or mangoes for a pop of color. This makes for a stunning dessert table centerpiece.
-
With Coconut Whipped Cream: Add a dollop of coconut whipped cream on the side for an extra indulgent touch. It pairs perfectly with the coconut flavors!
-
Bites for Brunch: Serve them at your next brunch gathering alongside coffee or tea. They are a delightful way to kick off the day with a sweet treat.
Recipe Variations
Here are a few fun twists you can try:
-
Chocolate Chip Surprise: Fold in some dairy-free chocolate chips into the mixture for a melty treat with every bite.
-
Tropical Twist: Add crushed pineapple for an extra burst of tropical flavor. Just be cautious about the moisture content!
-
Nuts About It: Throw in chopped nuts like pecans or walnuts for added texture and healthy fats.
-
Spicy Kick: Add a pinch of cayenne pepper or cinnamon for a surprising flavor kick that complements the sweetness beautifully.
-
Matcha Madness: For a vibrant green twist, fold in some matcha powder! It’s an exciting way to incorporate antioxidants.
Chef’s Notes
This recipe has been a real journey for me. I started experimenting with no-bake desserts when I was in culinary school, striving to create something that satisfied my sweet tooth without the guilt. After many trials—and let’s just say, a few mishaps—these coconut cups emerged as a clear winner!
They have evolved over time; I love finding new ingredients and fun variations to share with all of you. I take pride in knowing that every time someone bites into one of these cups, they’ll think of sunshine, family, and fun—just like my grandma’s kitchen.
FAQs and Troubleshooting
-
Why aren’t my coconut cups holding together?
- This might happen if there’s too much liquid or not enough binding ingredients. Make sure your ratio of wet to dry ingredients is balanced.
-
Can I store these, and if so, how long do they last?
- Absolutely! Store them in an airtight container in the fridge for up to a week. They can also be kept in the freezer for longer freshness.
-
How can I make these nut-free?
- Substitute the almond butter with sunflower butter or pumpkin seed butter. They work beautifully!
-
Can I use fresh coconut instead of shredded?
- Fresh coconut will work, but it may require additional adjustments to the recipe. Shredded coconut gives an ideal texture and sweetness level.
Nutritional Info
One No-Bake Vegan Coconut Cup contains approximately:
- Calories: 120
- Protein: 2g
- Carbohydrates: 10g
- Fat: 9g
- Fiber: 2g
- Sugar: 4g
These delightful cups are not only a treat for your taste buds but also provide healthy fats and a bit of fiber thanks to the coconut. Enjoy guilt-free indulgence!
Final Thoughts
There you have it, dear foodies—your ultimate guide to making No-Bake Vegan Coconut Cups! I hope this recipe sparks creativity in your kitchen and brings smiles to everyone who indulges. Remember, cooking should be joyful, playful, and filled with love. So gather your ingredients, invite a friend (or just enjoy some solo time), and let’s make something delicious together!
Thank you for joining me in this sweet adventure! If you try these coconut cups, don’t forget to snap a picture and share it with me—I’d love to see your creations! Until next time, keep your aprons on and your hearts wide open to the wonders of the kitchen. Let’s chow down! 🍽️💖
PrintNo-Bake Vegan Coconut Cups
Delightful no-bake vegan coconut cups combining creamy coconut goodness and sweetness, perfect for a guilt-free dessert.
- Prep Time: 15 minutes
- Cook Time: 0 minutes
- Total Time: 30 minutes
- Yield: 12 servings 1x
- Category: Dessert
- Method: No-Bake
- Cuisine: Vegan
- Diet: Vegan
Ingredients
- 1 cup unsweetened shredded coconut
- ½ cup melted coconut oil
- ⅓ cup maple syrup
- ¼ cup almond butter
- 2 tablespoons cocoa powder
- 1 teaspoon vanilla extract
- Pinch of sea salt
Instructions
- Prep your muffin tin by lining it with parchment paper or silicone muffin liners.
- Mix the coconut base by combining shredded coconut, melted coconut oil, maple syrup, and almond butter in a bowl.
- Add flavor boosters by mixing cocoa powder, vanilla extract, and sea salt into the coconut mixture.
- Spoon the mixture into the muffin tin, pressing each cup down firmly.
- Chill in the freezer for 20-30 minutes or until firm.
- Unmold the cups once firm and enjoy!
Notes
Feel free to play around with the ingredients. Maintain the wet to dry ratio for texture. Store in an airtight container for up to a week.
Nutrition
- Serving Size: 1 cup
- Calories: 120
- Sugar: 4g
- Sodium: 5mg
- Fat: 9g
- Saturated Fat: 8g
- Unsaturated Fat: 1g
- Trans Fat: 0g
- Carbohydrates: 10g
- Fiber: 2g
- Protein: 2g
- Cholesterol: 0mg
Keywords: no-bake, vegan, coconut, dessert, healthy snacks