emmawhitaker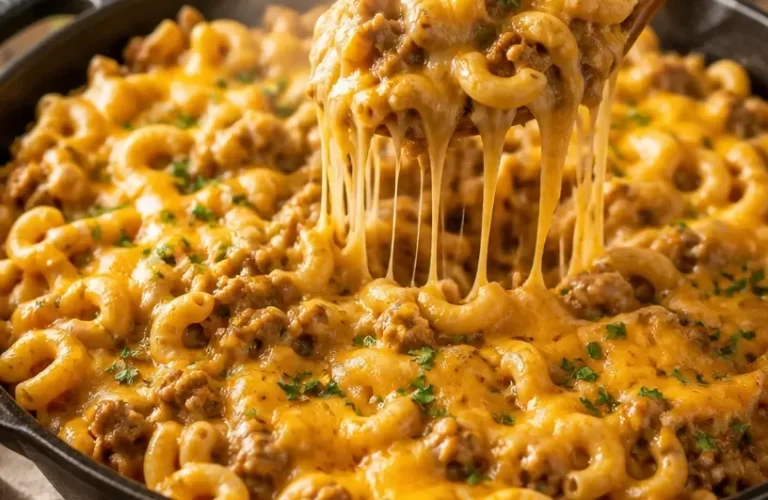
Dump-and-Bake Cheeseburger Pasta: A Comfort Food Classic Reimagined
Welcome back to the Feastora kitchen where we’re all about flavor, comfort, and easy meals that make your heart sing and your tummy dance! Today, we’re diving into a dish that feels like a warm hug on a busy weeknight: Dump-and-Bake Cheeseburger Pasta. This recipe is a game-changer—it’s quick, it’s delicious, and best of all, it’s a one-pot wonder that minimizes cleanup. Who doesn’t love that?
Now, I don’t know about you, but I love a good cheeseburger. The juicy patty, the melted cheese, the tangy pickles—everything about it speaks to my soul! And when I’m in the kitchen whipping up dinner, I often find myself experimenting with ways to encapsulate those mouthwatering flavors into something new. This cheeseburger pasta takes those classic elements and blends them into a comforting meal that’s perfect for the whole family.
Picture this: It’s a chilly evening, and the smell of bustling flavors fills the air. You’ve had a long day, and the last thing you want to do is slave away in the kitchen. That’s when I turned to this magical dump-and-bake recipe—it combines all the essentials of a cheeseburger with the heartiness of pasta, all in one simple pot. So, grab your apron, and let’s get started!
A Nostalgic Dish
Let me take you back to my childhood for a moment. I remember Saturday nights at home, my mom whipping up her famous cheeseburgers. She’d sizzle the patties to juicy perfection while I played around in the kitchen, stealing bites of cheese and ketchup as I stumbled upon my own meal experiments. Those nights were filled with laughter, tantalizing aromas, and the sheer joy of family mealtime.
Fast forward a few years, and here I am, stirring a pot of my Dump-and-Bake Cheeseburger Pasta, feeling a warm wave of nostalgia wash over me. Every bite reminds me of those Saturday nights, blending that classic flavor profile with the heartiness of pasta. It’s like a delicious love letter to those fond memories—and I can’t wait for you to make your own!
Ingredients
Here’s what you need to whip up this mouthwatering dish:
-
2 lbs lean ground beef: A great source of protein, and you can easily substitute with ground turkey or a plant-based alternative if you prefer.
-
12 oz elbow macaroni: This pasta is classic and creates the perfect bite-sized pieces. If you’re looking for whole grain or gluten-free options, spiral pasta or even chickpea pasta works beautifully!
-
3 cups beef broth: This adds depth and richness to the dish. If beef broth isn’t on hand, chicken broth or vegetable broth will work in a pinch.
-
1 cup milk: Creaminess alert! It ties all the flavors together. You can swap it for almond milk or soy milk for a dairy-free version.
-
2 cups cheddar cheese: The star of the show! I recommend sharp cheddar for the best flavor, but feel free to mix it up with mozzarella or pepper jack for some extra kick.
-
2 tbsp ketchup: This adds a touch of sweetness and that beloved burger flavor. For homemade, use tomato sauce with a dash of vinegar and a dash of sugar!
-
1 tbsp yellow mustard: Essential for that zesty burger taste. If you’re feeling adventurous, try a spicy brown or Dijon mustard for an extra flavor dimension.
Step-by-Step Instructions
Ready to get cooking? Let’s make dinner magic happen in the easiest way possible:
-
Preheat Your Oven: Start by preheating your oven to 375°F (190°C). It sets the stage for all that deliciousness to come!
-
Brown the Beef: In a large oven-safe pot or Dutch oven over medium heat, add the lean ground beef. Cook until browned, breaking it up with a spatula—a good 5-7 minutes. This browning adds so much flavor to the final dish. Drain excess fat if needed, but don’t go too far—I personally like to leave a little for extra flavor!
-
Add the Dry Pasta: Sprinkle those 12 ounces of elbow macaroni right over the browned beef. Don’t stir just yet—this will help the pasta absorb all that meaty goodness as it cooks.
-
Pour in the Liquids: Carefully pour in your 3 cups of beef broth and your 1 cup of milk. Add in the two tablespoons of ketchup and one tablespoon of mustard. Give everything a good stir to combine. Pro tip: make sure the pasta is submerged in liquid; this ensures even cooking.
-
Cheese, Please!: Next up, sprinkle one cup of cheddar cheese right over the top. The cheesy goodness will melt in beautifully as it bakes.
-
Bake It Up: Cover your pot with a lid or foil, and pop it into your preheated oven for about 25 minutes. This allows the pasta to cook al dente and soak in all those flavors. If you like a crispier top, bake it uncovered for the last 10 minutes.
-
Uncover and Stir: After 25 minutes, remove the pot from the oven carefully (it’s hot!). Give everything a good stir to recombine all those flavors. Top with the remaining cup of cheddar cheese and return it to the oven uncovered for another 5-10 minutes, just until the cheese is melted and bubbly.
-
Serve and Enjoy: Once it’s beautifully golden, remove it from the oven. Let sit for a few minutes (if you can resist!), and then serve it up in bowls.
Serving Suggestions
Nothing says comfort like a big bowl of cheeseburger pasta! I like to garnish each serving with a sprinkle of fresh parsley for a pop of color and freshness. You could even toss on some crushed potato chips for extra crunch—a fun assembly of flavors reminiscent of an actual cheeseburger!
Recipe Variations
The beauty of this Dump-and-Bake Cheeseburger Pasta lies in its versatility. Here are a few creative twists you can try:
-
Veggie-Loaded: Add some finely diced bell peppers, onions, or even zucchinis to the meat for extra veggies.
-
Cheeseburger Deluxe: Use a combination of cheeses—swap half the cheddar for mozzarella, or add some crumbled blue cheese for an incredible twist.
-
Spicy Kick: Mix in some diced jalapeños or buffalo sauce for an extra kick!
-
Herbaceous Twist: Add a touch of dried oregano and basil to give it an Italian flair.
-
One-Pan Wonder: Substitute the elbow macaroni with cauliflower rice for a low-carb alternative!
Chef’s Notes
You know, there were a few times early on in my cooking adventures that I miscalculated cooking times, and the pasta came out overly mushy. Let’s just say those kitchen casualties taught me to respect the cooking process! With this dump-and-bake method, it’s nearly impossible to mess it up, but ensuring those ingredients are properly measured goes a long way—and keeps those sentimental memories intact.
This recipe has truly evolved over the years, and I love seeing how it resonates with everyone in different ways. Some folks treat it like comfort food, while others turn it into a lively party dish when hosting friends. Regardless, every forkful is a trip down memory lane—just like those fun Saturday nights from my childhood.
FAQs and Troubleshooting
You might have a few questions as you embark on this delicious journey:
-
Can I make this ahead? Absolutely! Assemble the dish ahead of time, up to a day in advance, and store it in the fridge until it’s time to bake.
-
What if I forgot to thaw the beef? No problem! Just take it directly from the freezer. The longer cooking time won’t hurt the dish, but be sure to check the pasta for doneness.
-
Why is my pasta still hard? If you find that your pasta isn’t cooked through, it might just need a few extra minutes in the oven. Give it a gentle stir, add a splash more broth or milk if needed, and pop it back in for a few more.
-
Can I freeze leftovers? Yes, this dish freezes well! Portion it out, place it in airtight containers, and enjoy it later on a busy weeknight.
Nutritional Info
While I didn’t provide specific nutritional values here, you can always customize and calculate based on your ingredient choices—whether it’s cutting fat or adding fiber. You can even make it healthier by choosing leaner meats, reducing cheese, or using whole-grain pasta for a heartier meal.
And there you have it—a cozy dish that carries heartwarming memories and all the cheesy, burger flavors we love! I hope this Dump-and-Bake Cheeseburger Pasta brings a smile to your family’s faces just as it has for mine. Happy cooking, friends! Let’s gather ’round the table and make a moment to remember.
PrintDump-and-Bake Cheeseburger Pasta
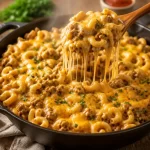
A comforting one-pot cheeseburger pasta dish that combines classic flavors into a quick and easy meal.
- Prep Time: 10 minutes
- Cook Time: 35 minutes
- Total Time: 45 minutes
- Yield: 6 servings 1x
- Category: Main Course
- Method: Baking
- Cuisine: American
- Diet: None
Ingredients
- 2 lbs lean ground beef
- 12 oz elbow macaroni
- 3 cups beef broth
- 1 cup milk
- 2 cups cheddar cheese
- 2 tbsp ketchup
- 1 tbsp yellow mustard
Instructions
- Preheat your oven to 375°F (190°C).
- Brown the beef in a large oven-safe pot or Dutch oven over medium heat for 5-7 minutes until cooked through.
- Add the elbow macaroni directly over the browned beef without stirring.
- Pour in the beef broth, milk, ketchup, and mustard; stir to combine and ensure pasta is submerged.
- Sprinkle one cup of cheddar cheese on top.
- Bake covered for about 25 minutes; uncover for the last 10 minutes for a crispy top.
- Uncover, stir to combine, and top with remaining cheddar cheese; return to oven for 5-10 minutes until melted.
- Serve and enjoy your delicious cheeseburger pasta!
Notes
For added flavors, consider garnish with fresh parsley and crushed potato chips. You can also customize with different cheese blends or vegetables.
Nutrition
- Serving Size: 1 serving
- Calories: 500
- Sugar: 6g
- Sodium: 800mg
- Fat: 24g
- Saturated Fat: 10g
- Unsaturated Fat: 14g
- Trans Fat: 0g
- Carbohydrates: 38g
- Fiber: 2g
- Protein: 32g
- Cholesterol: 90mg
Keywords: cheeseburger pasta, comfort food, one-pot meal, family dinner, easy recipe