emmawhitaker

The Dreamy Soft Dinner Bread That Will Steal the Show
Hey there, my fellow culinary adventurers! Today, I’m bursting with excitement to share a recipe that truly embodies the warmth and comfort of home— Soft Dinner Bread. This fluffy, buttery delight is the perfect companion to any meal and a wonderful way to bring family together around the dinner table. Imagine golden-brown rolls, fresh from the oven, soft and pillowy, waiting for a generous slab of butter or your favorite spread. Are you ready to dive in?
A Little Bread Backstory
As I reminisce about my childhood, one memory stands out: Sunday dinners with my family. As a kid, my favorite part wasn’t just the meal itself but the anticipation of pulling warm rolls from the oven. My grandma would keep her secret recipe tucked away, only to be revealed when we gathered at the table. I can still hear her joyful laughter, filling the kitchen with warmth and comfort, just like the bread did.
Fast forward to my culinary journey, and I’ve had my fair share of bread-making experiments. Some turned out fabulously, while others were a bit… well, let’s say "edible.” Each attempt taught me something new about dough, yeast, and that magical bond we share over a hearty meal. This recipe is inspired by those cherished moments of trial and triumph. I’m thrilled to guide you in baking your very own soft dinner bread that’s bound to create memories just like the ones I hold dear.
Ingredients
Let’s gather what you need to create this fluffy masterpiece. Here’s your shopping list:
-
All-Purpose Flour: The backbone of our dough. I love using all-purpose because it creates the perfect balance of structure and tenderness. If you’re feeling adventurous, try substituting half with whole wheat flour for a nuttier flavor!
-
Instant Yeast: This is the magic that makes your bread rise! Instant yeast can be added directly to your dry ingredients without needing to bloom it first, making the process quicker. If you only have active dry yeast, no worries—you can use that too, but bloom it in warm water first.
-
Sugar: Just a touch to feed the yeast and enhance the flavor. A tablespoon of honey or maple syrup makes a lovely substitute and adds a hint of sweetness.
-
Salt: Essential for flavor! Don’t skip this, as it not only enhances taste but also strengthens the gluten structure.
-
Milk: Adds richness and moisture. Whole milk is ideal, but you can swap it with almond milk for a dairy-free version. Warm it slightly before adding to help the yeast’s activation.
-
Butter: Nothing beats the flavor of good, old-fashioned butter! It provides that irresistible softness. If you want to lighten it up, substitute with olive oil—your rolls will still be delicious!
-
Eggs: They contribute to the bread’s structure and are key to achieving that golden color. If you need an egg-free option, consider using flaxseed meal or applesauce.
Step-by-Step Instructions
Ready to roll? Let’s dive into the heart of the process.
-
Mix the Dry Ingredients: In a large mixing bowl, combine 4 cups of all-purpose flour, 2 teaspoons of instant yeast, 2 tablespoons of sugar, and 1 teaspoon of salt. Give it a good whisk to evenly distribute everything. Adding salt too early could inhibit the yeast, so make sure to mix it well here!
-
Warm Your Wet Ingredients: Next, pour in 1 cup warm milk (about 110°F or just warm to the touch), 4 tablespoons melted butter, and 1 egg. Use a spatula or a whisk to combine the wet and dry mixtures. It’s going to look a bit shaggy and messy, but aren’t we all a little messy in the kitchen? That’s part of the fun!
-
Knead the Dough: Turn the mixture onto a floured surface and knead for about 8-10 minutes. You’ll want to work the dough until it’s smooth and elastic. Here’s a chef’s tip: To know it’s ready, perform the “windowpane test.” Stretch a small piece of dough; if it holds together without breaking, you’re golden!
-
First Rise: Place the dough in a lightly greased bowl, cover it with a damp cloth, and let it rise in a warm spot for about 1 hour, or until it’s doubled in size. I like to turn on my oven to the lowest setting for a minute, then switch it off—creating the perfect cozy environment for rising!
-
Shape the Rolls: Once it’s risen, gently punch down the dough (it’s therapeutic!) and then transfer to a floured surface. Divide it into 12 equal pieces and shape each piece into a ball. Place them in a greased baking dish, leaving a little space between each roll for the second rise.
-
Second Rise: Cover the rolls with a cloth again and let them rise for another 30-45 minutes until puffed up. The aroma alone will make your mouth water!
-
Bake: Preheat your oven to 350°F (175°C) while the rolls are rising. Once ready, pop them into the oven for 20-25 minutes or until golden brown on top. For an added touch, brush them with melted butter as soon as they come out!
-
Cool and Enjoy: Let the rolls cool for a few minutes before diving in. Trust me, the wait is worth it as they’ll be warm and fluffy. Get ready for those satisfied faces around the table!
Serving Suggestions
Now that you have these beautiful rolls ready, let’s talk presentation! For that rustic touch, a wooden board or a simple white platter is perfect. Arrange the rolls in a circle, brushing with a bit more melted butter and sprinkling some flaky sea salt on top for added flavor and aesthetic appeal.
Pair these soft dinner rolls with a warming soup, hearty stew, or even alongside your favorite roasted veggies. Of course, they also shine on their own—especially when slathered with butter or a homemade herb garlic spread. The only challenge you’ll face is keeping everyone from grabbing seconds… and thirds!
Recipe Variations
The beauty of soft dinner bread lies in its versatility. Here are a few creative twists to consider:
-
Garlic Herb Rolls: Mix chopped fresh herbs like rosemary or thyme and a teaspoon of garlic powder into the dough for an aromatic experience.
-
Cheese-Stuffed Rolls: Before shaping, place a small cube of cheddar or mozzarella inside each ball of dough for a delightful surprise.
-
Sweet Cinnamon Rolls: Incorporate cinnamon and sugar into the dough and top with a cream cheese frosting once baked to transform them into sweet rolls.
-
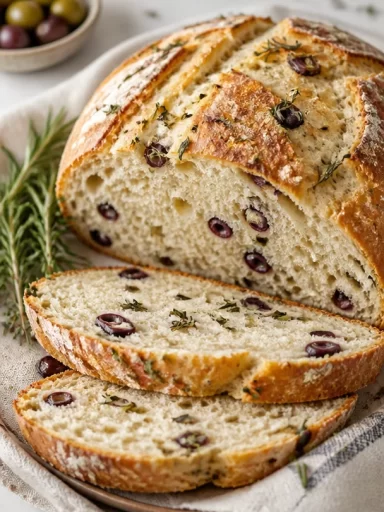
Olive Oil & Rosemary: Swap the butter for olive oil and fold in finely chopped rosemary for a Mediterranean flair!
-
Whole Wheat Variation: Substitute half of the all-purpose flour with whole wheat flour for a heartier texture and nutty flavor.
Chef’s Notes
As I’ve shared this recipe with friends over the years, I’ve seen how it can evolve. One time, I attempted to incorporate a new flour blend, but let’s just say it resulted in an interesting lump of “bread.” Plus, who knew kneading could also be an unexpected workout routine? Embrace the process—there’s always a story to tell, even if it’s about that one failed loaf of bread. It’s these moments that make cooking an adventure, and I wouldn’t trade them for anything!
FAQs and Troubleshooting
1. My dough didn’t rise! What did I do wrong?
This could be due to many factors—expired yeast, too cold of an environment, or not enough sugar to activate the yeast. Always check the expiration date on your yeast, and consider a warmer spot for proofing.
2. How can I store the leftovers?
Once cooled, store the rolls in an airtight container at room temperature for up to 3 days. You can also freeze them; just wrap each roll individually in plastic wrap and place in a freezer bag. Thaw at room temperature when you’re ready to enjoy!
3. Why are my rolls dense?
This might happen if the dough was over-kneaded or not allowed to rise long enough. Always keep an eye on your dough; it should feel soft and spring back when poked.
4. Can I make these ahead of time?
Absolutely! You can prepare the dough a day in advance and let it rise in the fridge overnight. Just bring it back to room temperature before shaping and rising again.
Nutritional Info
While I believe that comfort food is meant to be enjoyed without counting calories, understanding the nutritional facts can help with mindful eating. Each roll (assuming you make a dozen) is roughly:
- Calories: 150
- Fat: 6g
- Carbohydrates: 20g
- Protein: 4g
Feel free to adjust ingredients to suit your dietary needs, whether that means reducing sugar, swapping for whole grains, or adjusting fat content. Just remember, moderation is key!
Final Thoughts
Baking soft dinner bread is more than just a recipe; it’s an experience, an excuse to gather friends and family, and a chance to create cherished memories. Let this be a regular staple in your kitchen, bringing joy and comfort to every meal. So go ahead and gather those loved ones around your table, slice up those fluffy rolls, and spread the love (and butter)! I can’t wait to hear about the delicious creations you whip up—be sure to share your bread-baking stories with me. Happy baking, and until next time, may your kitchen be filled with laughter and the delicious smell of fresh bread!
— Emily
PrintDreamy Soft Dinner Bread

This fluffy, buttery soft dinner bread is the perfect companion to any meal, ideal for bringing family together around the dinner table.
- Prep Time: 15 minutes
- Cook Time: 25 minutes
- Total Time: 40 minutes
- Yield: 12 servings 1x
- Category: Side Dish
- Method: Baking
- Cuisine: American
- Diet: Vegetarian
Ingredients
- 4 cups all-purpose flour
- 2 teaspoons instant yeast
- 2 tablespoons sugar
- 1 teaspoon salt
- 1 cup warm milk
- 4 tablespoons melted butter
- 1 egg
Instructions
- Mix the dry ingredients: In a large mixing bowl, combine flour, yeast, sugar, and salt. Whisk to evenly distribute.
- Warm your wet ingredients: Pour in warm milk, melted butter, and egg. Combine wet and dry ingredients.
- Knead the dough: Turn the mixture onto a floured surface and knead for 8-10 minutes until smooth and elastic.
- First rise: Place dough in a greased bowl, cover, and let rise for about 1 hour until doubled in size.
- Shape the rolls: Punch down the dough, divide into 12 equal pieces, and shape each into a ball. Place in a greased baking dish.
- Second rise: Cover the rolls and let them rise for another 30-45 minutes until puffed up.
- Bake: Preheat the oven to 350°F (175°C) and bake for 20-25 minutes until golden brown.
- Cool and enjoy: Let the rolls cool for a few minutes before serving.
Notes
These rolls can be stored in an airtight container at room temperature for up to 3 days or frozen individually.
Nutrition
- Serving Size: 1 roll
- Calories: 150
- Sugar: 2g
- Sodium: 180mg
- Fat: 6g
- Saturated Fat: 3g
- Unsaturated Fat: 2g
- Trans Fat: 0g
- Carbohydrates: 20g
- Fiber: 1g
- Protein: 4g
- Cholesterol: 20mg
Keywords: dinner rolls, soft bread, baking, comfort food, family recipe